
So we recently purchased an Intel NUC to perform a single dedicated compute task here that requires 24/7 operation but does not require significant computing resources. These NUCs are perfect for such a scenario, being reasonably cheap, physically very small and burn very little power.
The unit we purchased contains a Celeron J3455 which we paired up with 16GB of RAM and a 256GB SSD which we had laying around the office. It’s running Debian 9 (Stretch) and a Windows 10 VM. We were very happy with the performance of the system except for one major concern – the thermal performance.
The CPU sits between 20-40% utilisation, spiking up to 70%. Even with this relatively low usage, the CPU was running at around 57 degrees Celsius (ambient of 26 degrees). Whilst this isn’t particularly hot, it will certainly degrade the CPU faster then otherwise. I’m hoping we can get 5-7 years out of this box so even a 10% reduction in lifespan because of the heat will be annoying.
Intel is renowned for not applying thermal paste inside their CPUs very well, particularly on their lower-end products. It’s why de-lidding is a thing. So I thought it might be worthwhile to pop the top off the NUC to see if we could replace the thermal paste on the CPU and drop the temperatures a bit.
When searching online for info on taking the NUC apart, I found that there really wasn’t a lot out there. So I thought I’d document the process myself as a resource for anyone else wanting to perform surgery on their NUC. Unfortunately our main camera was charging so I had to use my phone to take these shots but hopefully they are good enough for your purposes.
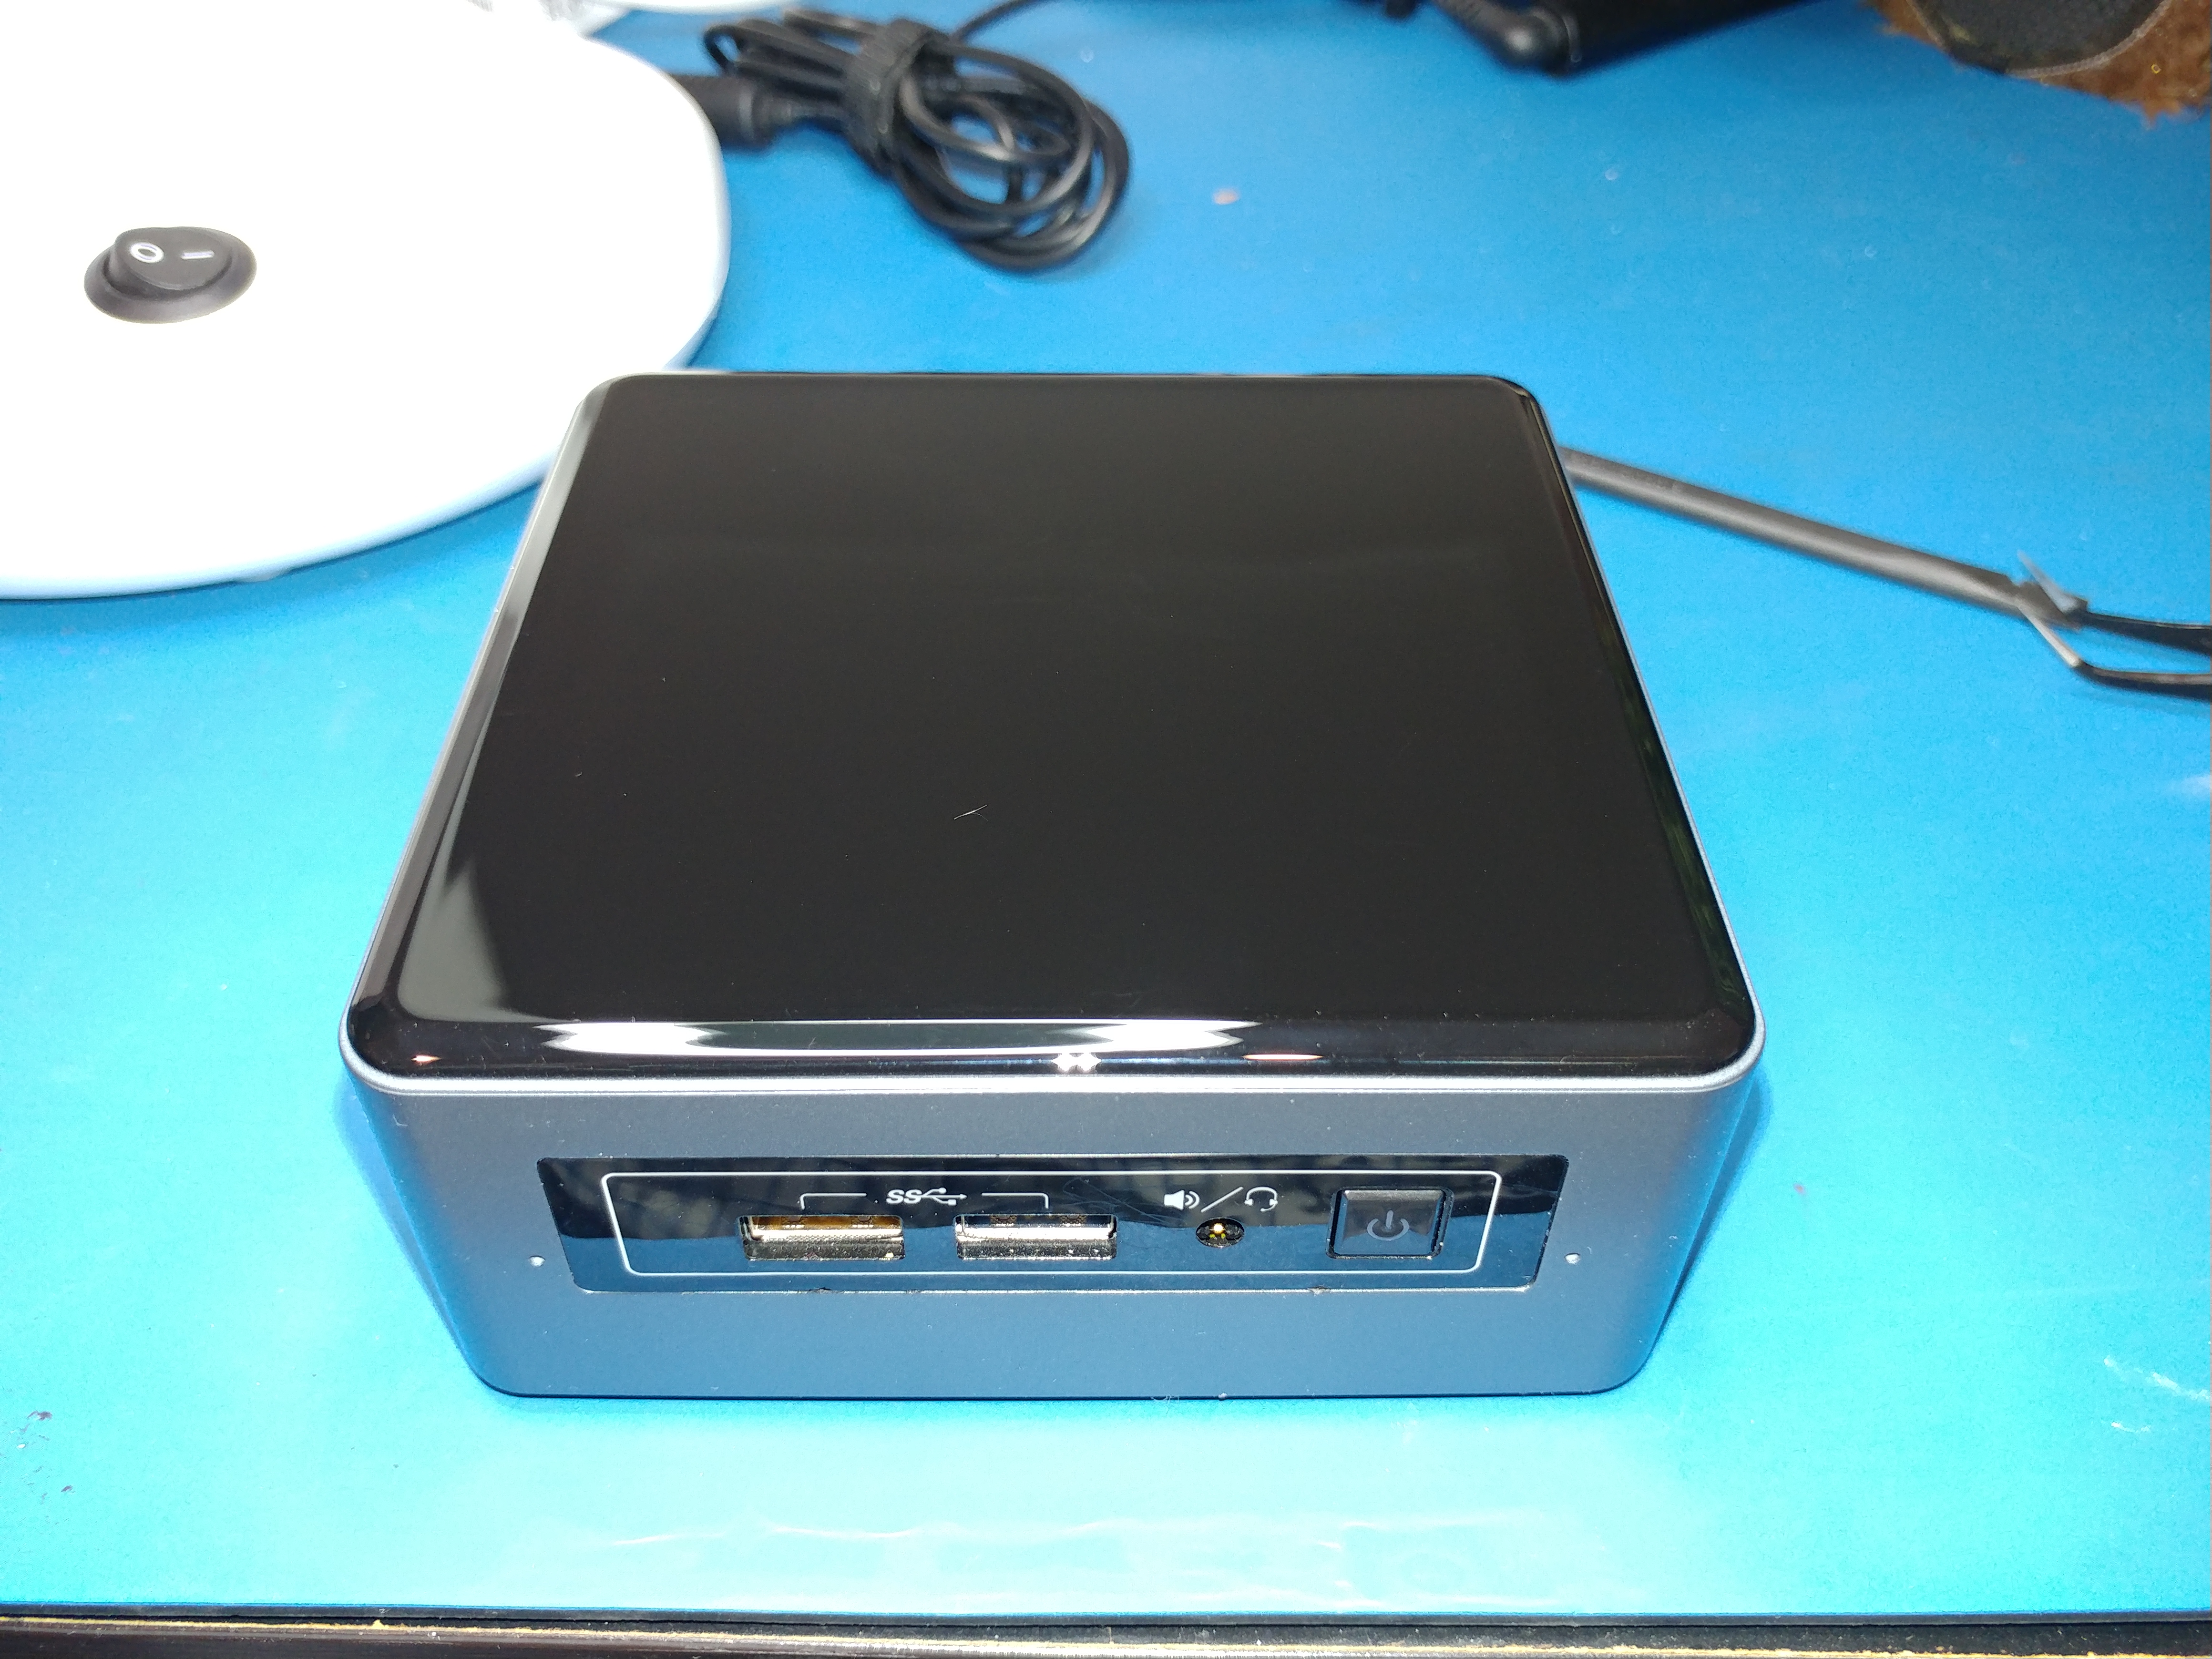 This is the top of the NUC. It is held on by a couple of small plastic clips. Using a pry tool you can just gently lift it up and pop it off.
 This is top with the black cover removed. At this stage there isn’t much to see here, but we’ll be back.
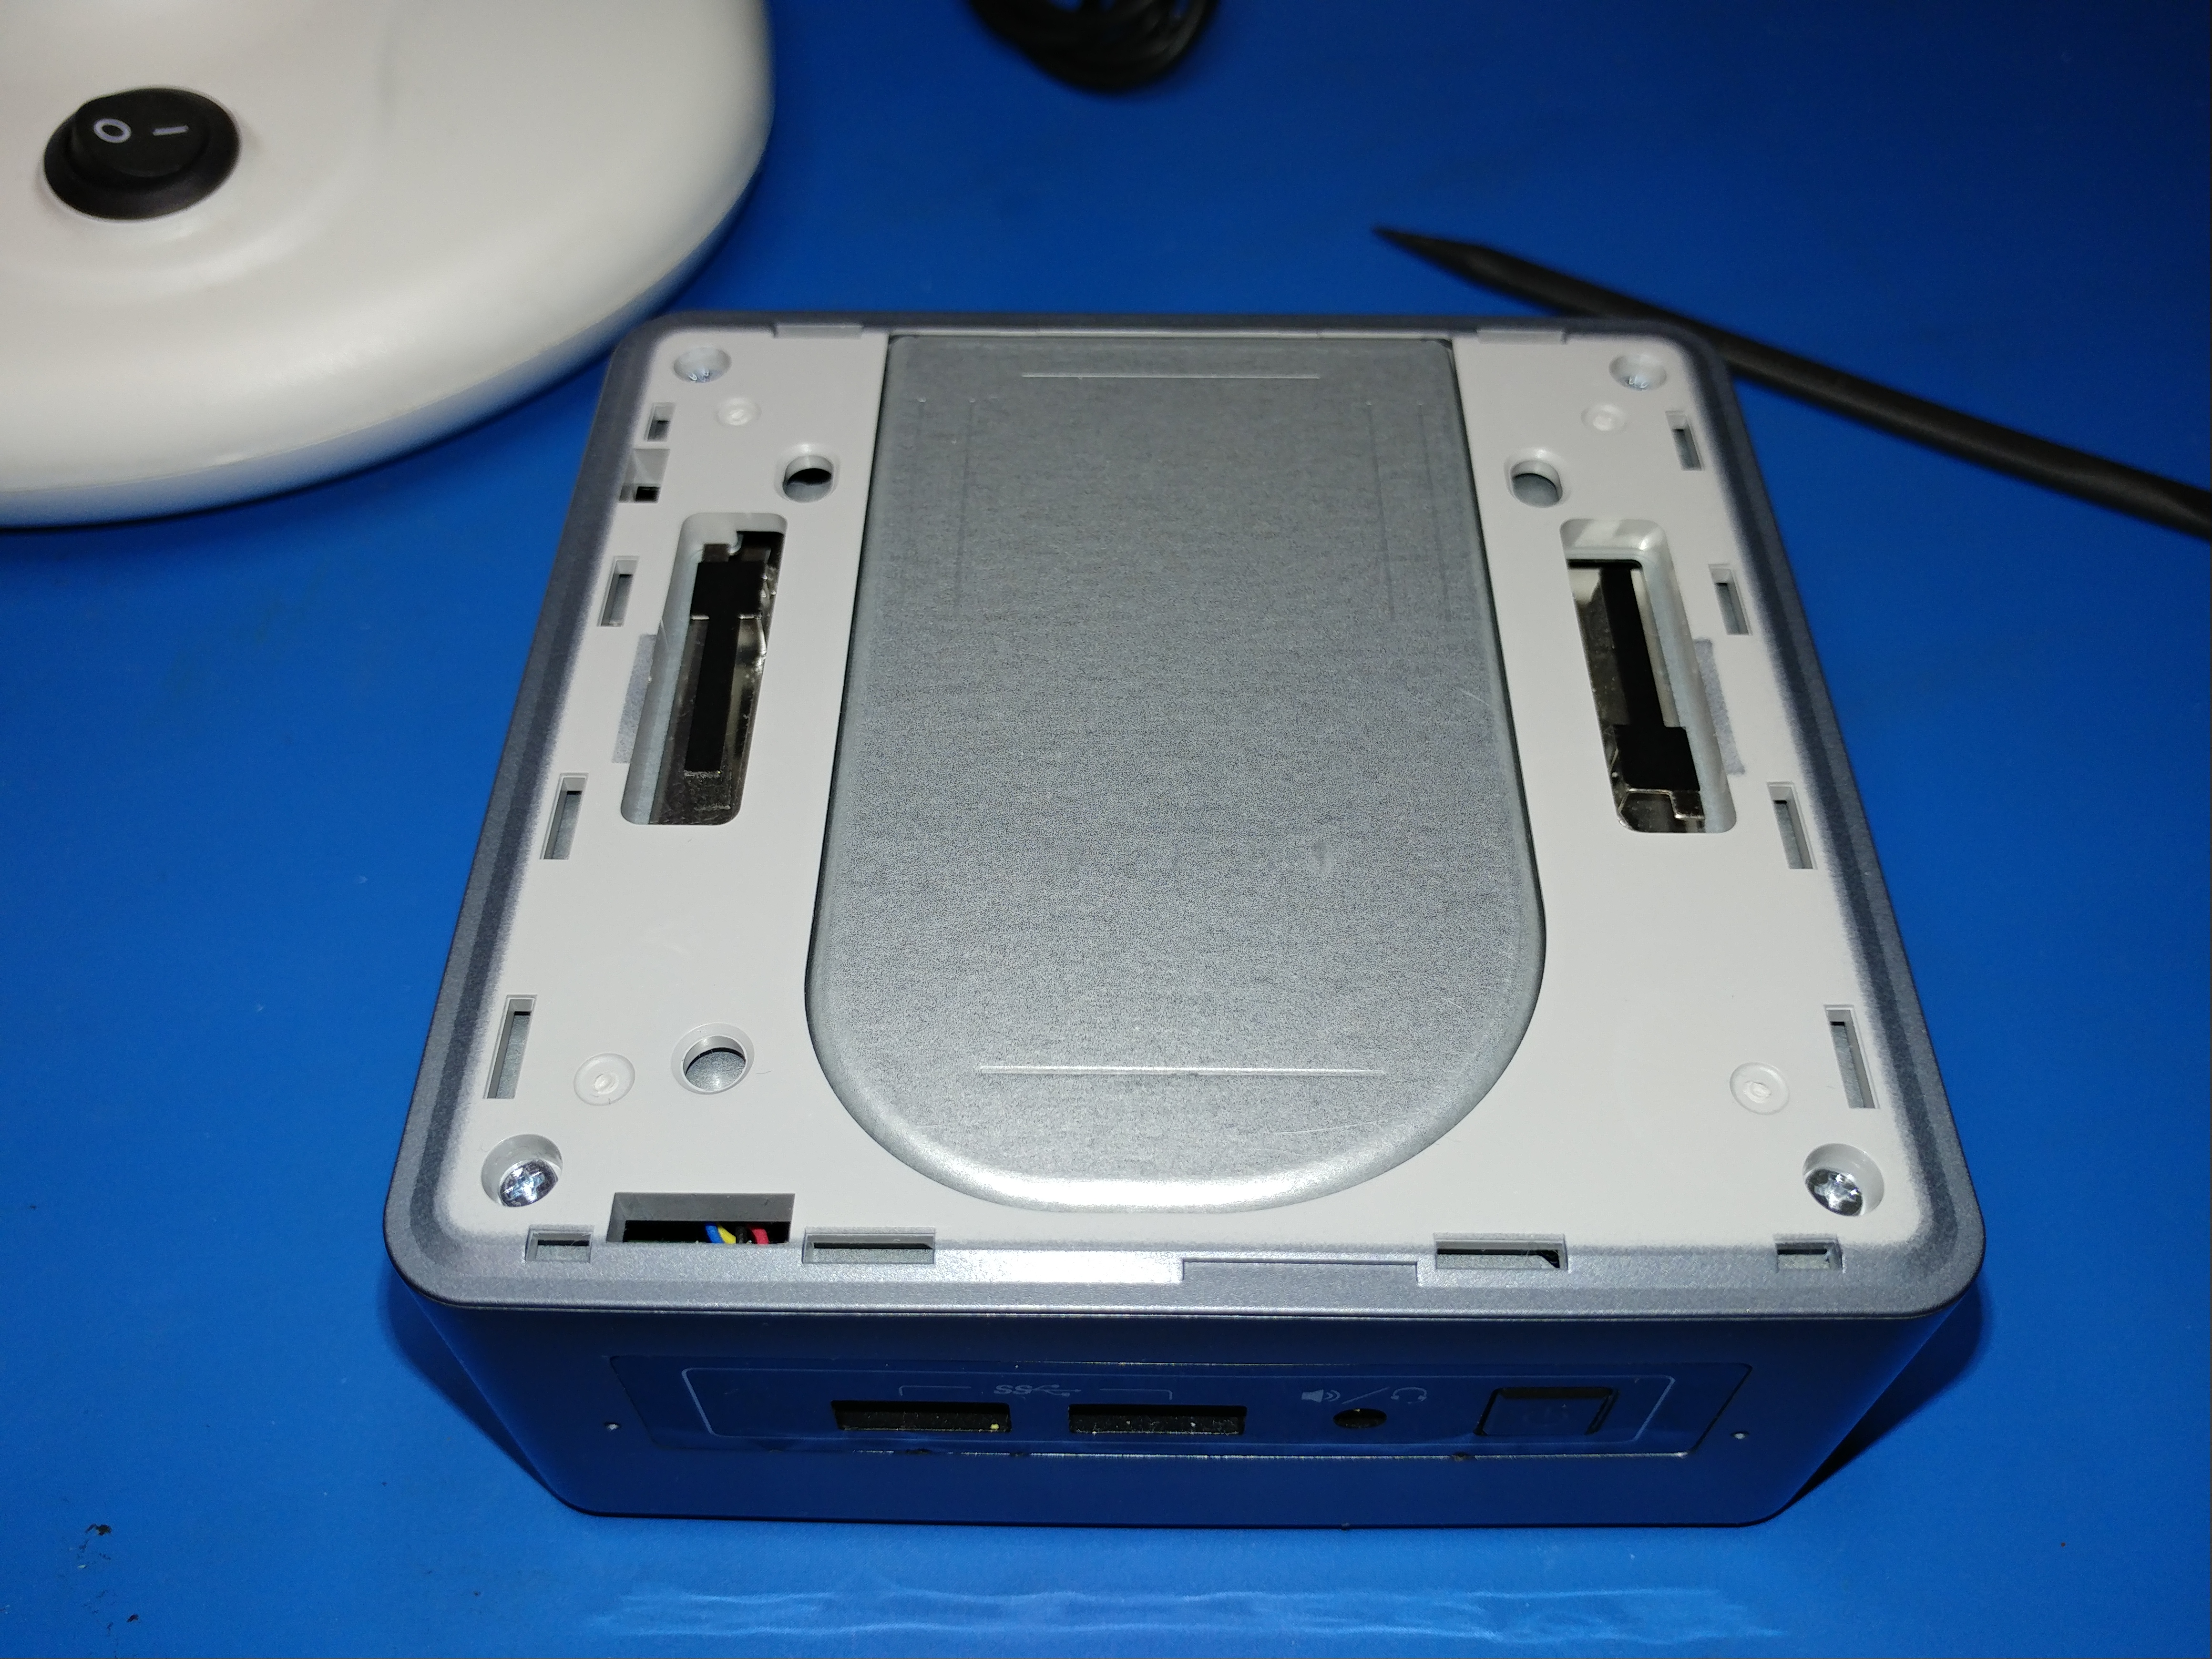
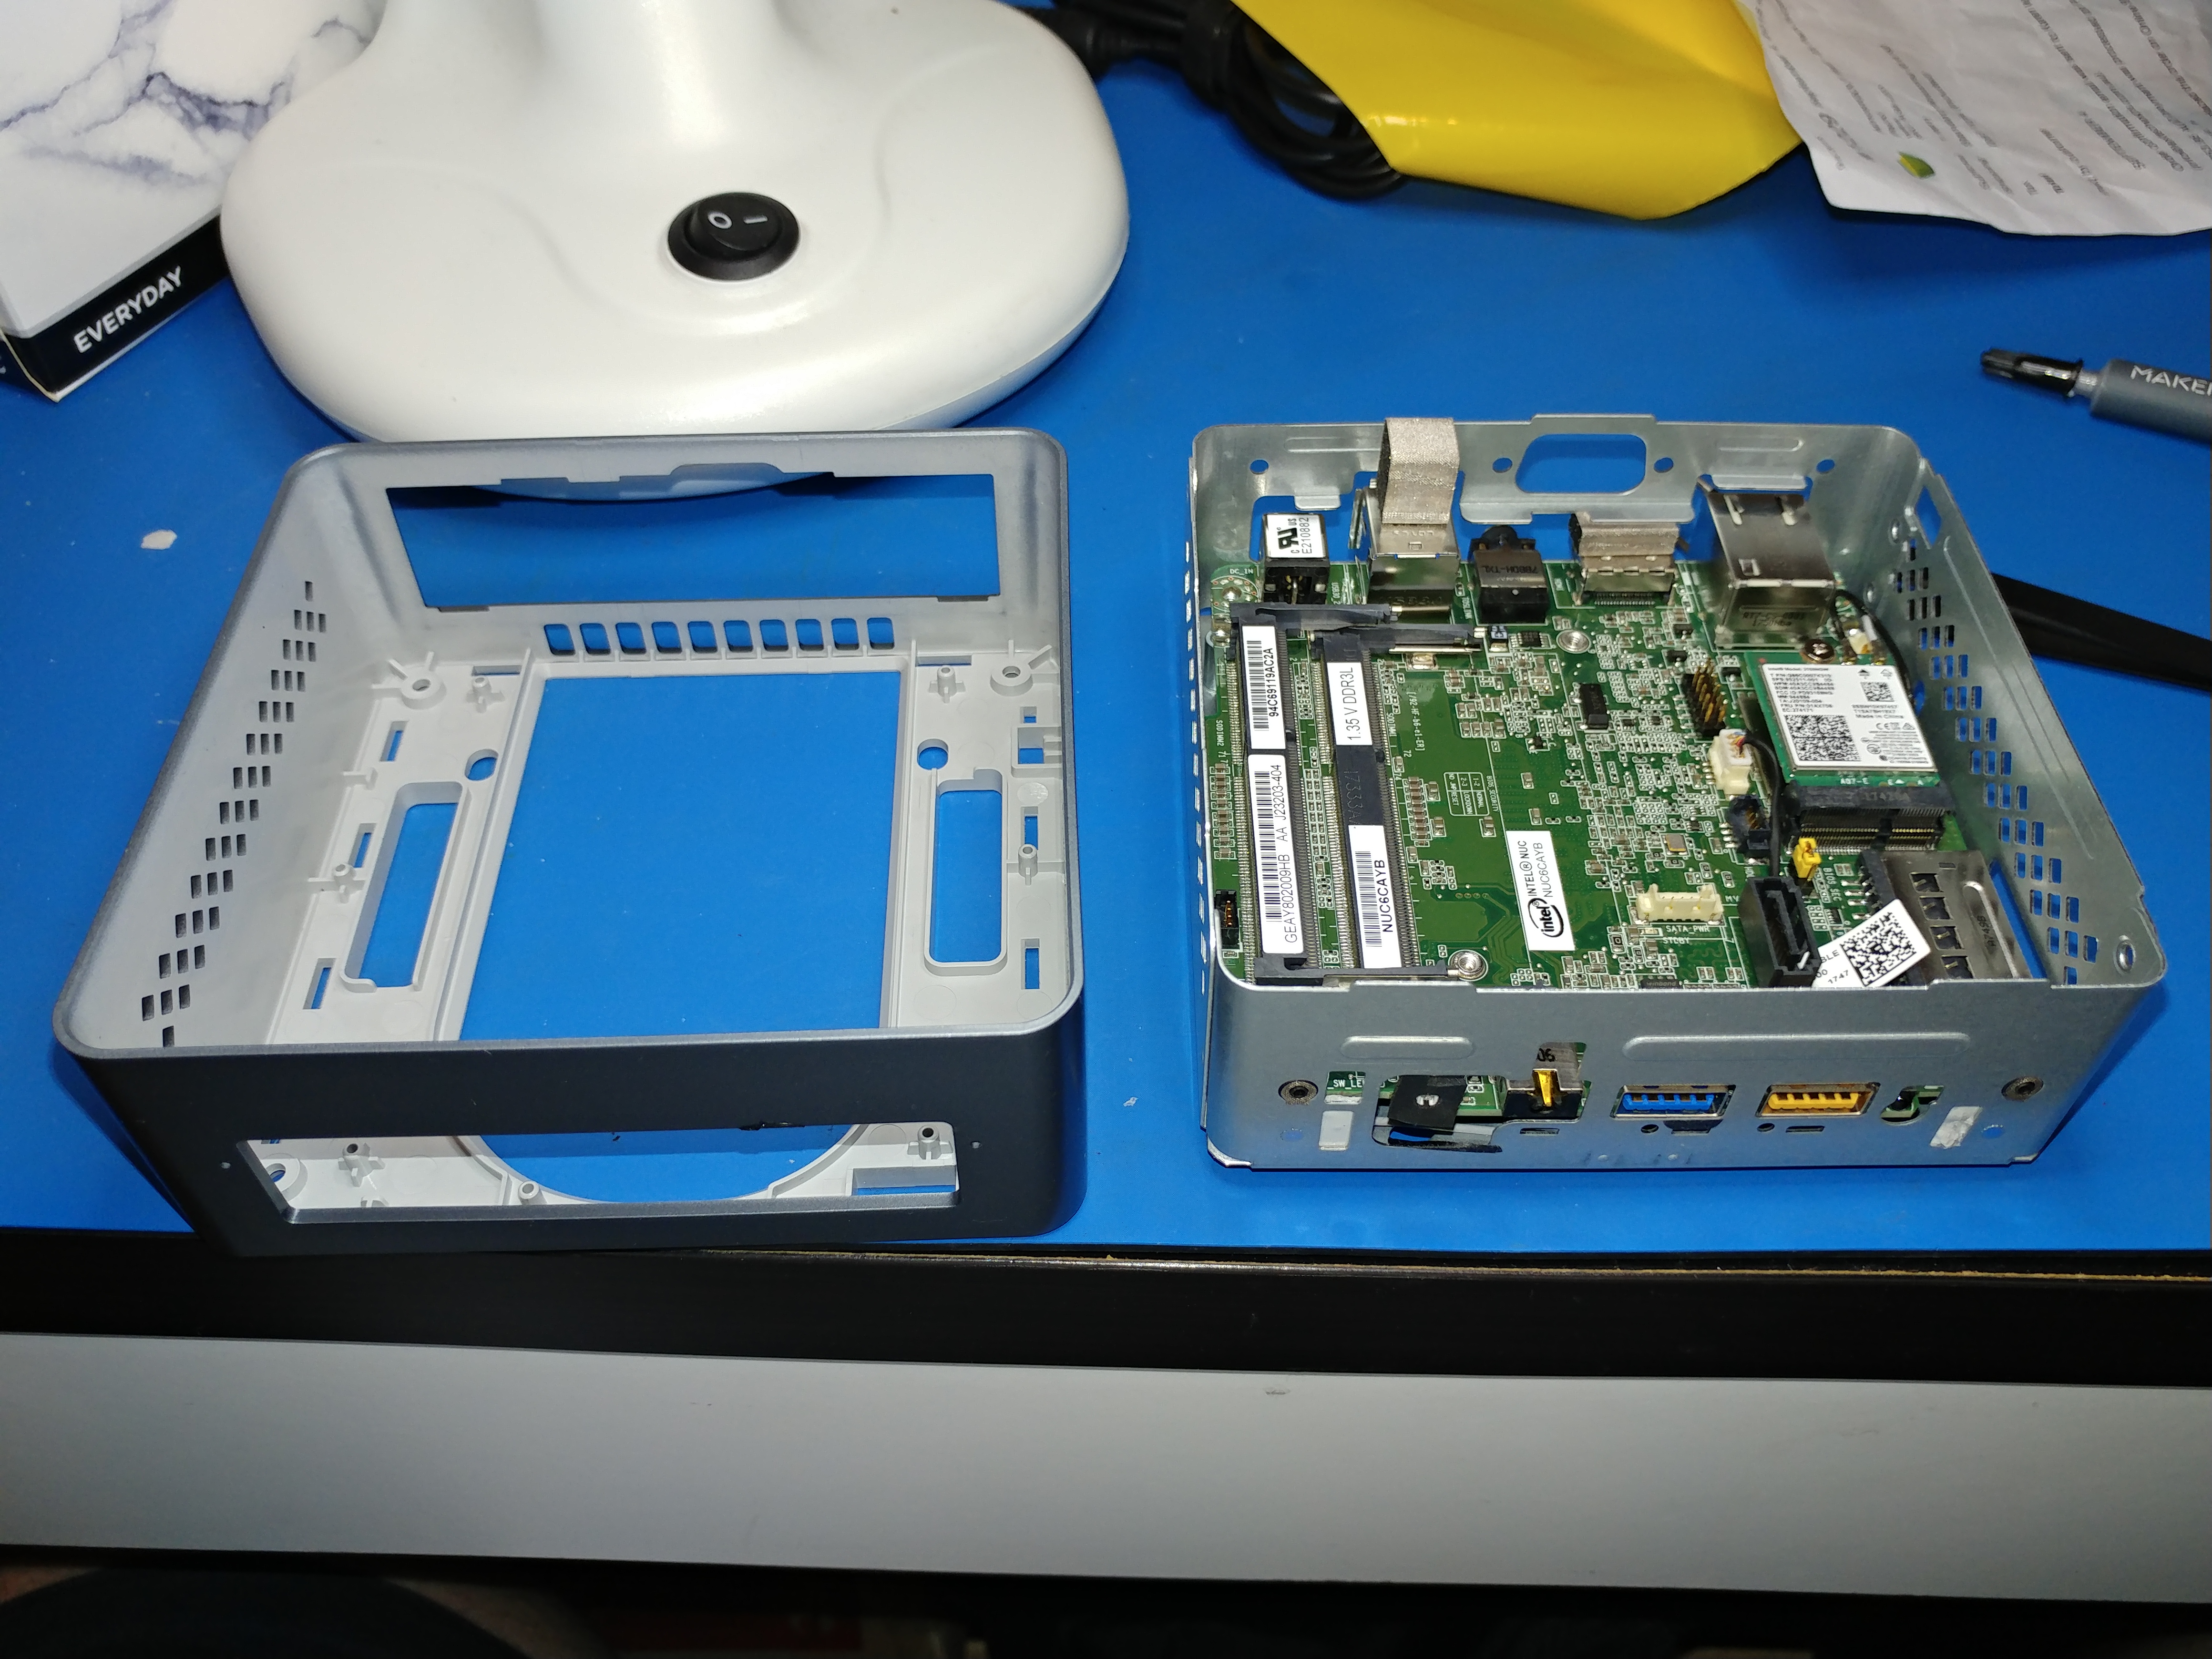
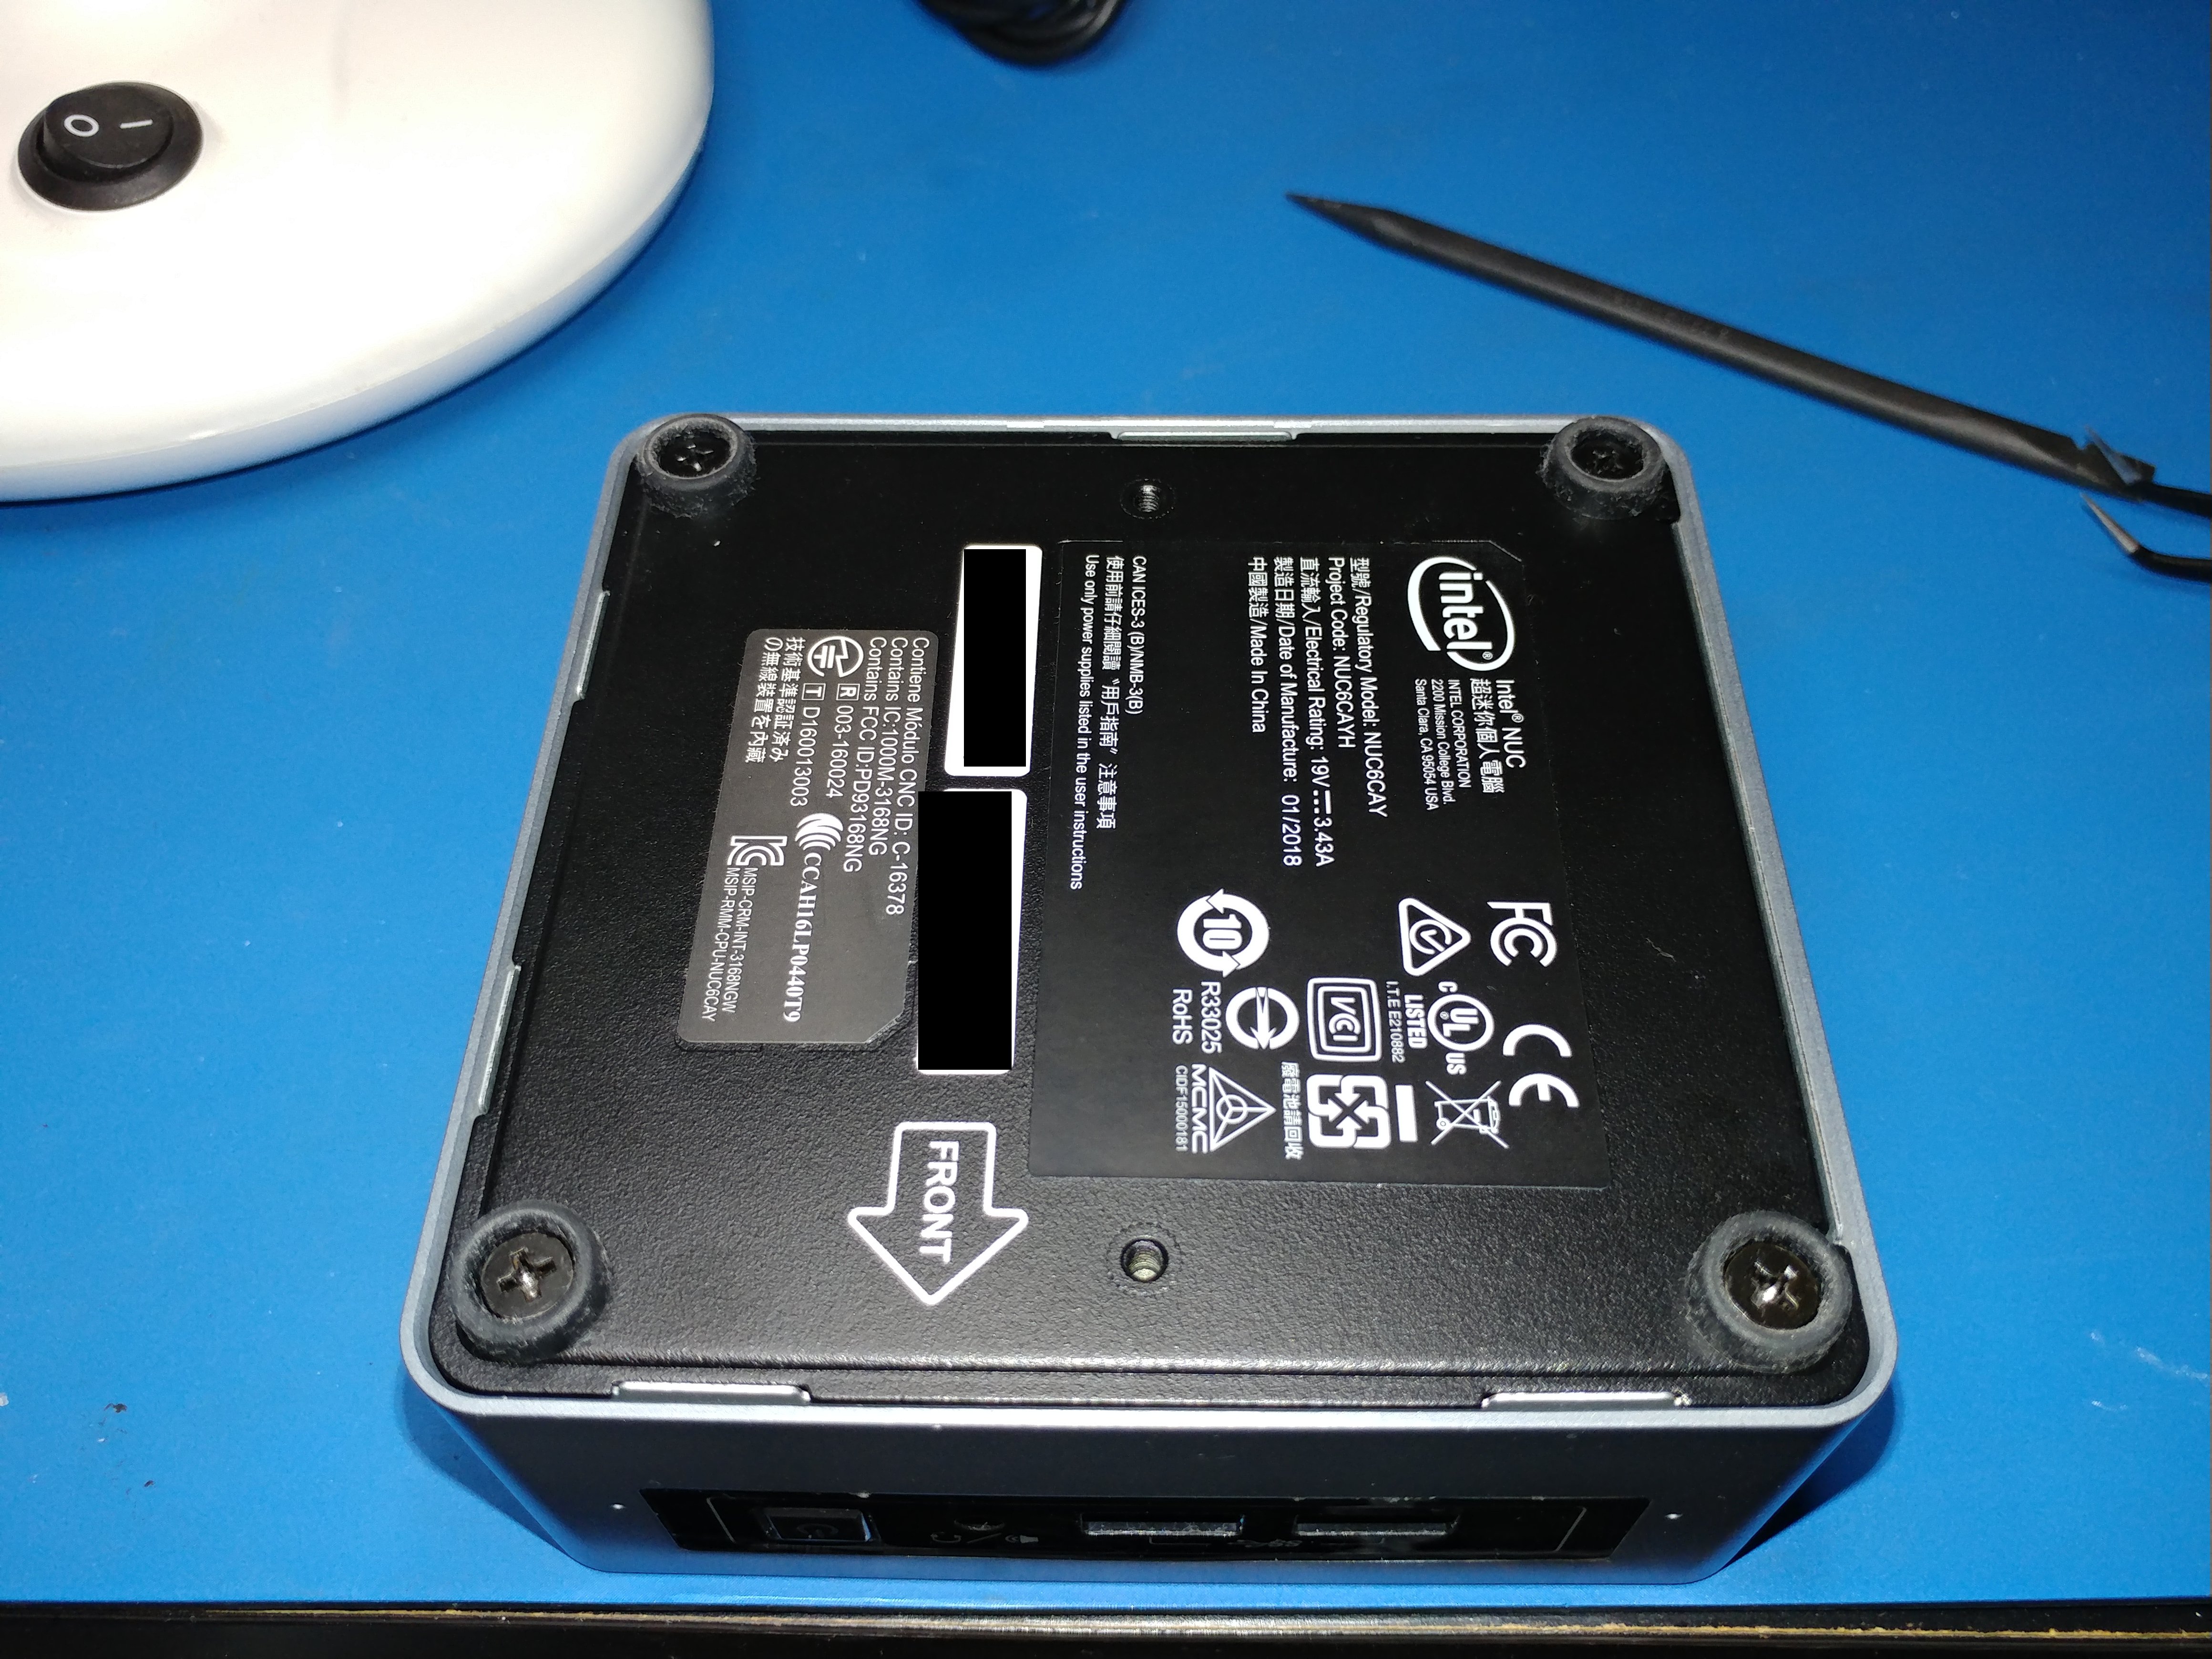 This is the bottom. Remove the four screws in the corners to access the internals.
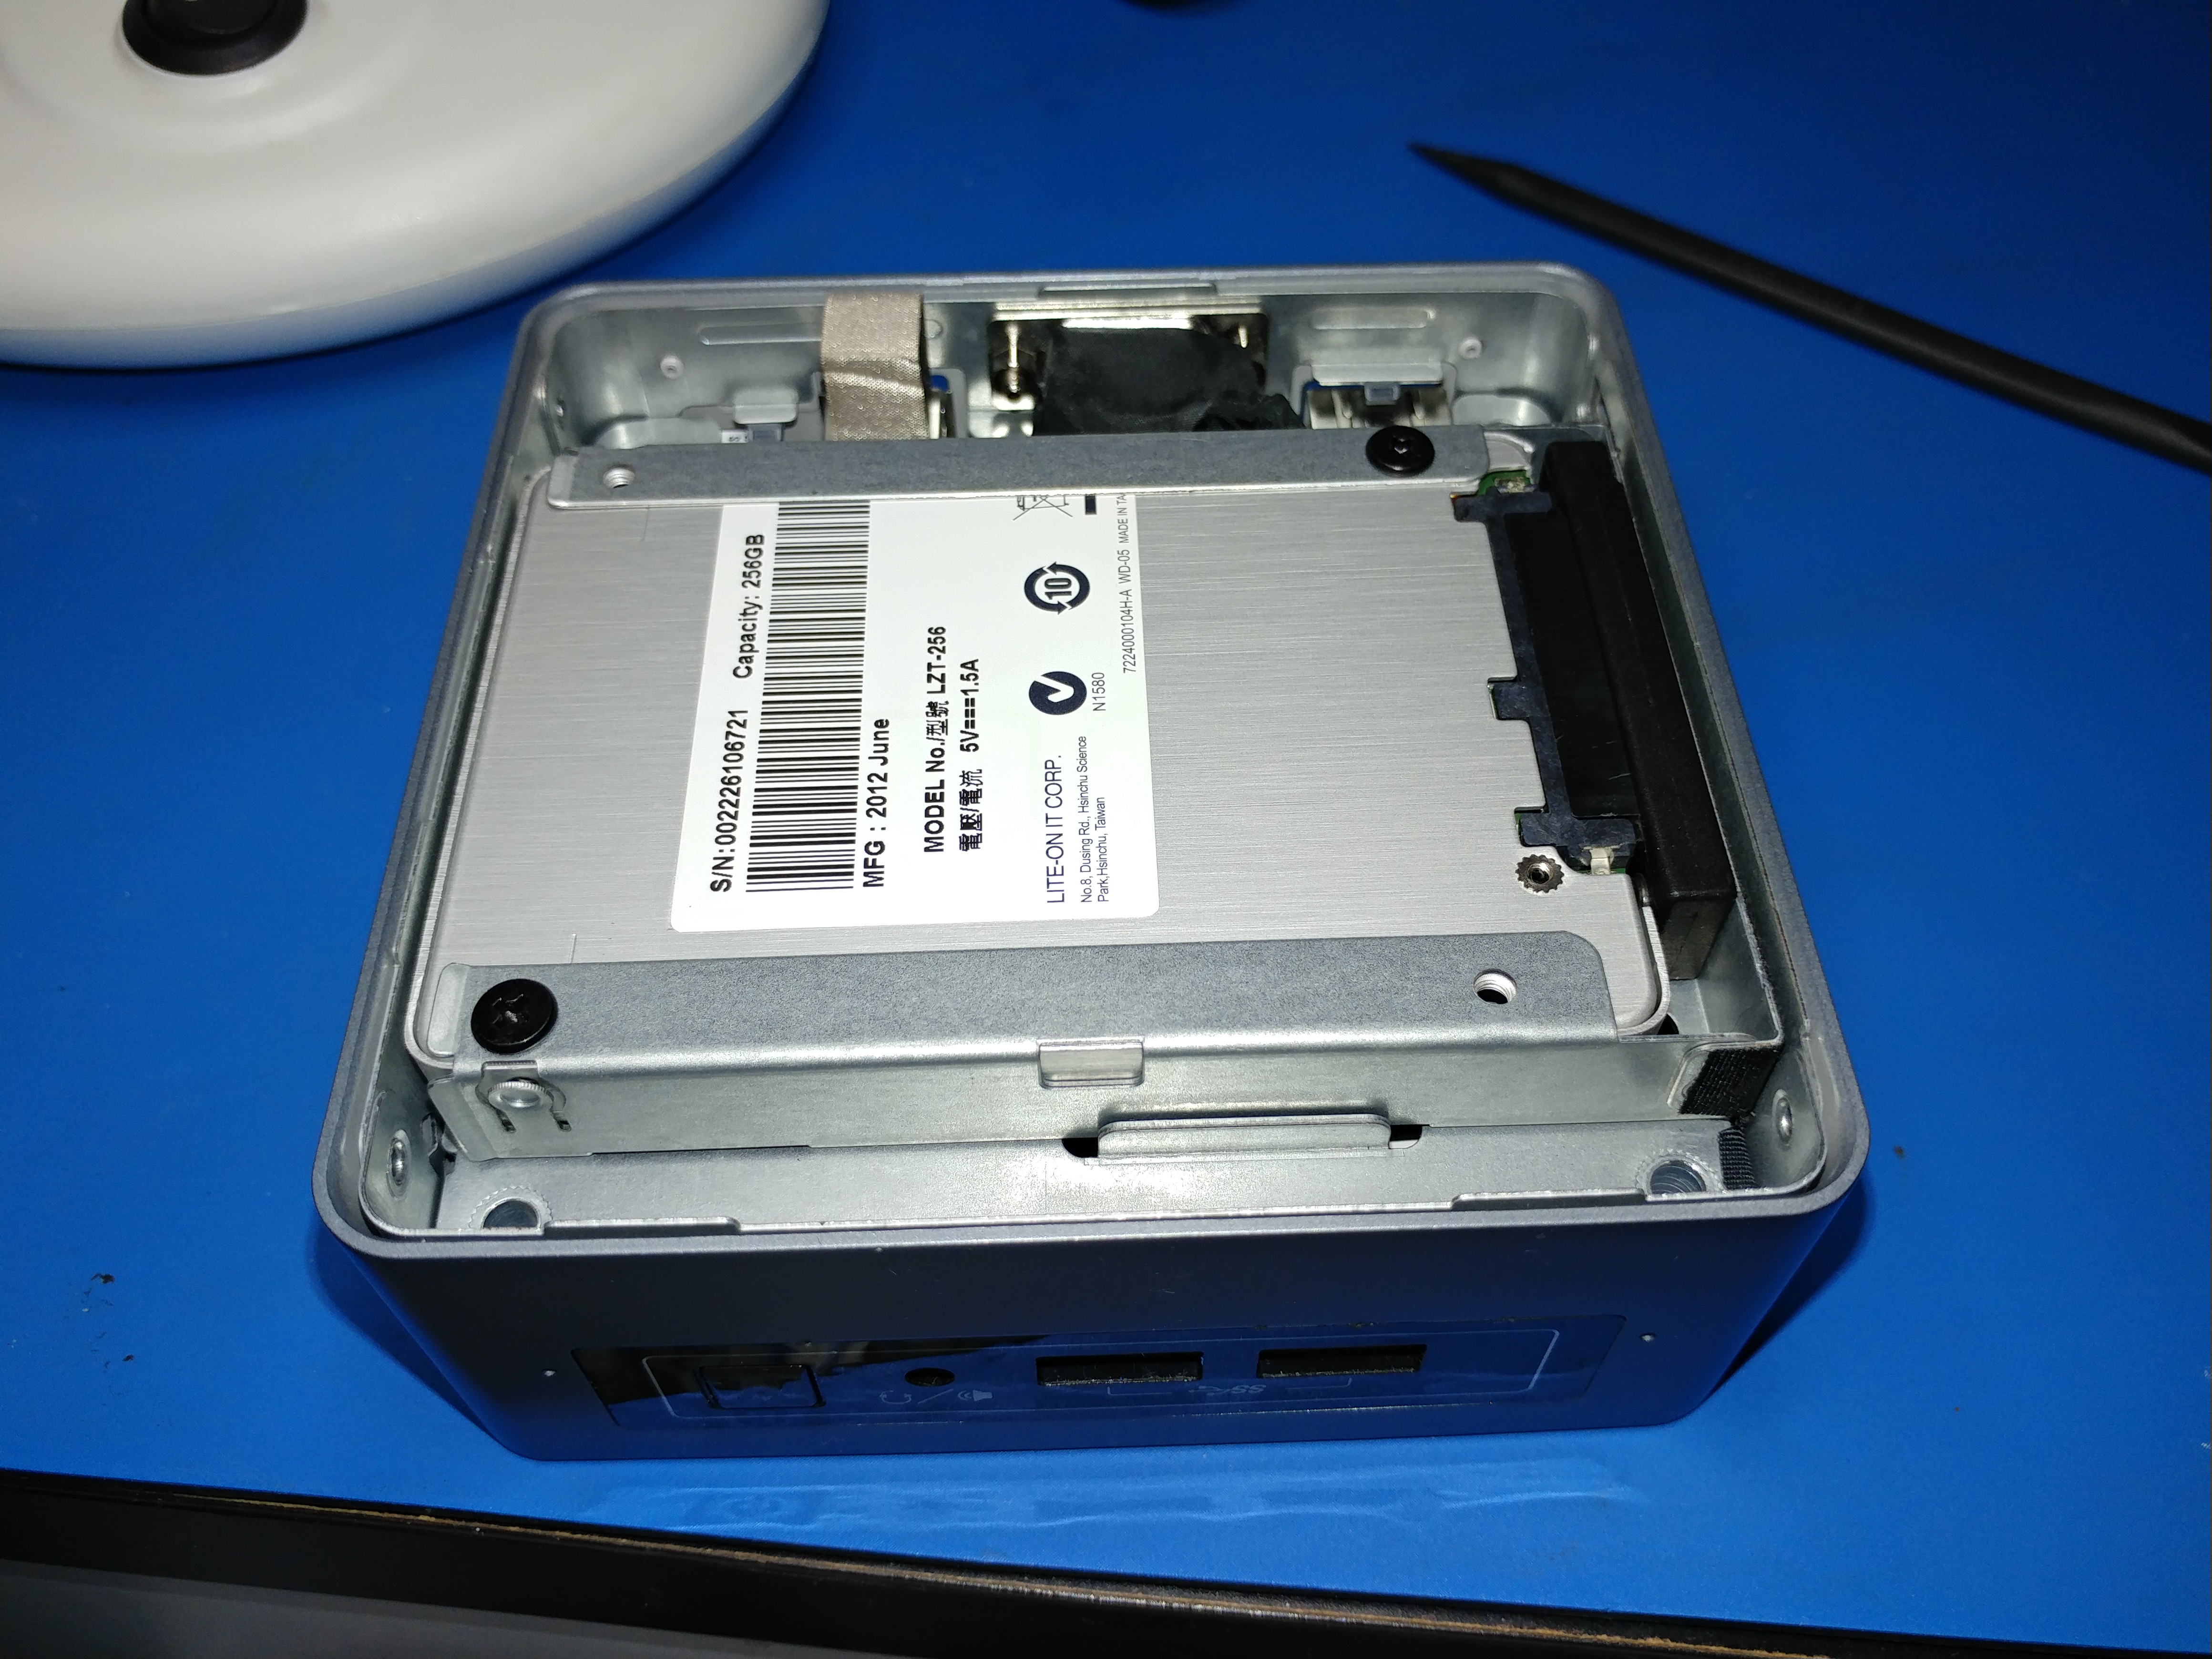 When you take the bottom cover off the first thing you’ll see is the Hard Drive bay. You can see the 2.5″ SSD install here. What you can also see is that the hardware is inside a metal frame which sits inside the plastic outer shell. Take out the SATA cable to make it easier to get down to the motherboard.
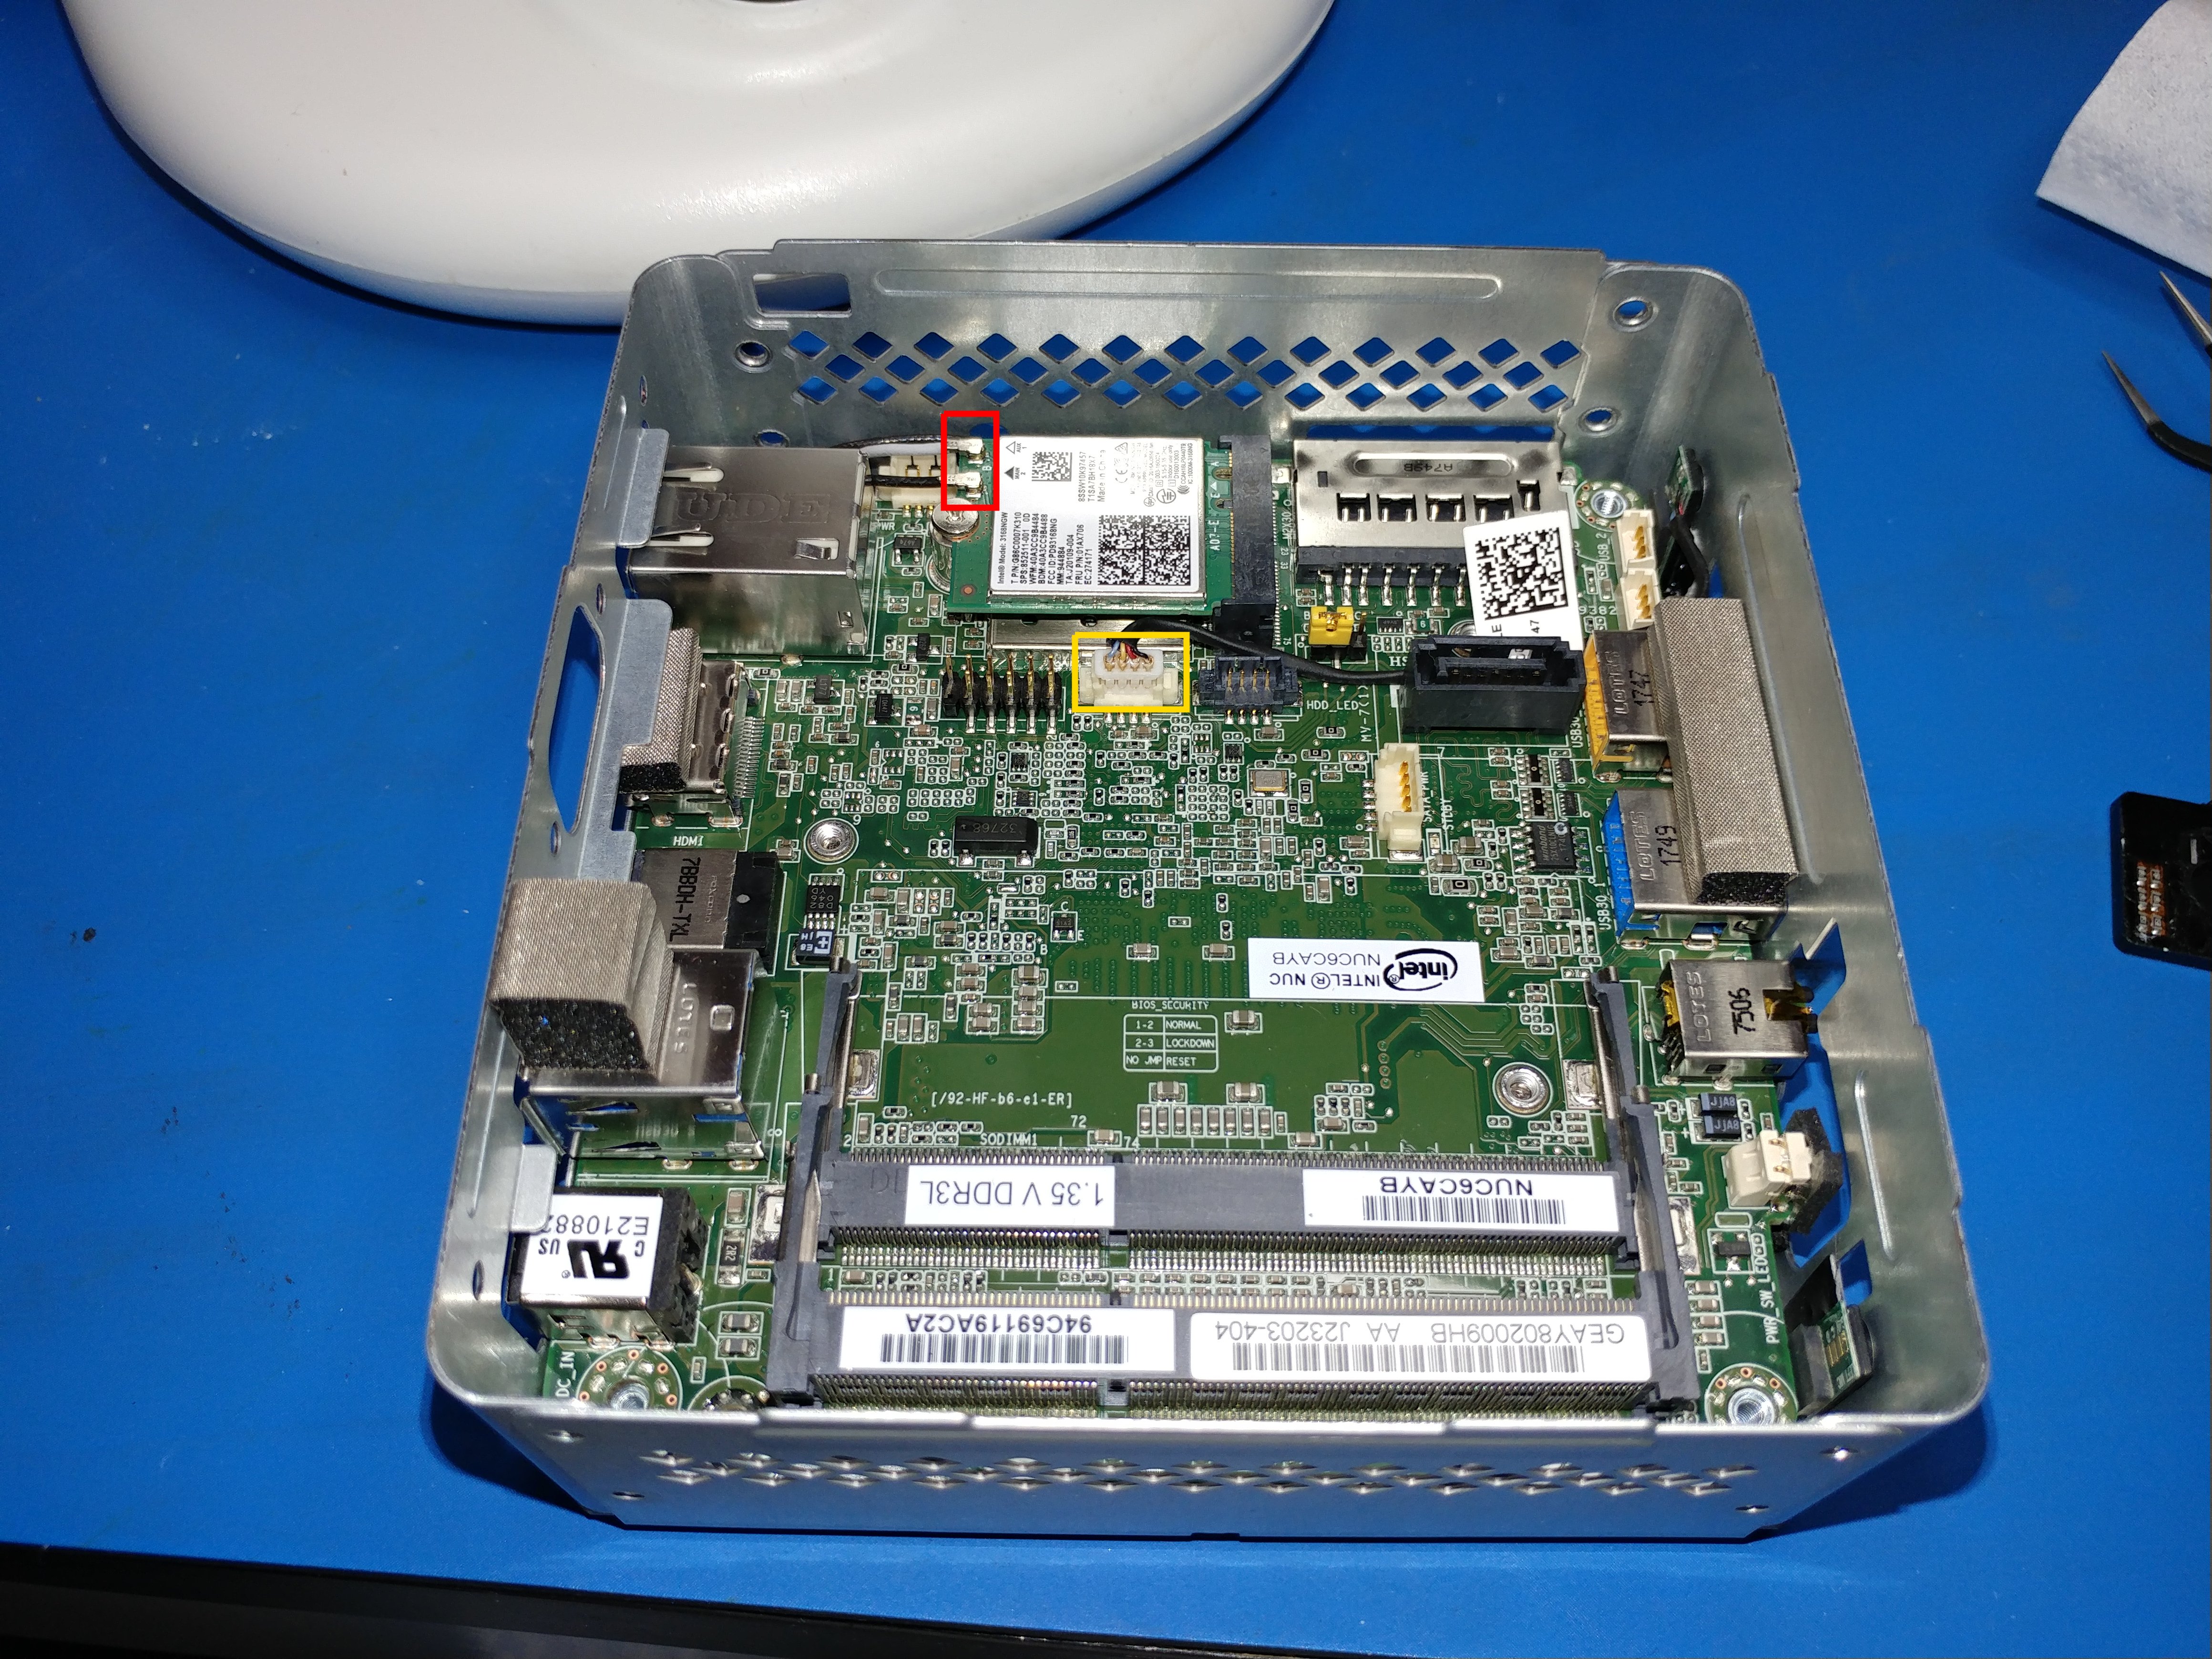
 If you decide not to take out the SATA cable out of the HDD/SSD, you need to unplug the SATA data (yellow box) and SATA power (red box) cables from the motherboard to be able to remove the HDD cage.
 Here you can see the motherboard of the unit. All very compact, but surprisingly easy to work in. You can see the SODIMM RAM on the left, there are two slots. I’ve installed the single 16GB SODIMM into the upper of the two slots to try to increase the airflow around the memory chips and keep them a little cooler.
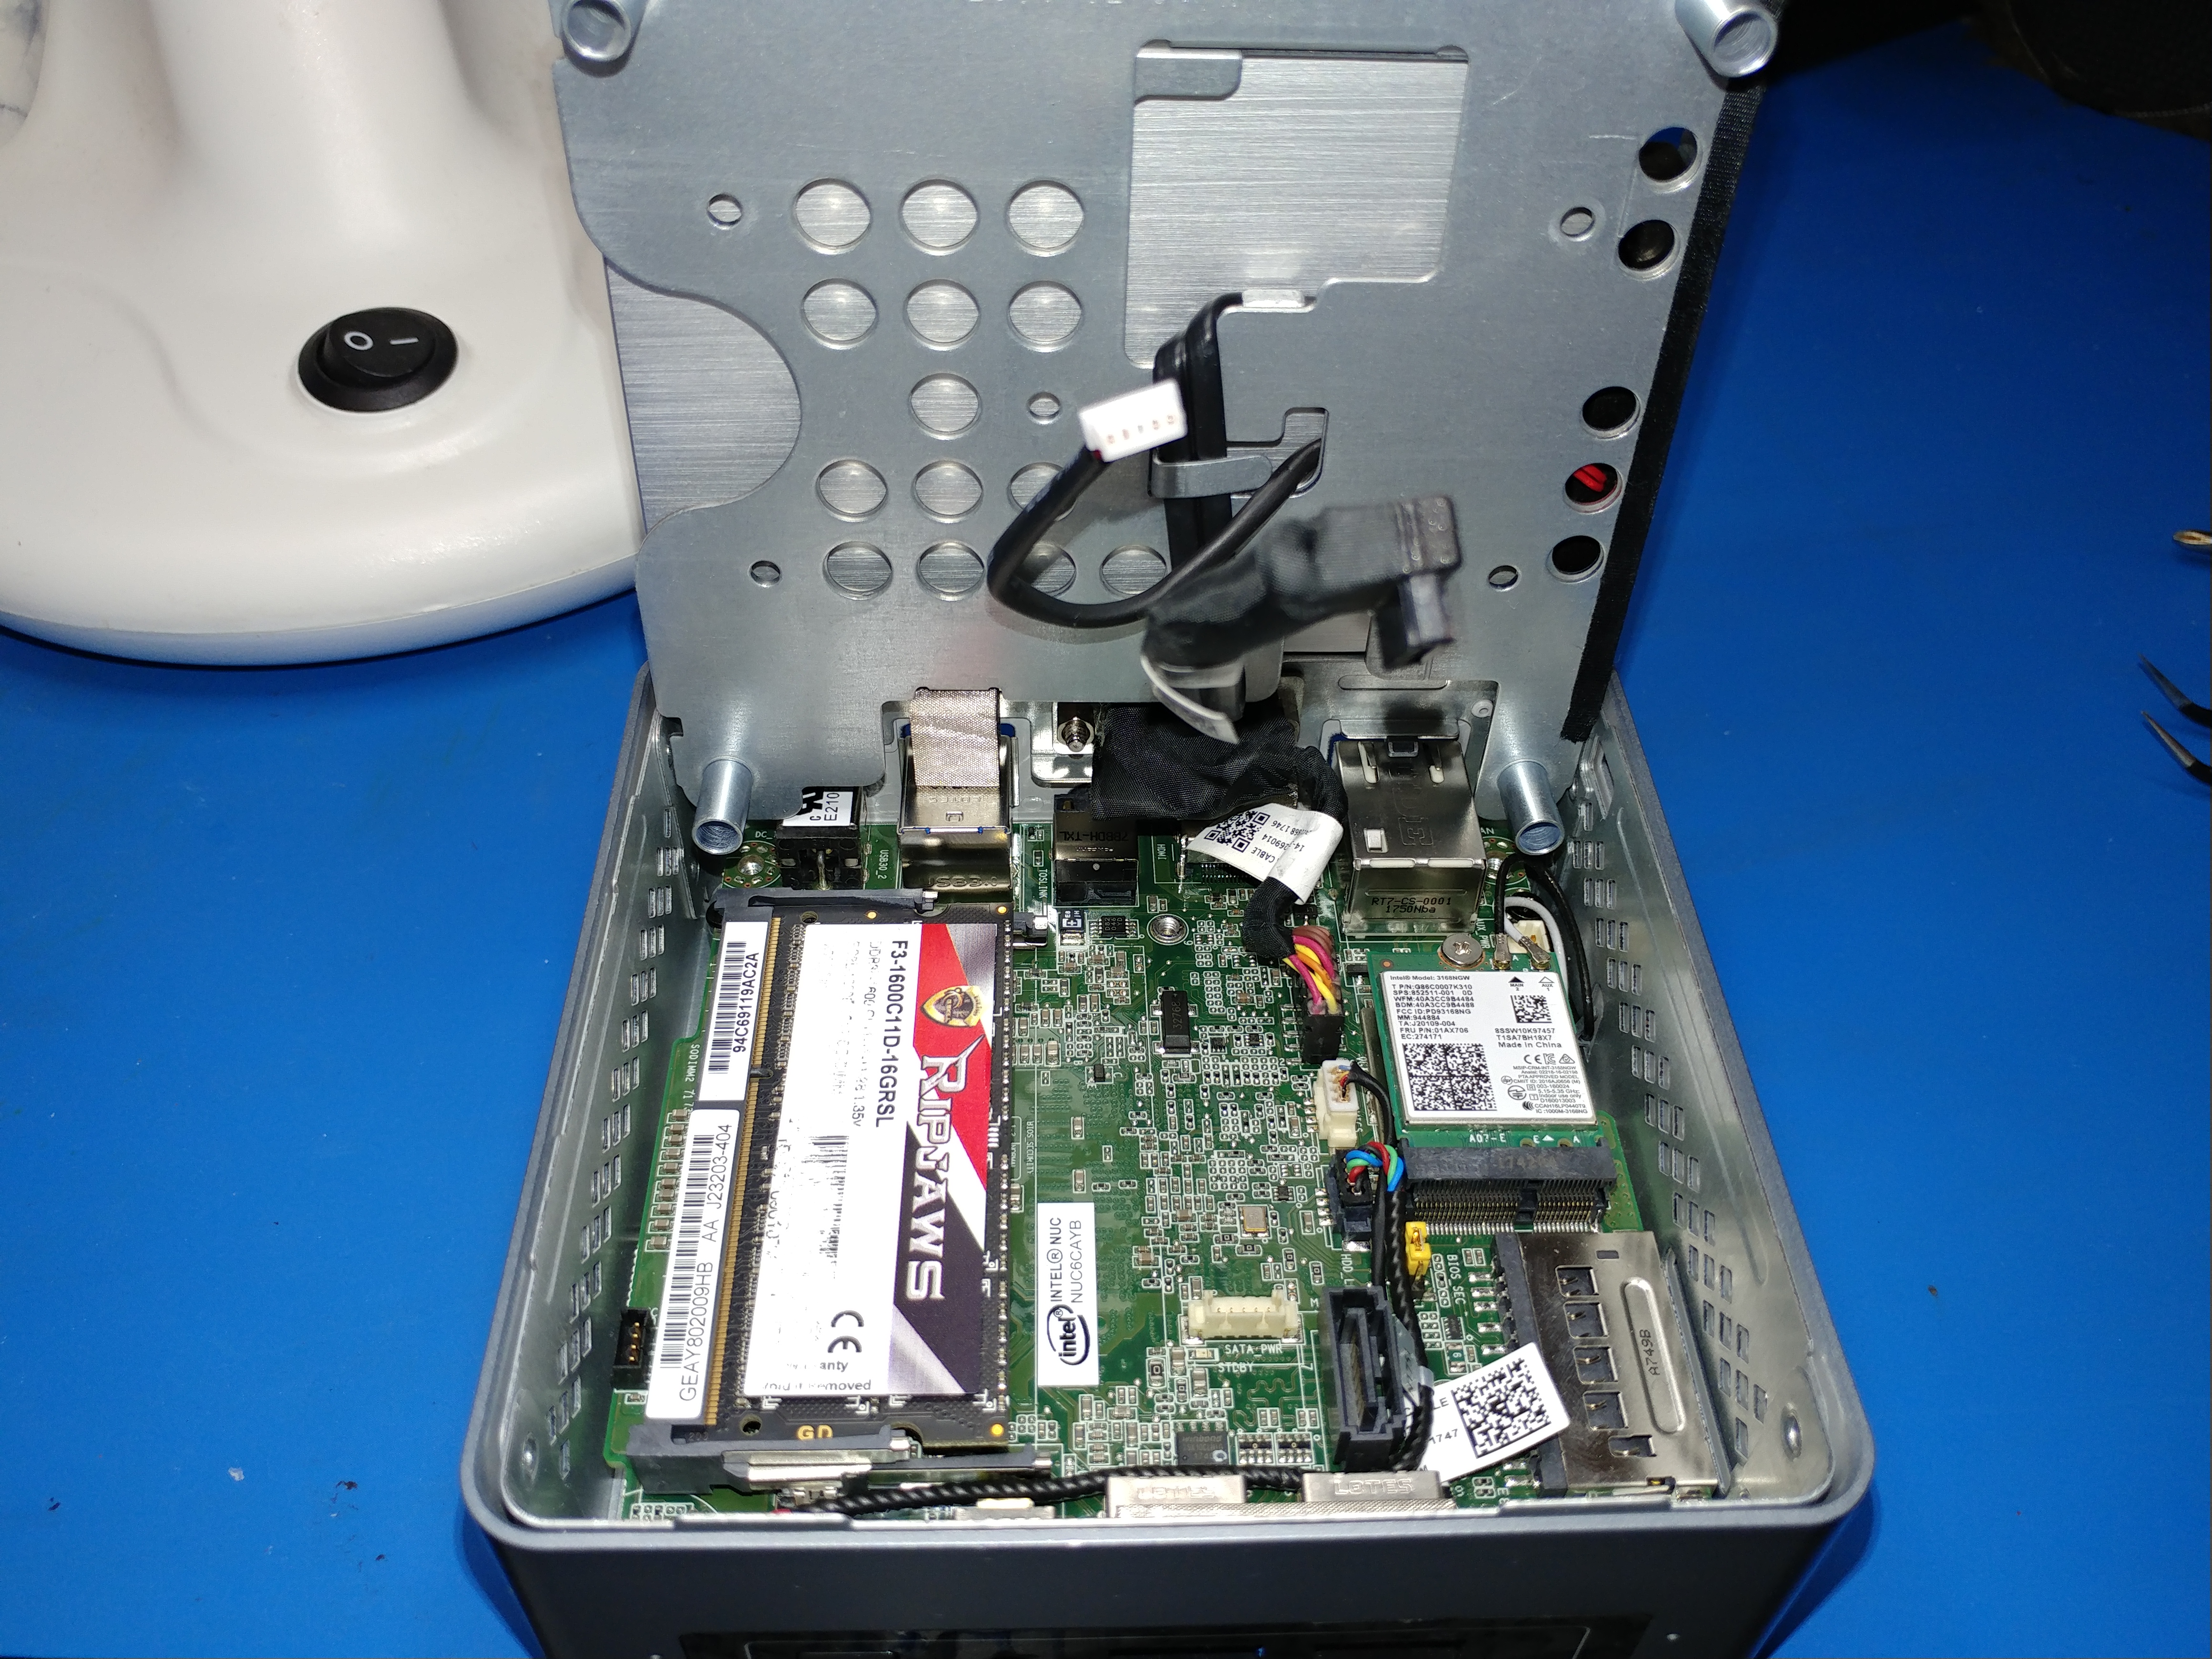
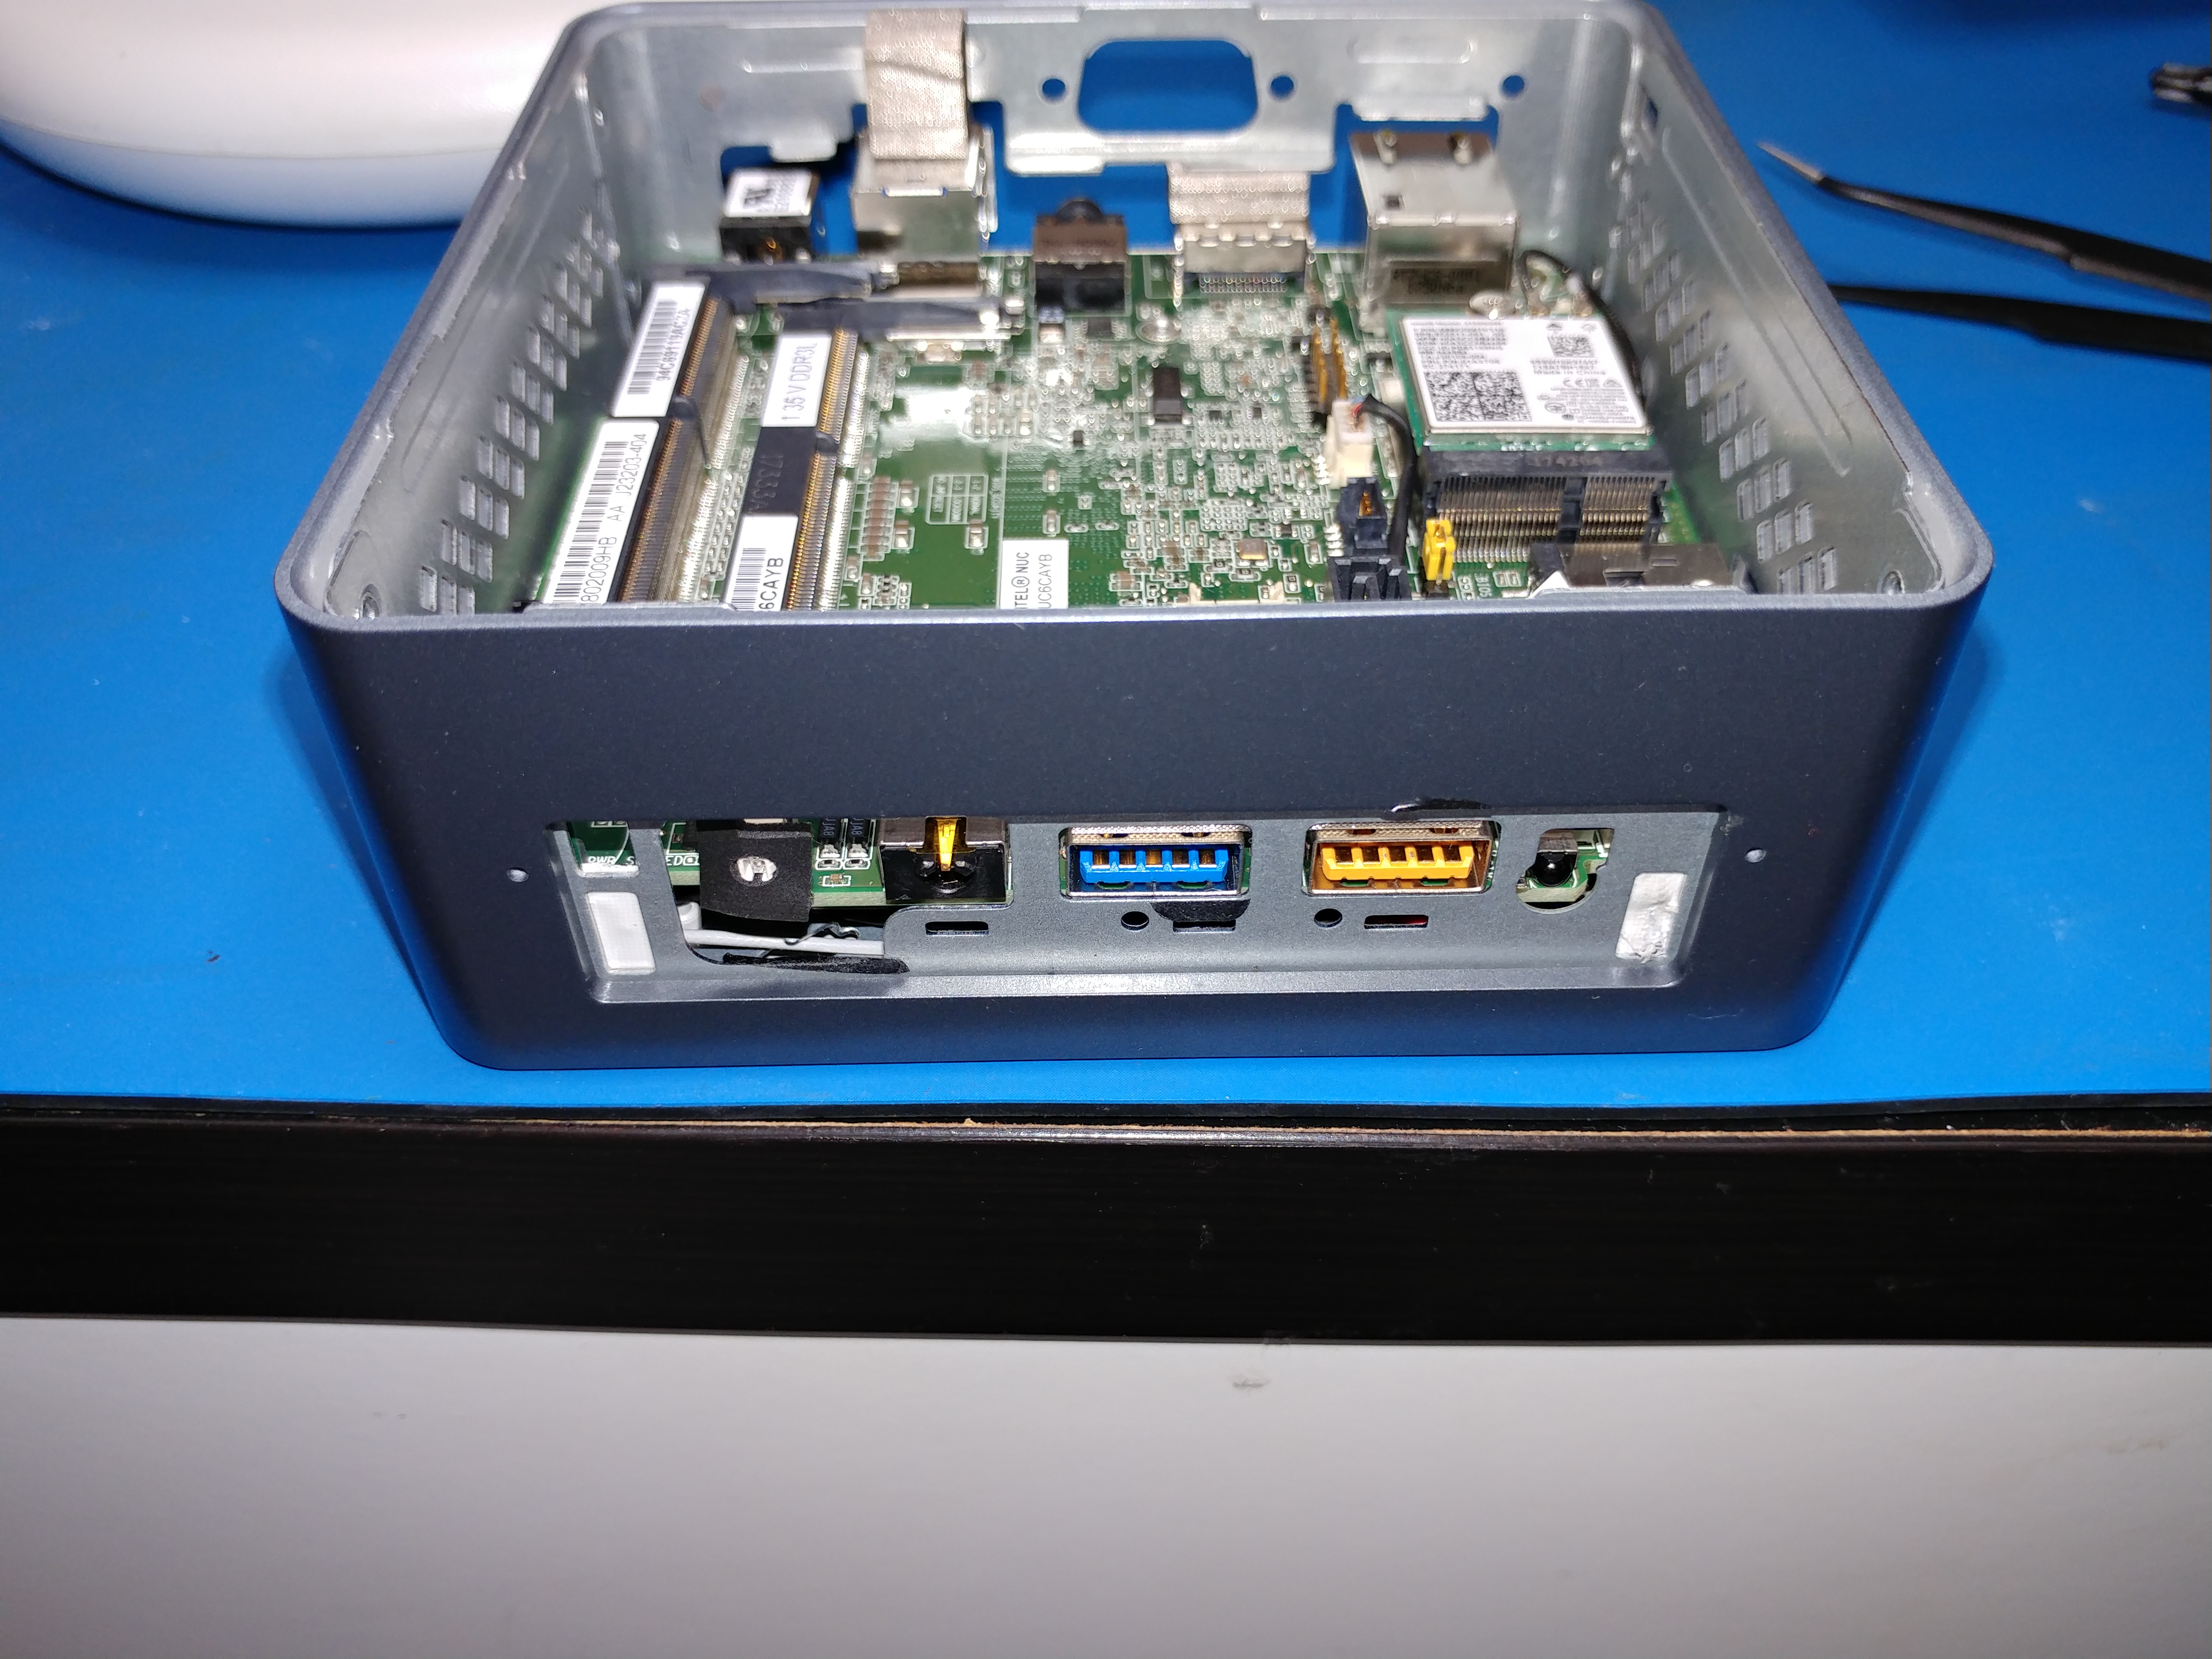
 With the HDD cage removed you get a good look at the rear IO (input/output) ports. A couple of things to note here: the Wifi card (red box) is installed in the M.2 slot. The front panel IO cable (green box) we’ll come back to later. Note as well the two tabs (yellow boxes), these are important shortly.
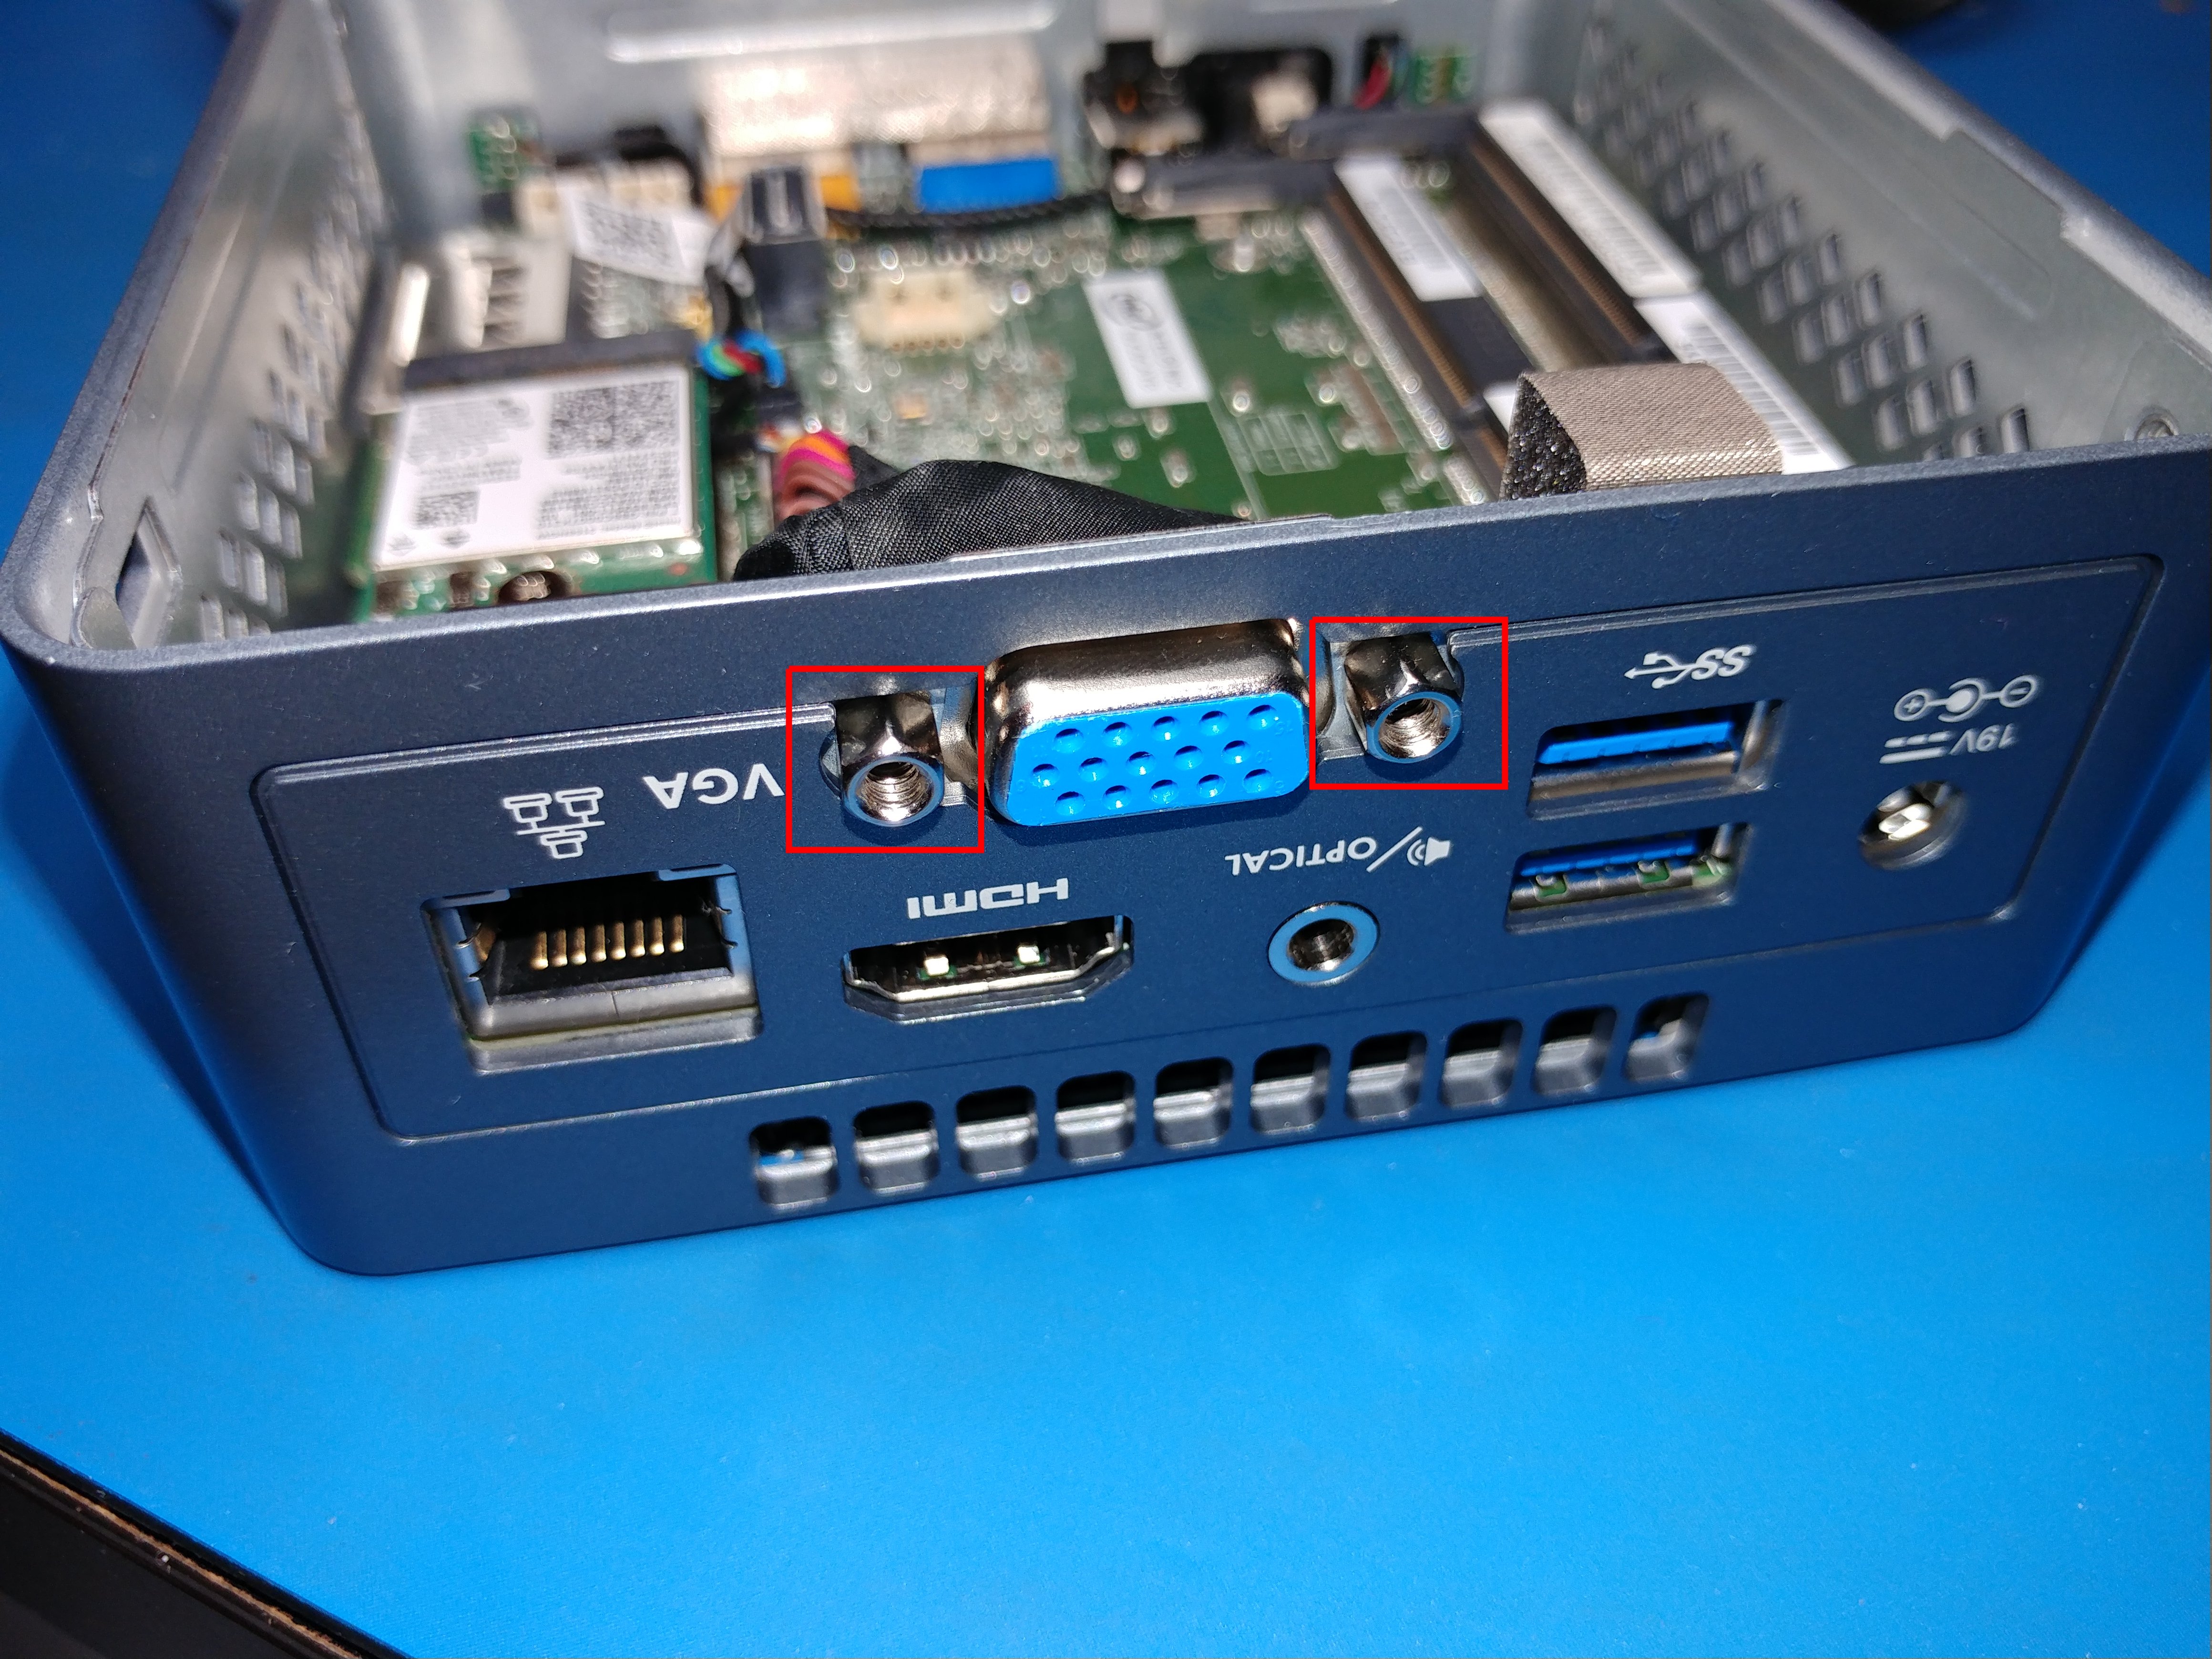 Next step is to remove the screws holding in the VGA display port (red boxes). You’ll need either a small spanner, pliers or a small socket (the iFixIt Pro Tech toolkit has a socket exactly the right size).
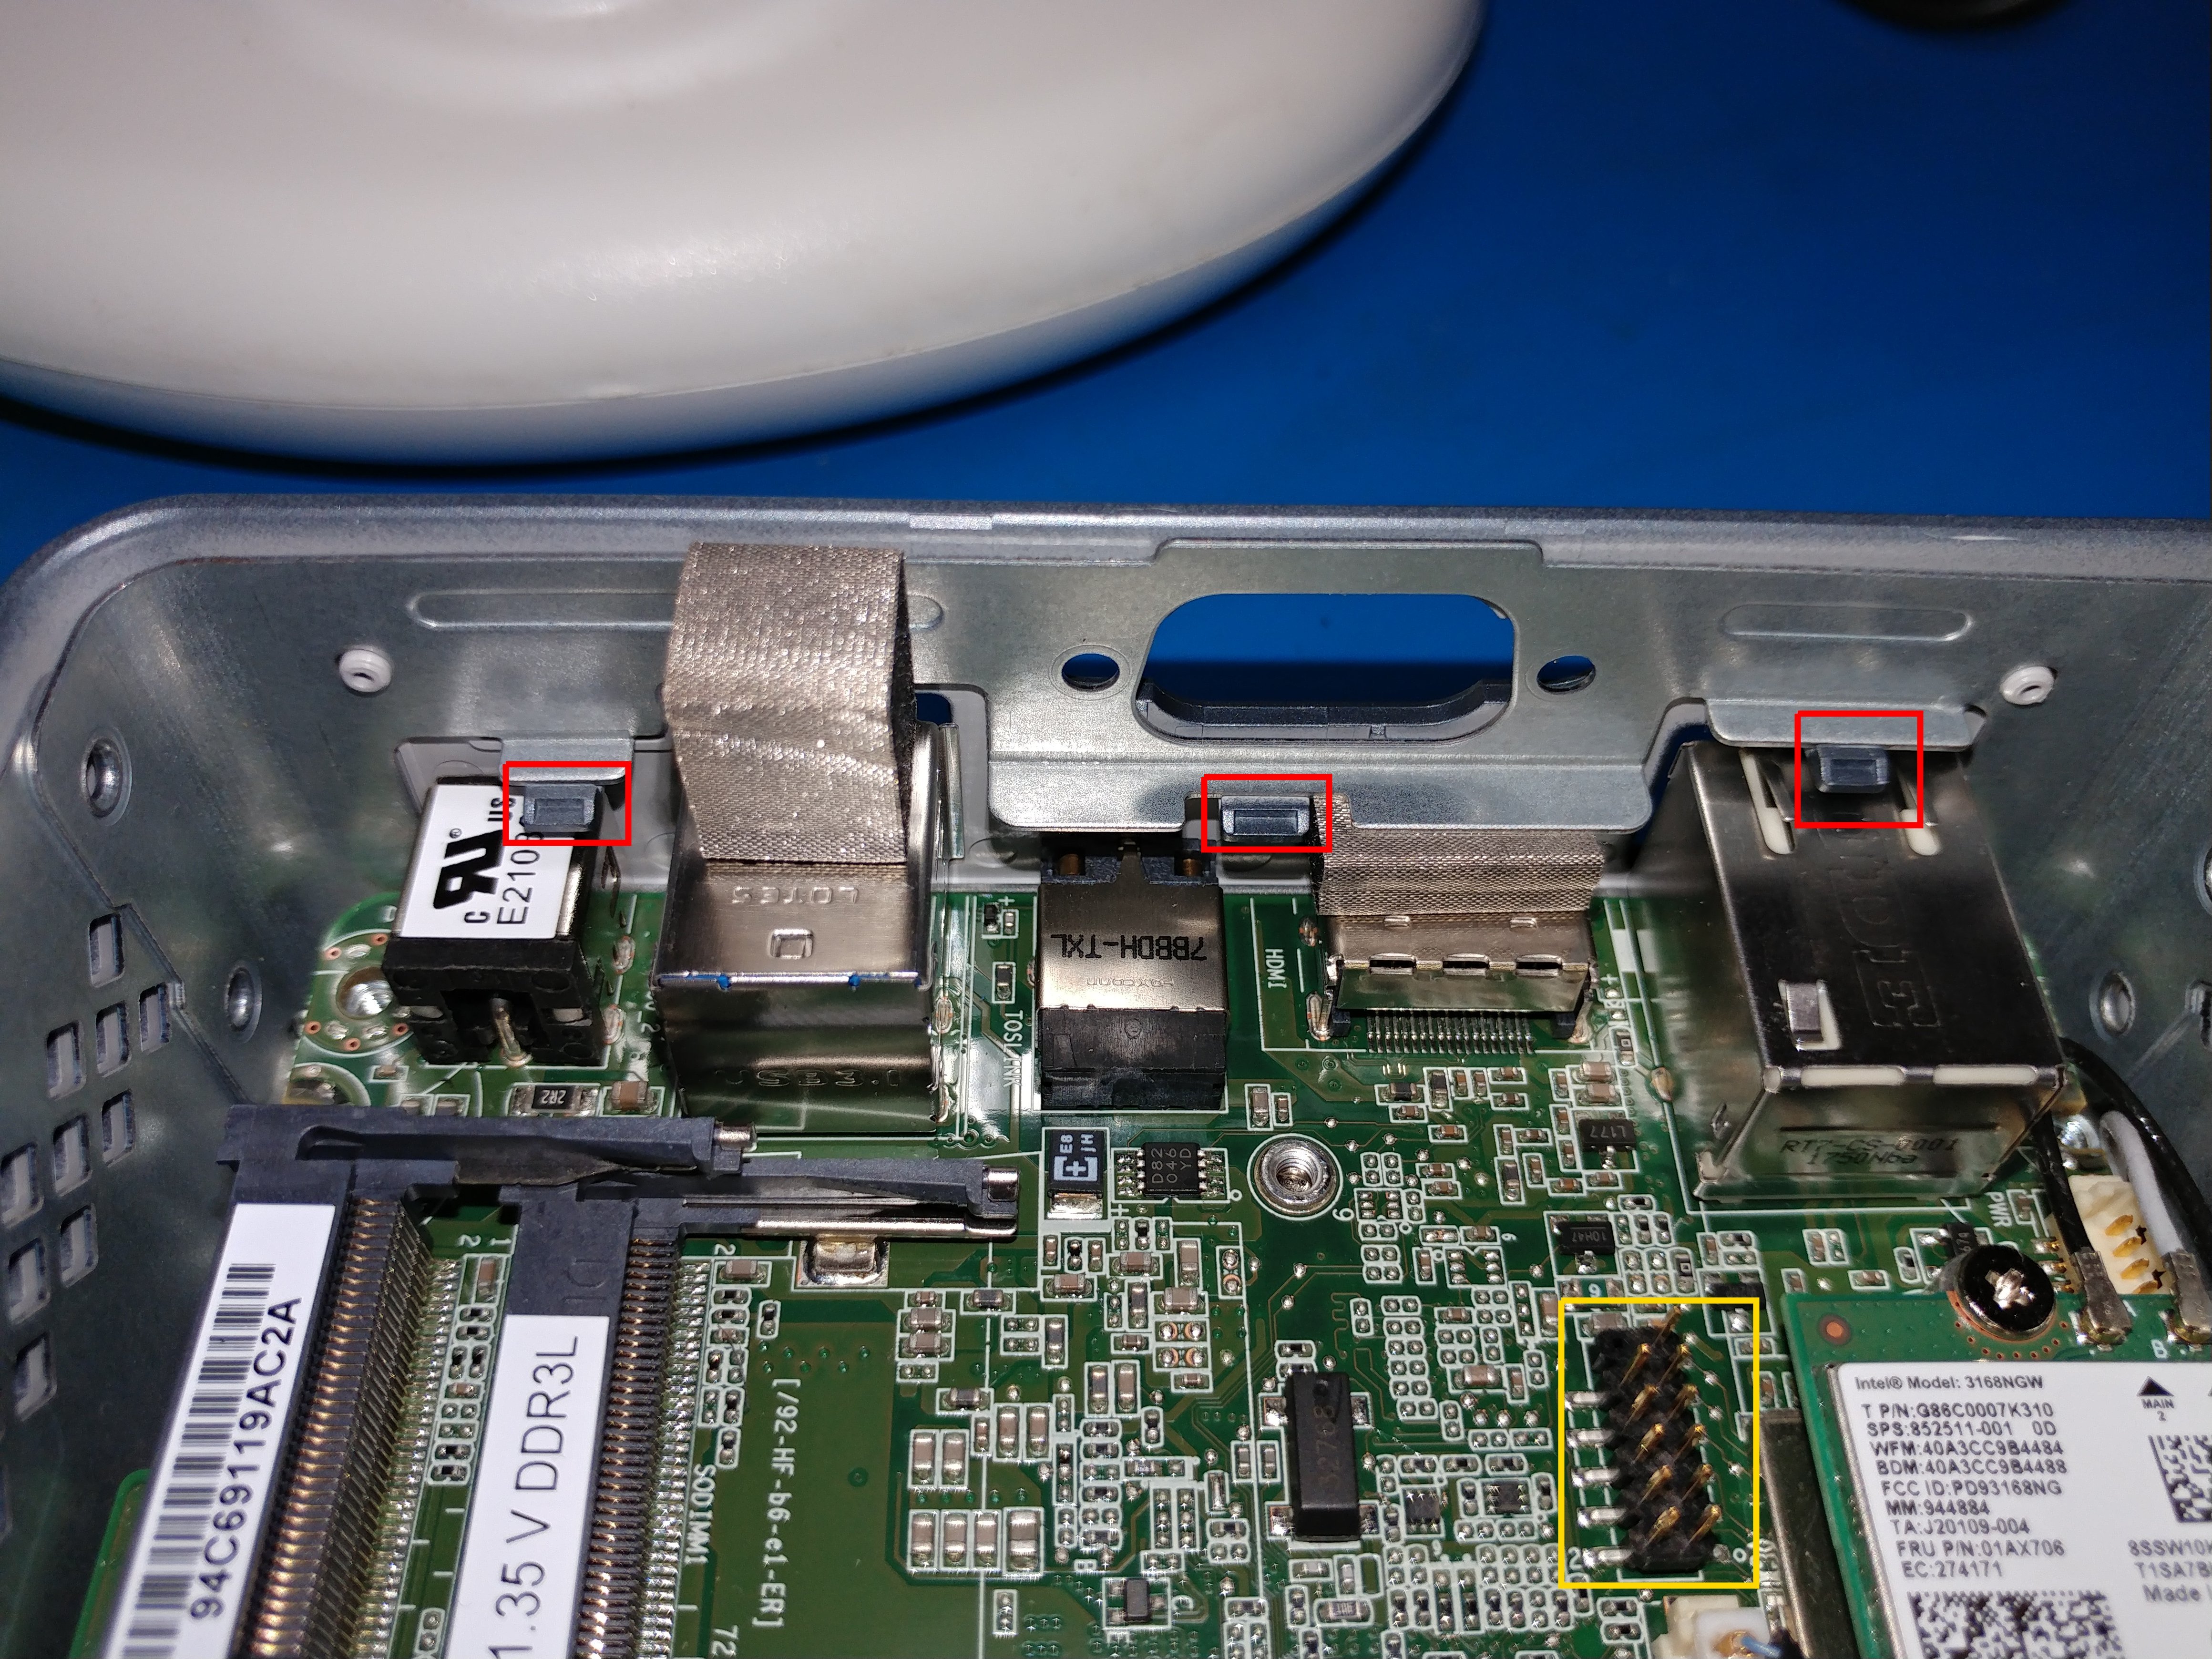 Remember those tabs from two steps above? Well you’ll note in this picture (red boxes) that a third one has spawned under where the VGA connector was. Speaking of which, you’ll note that the VGA connector has been removed from the motherboard as well.
 Here’s just a good view of the rear IO (minus the VGA connector). By pushing down gently on the three tabs you will be able to just push the plate out.
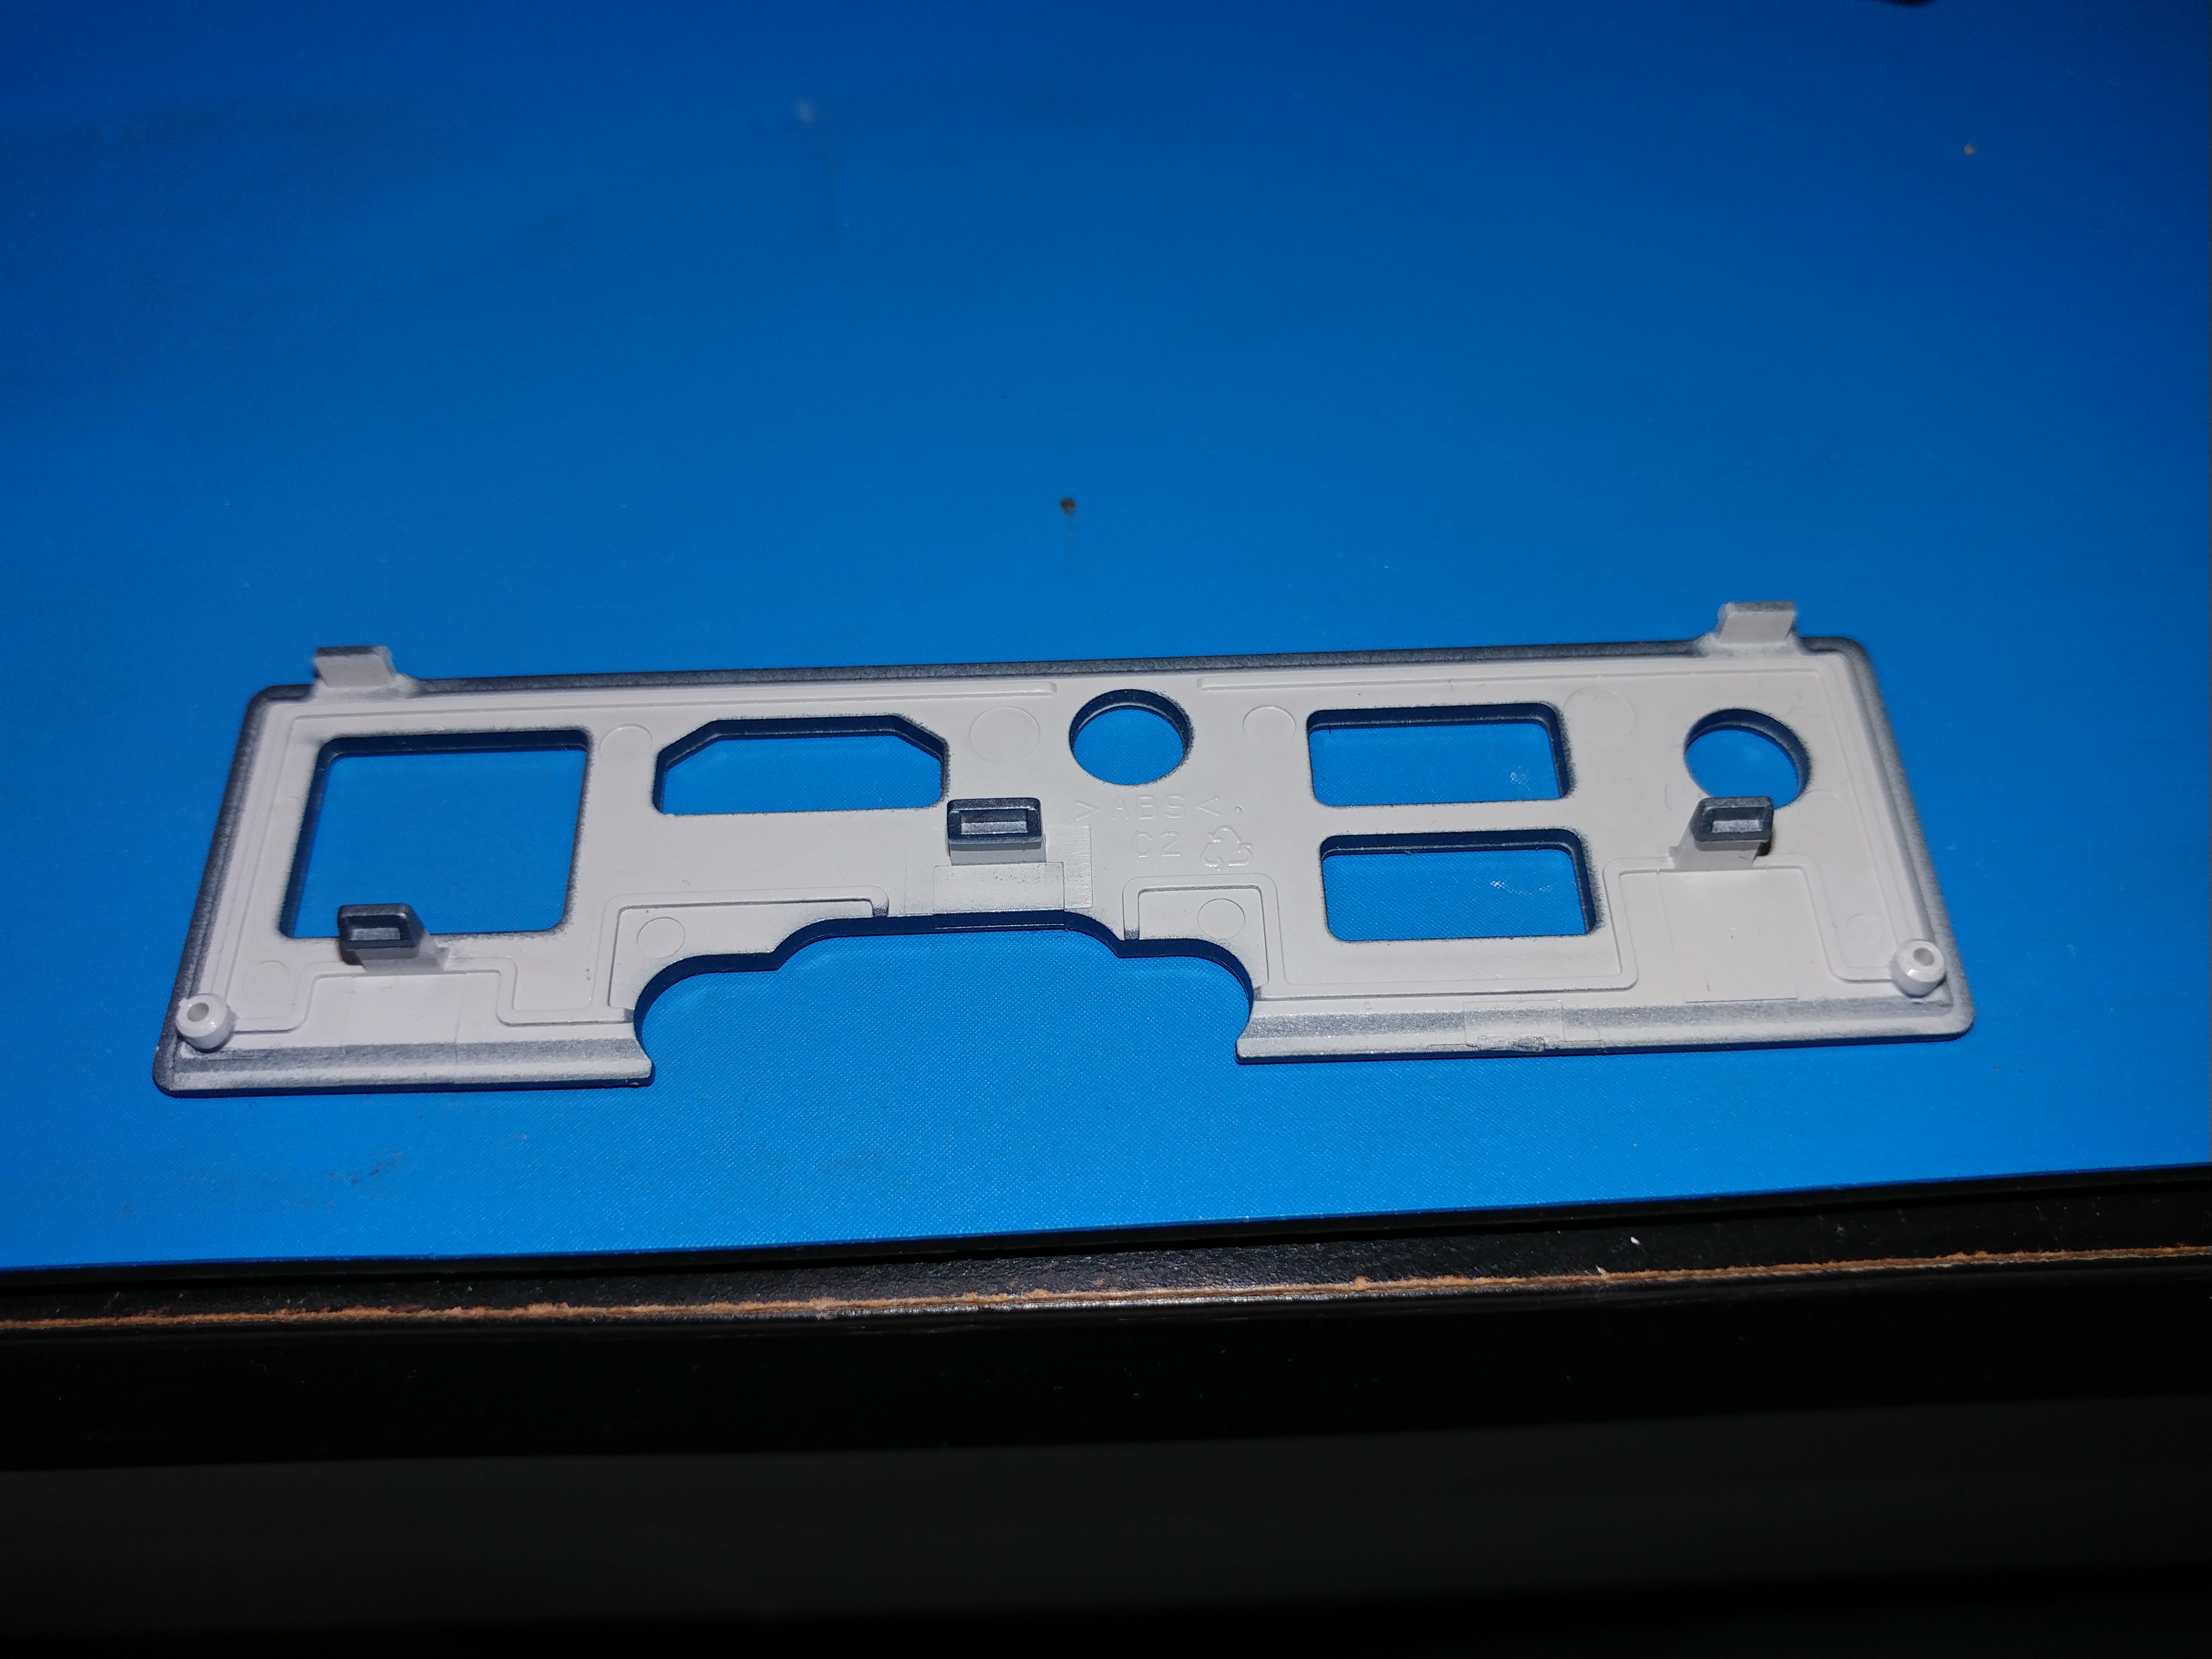 He’s the plate itself, you can see the three tabs and the two small notches at the top of the plate which slot into the chassis.
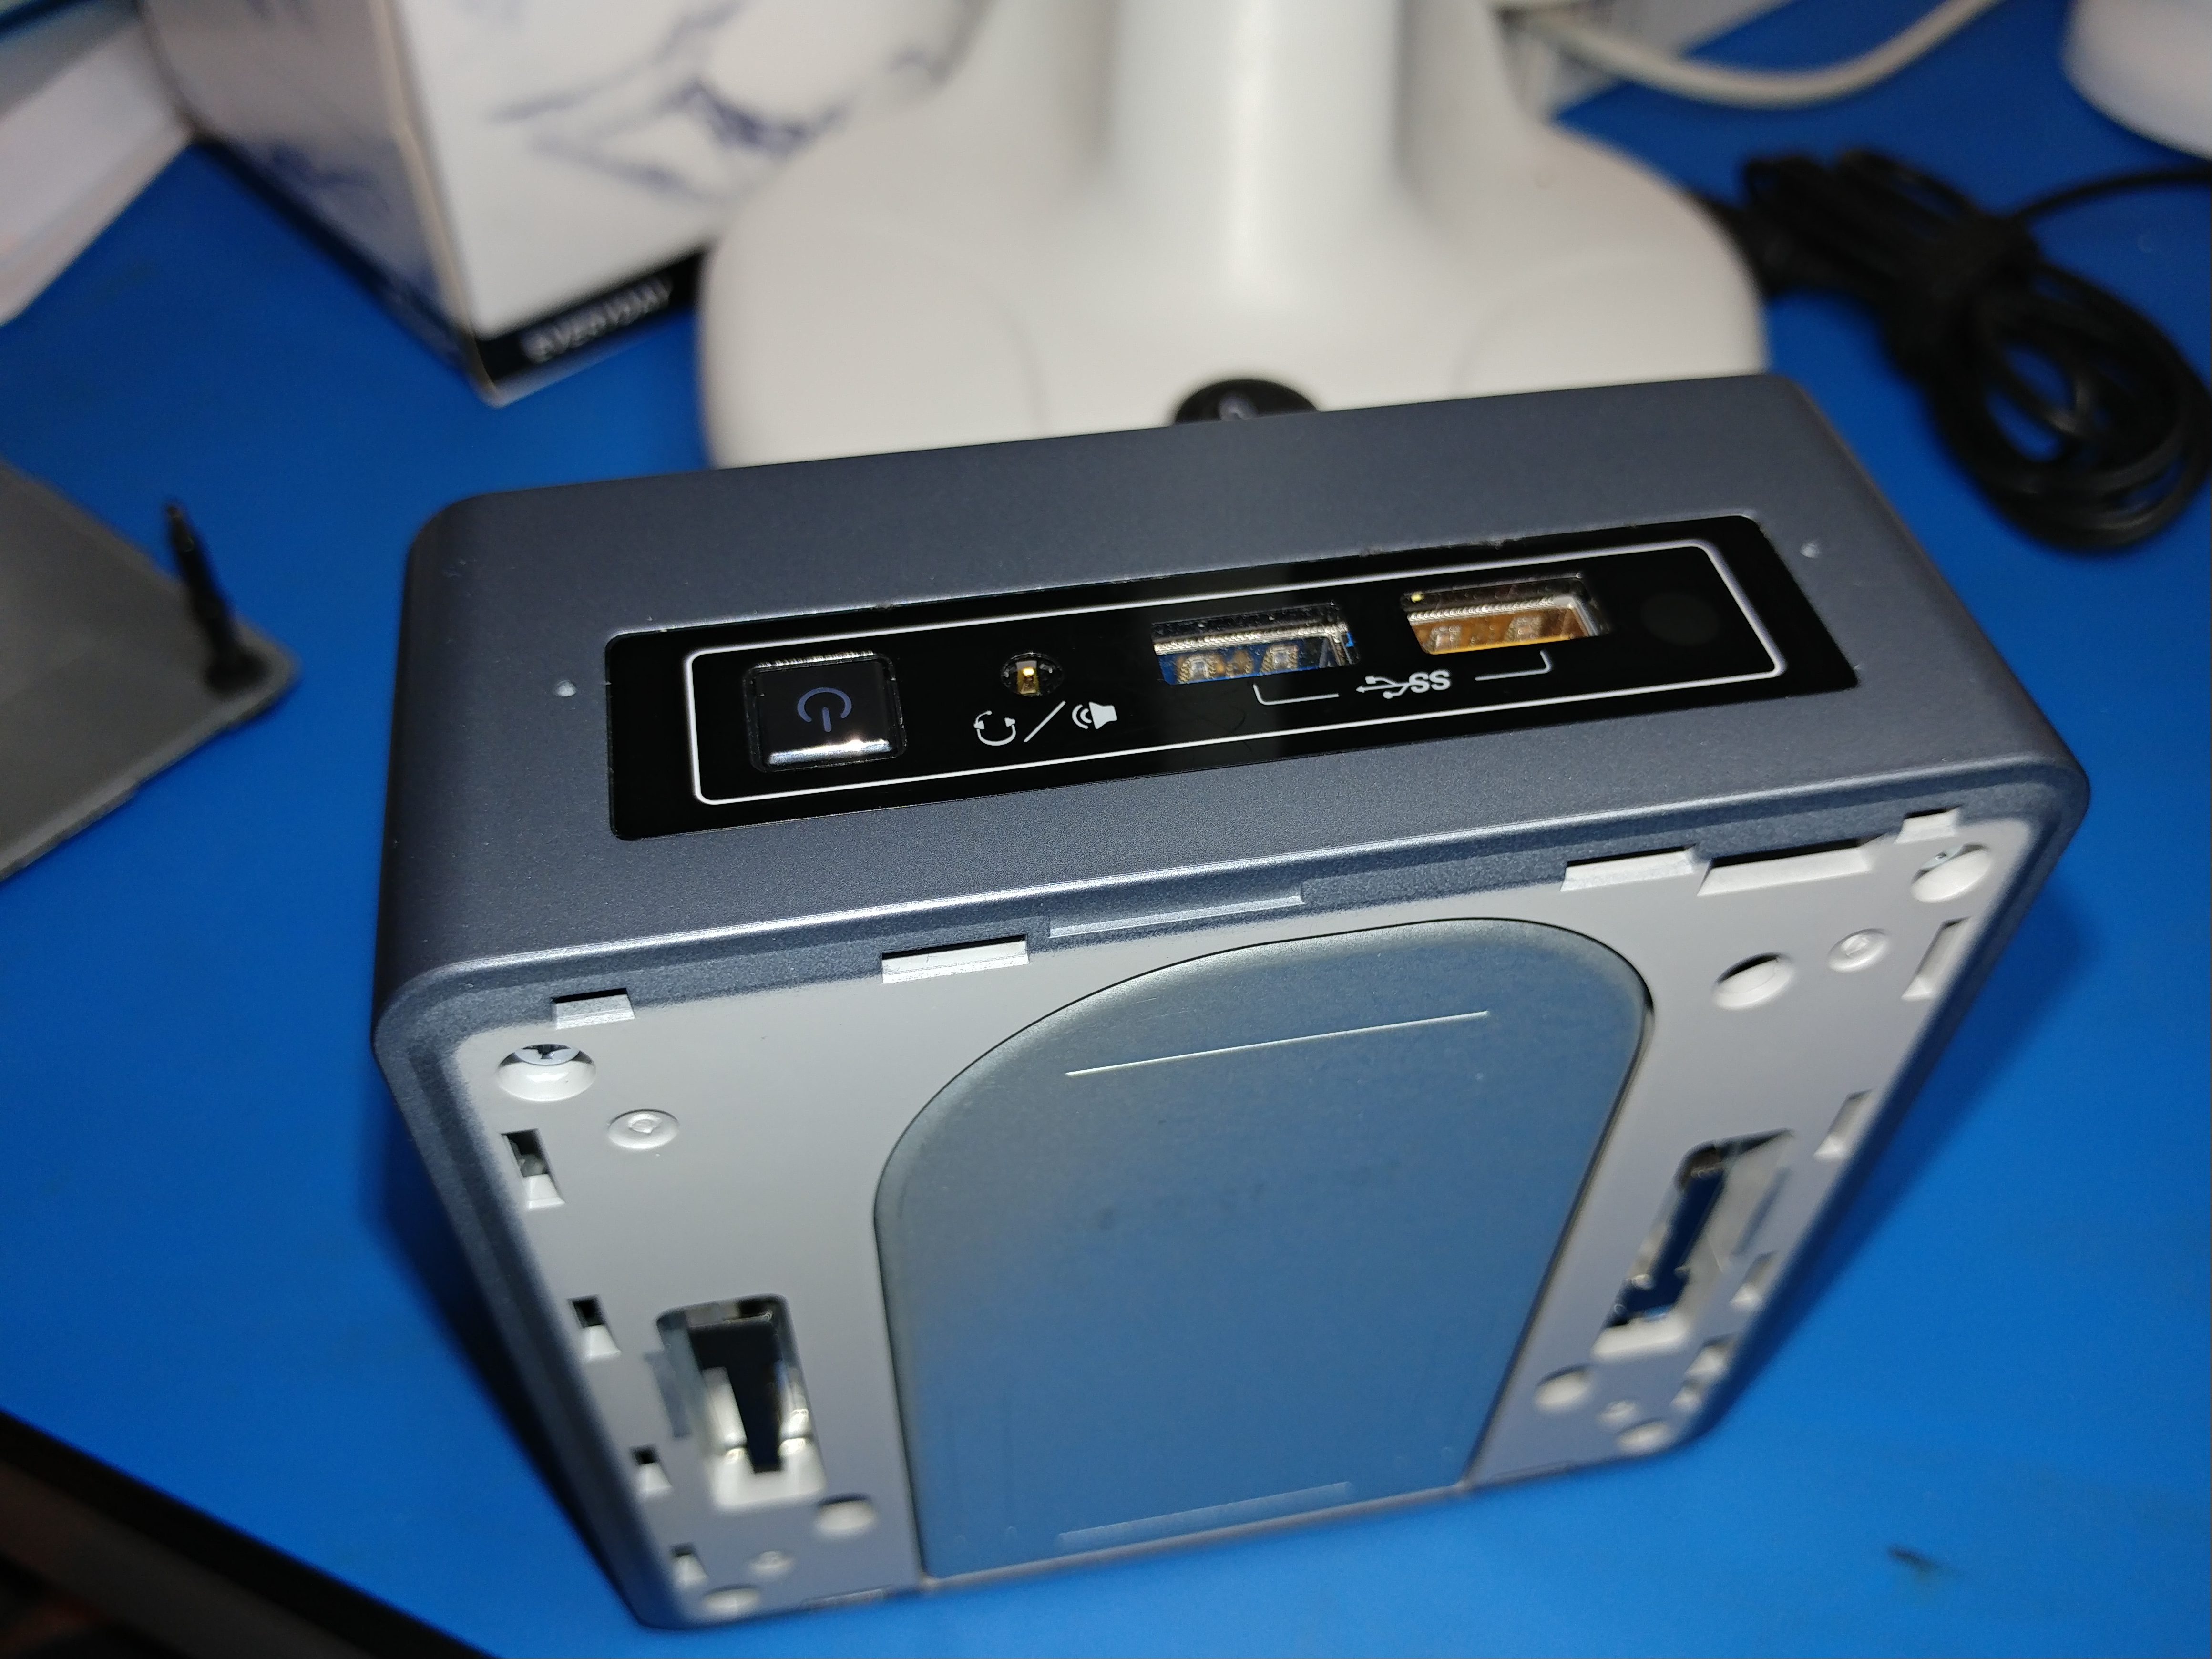 In contrast to the rear IO panel, the front IO panel is not easy to get off. Even after taking it apart I couldn’t see a better way to do it, but if you have any knowledge/suggestions, please leave a comment below.
 The front IO panel is held on by a very sticky glue. You’ll need lots of patience to get it off. Essentially the process was this:
- Identify the end of the panel that doesn’t have the cable going to it.
- From the font, use a pry tool to lift up the end.
- Use a razor blade to separate the glue from the device, hopefully leaving as much glue on the IO panel as possible.
- Put something in to wedge up the area you’ve worked on (the metal spudger from the iFixIt kit worked perfectly for this).
- Keep working your way along until you can just pull the panel up.
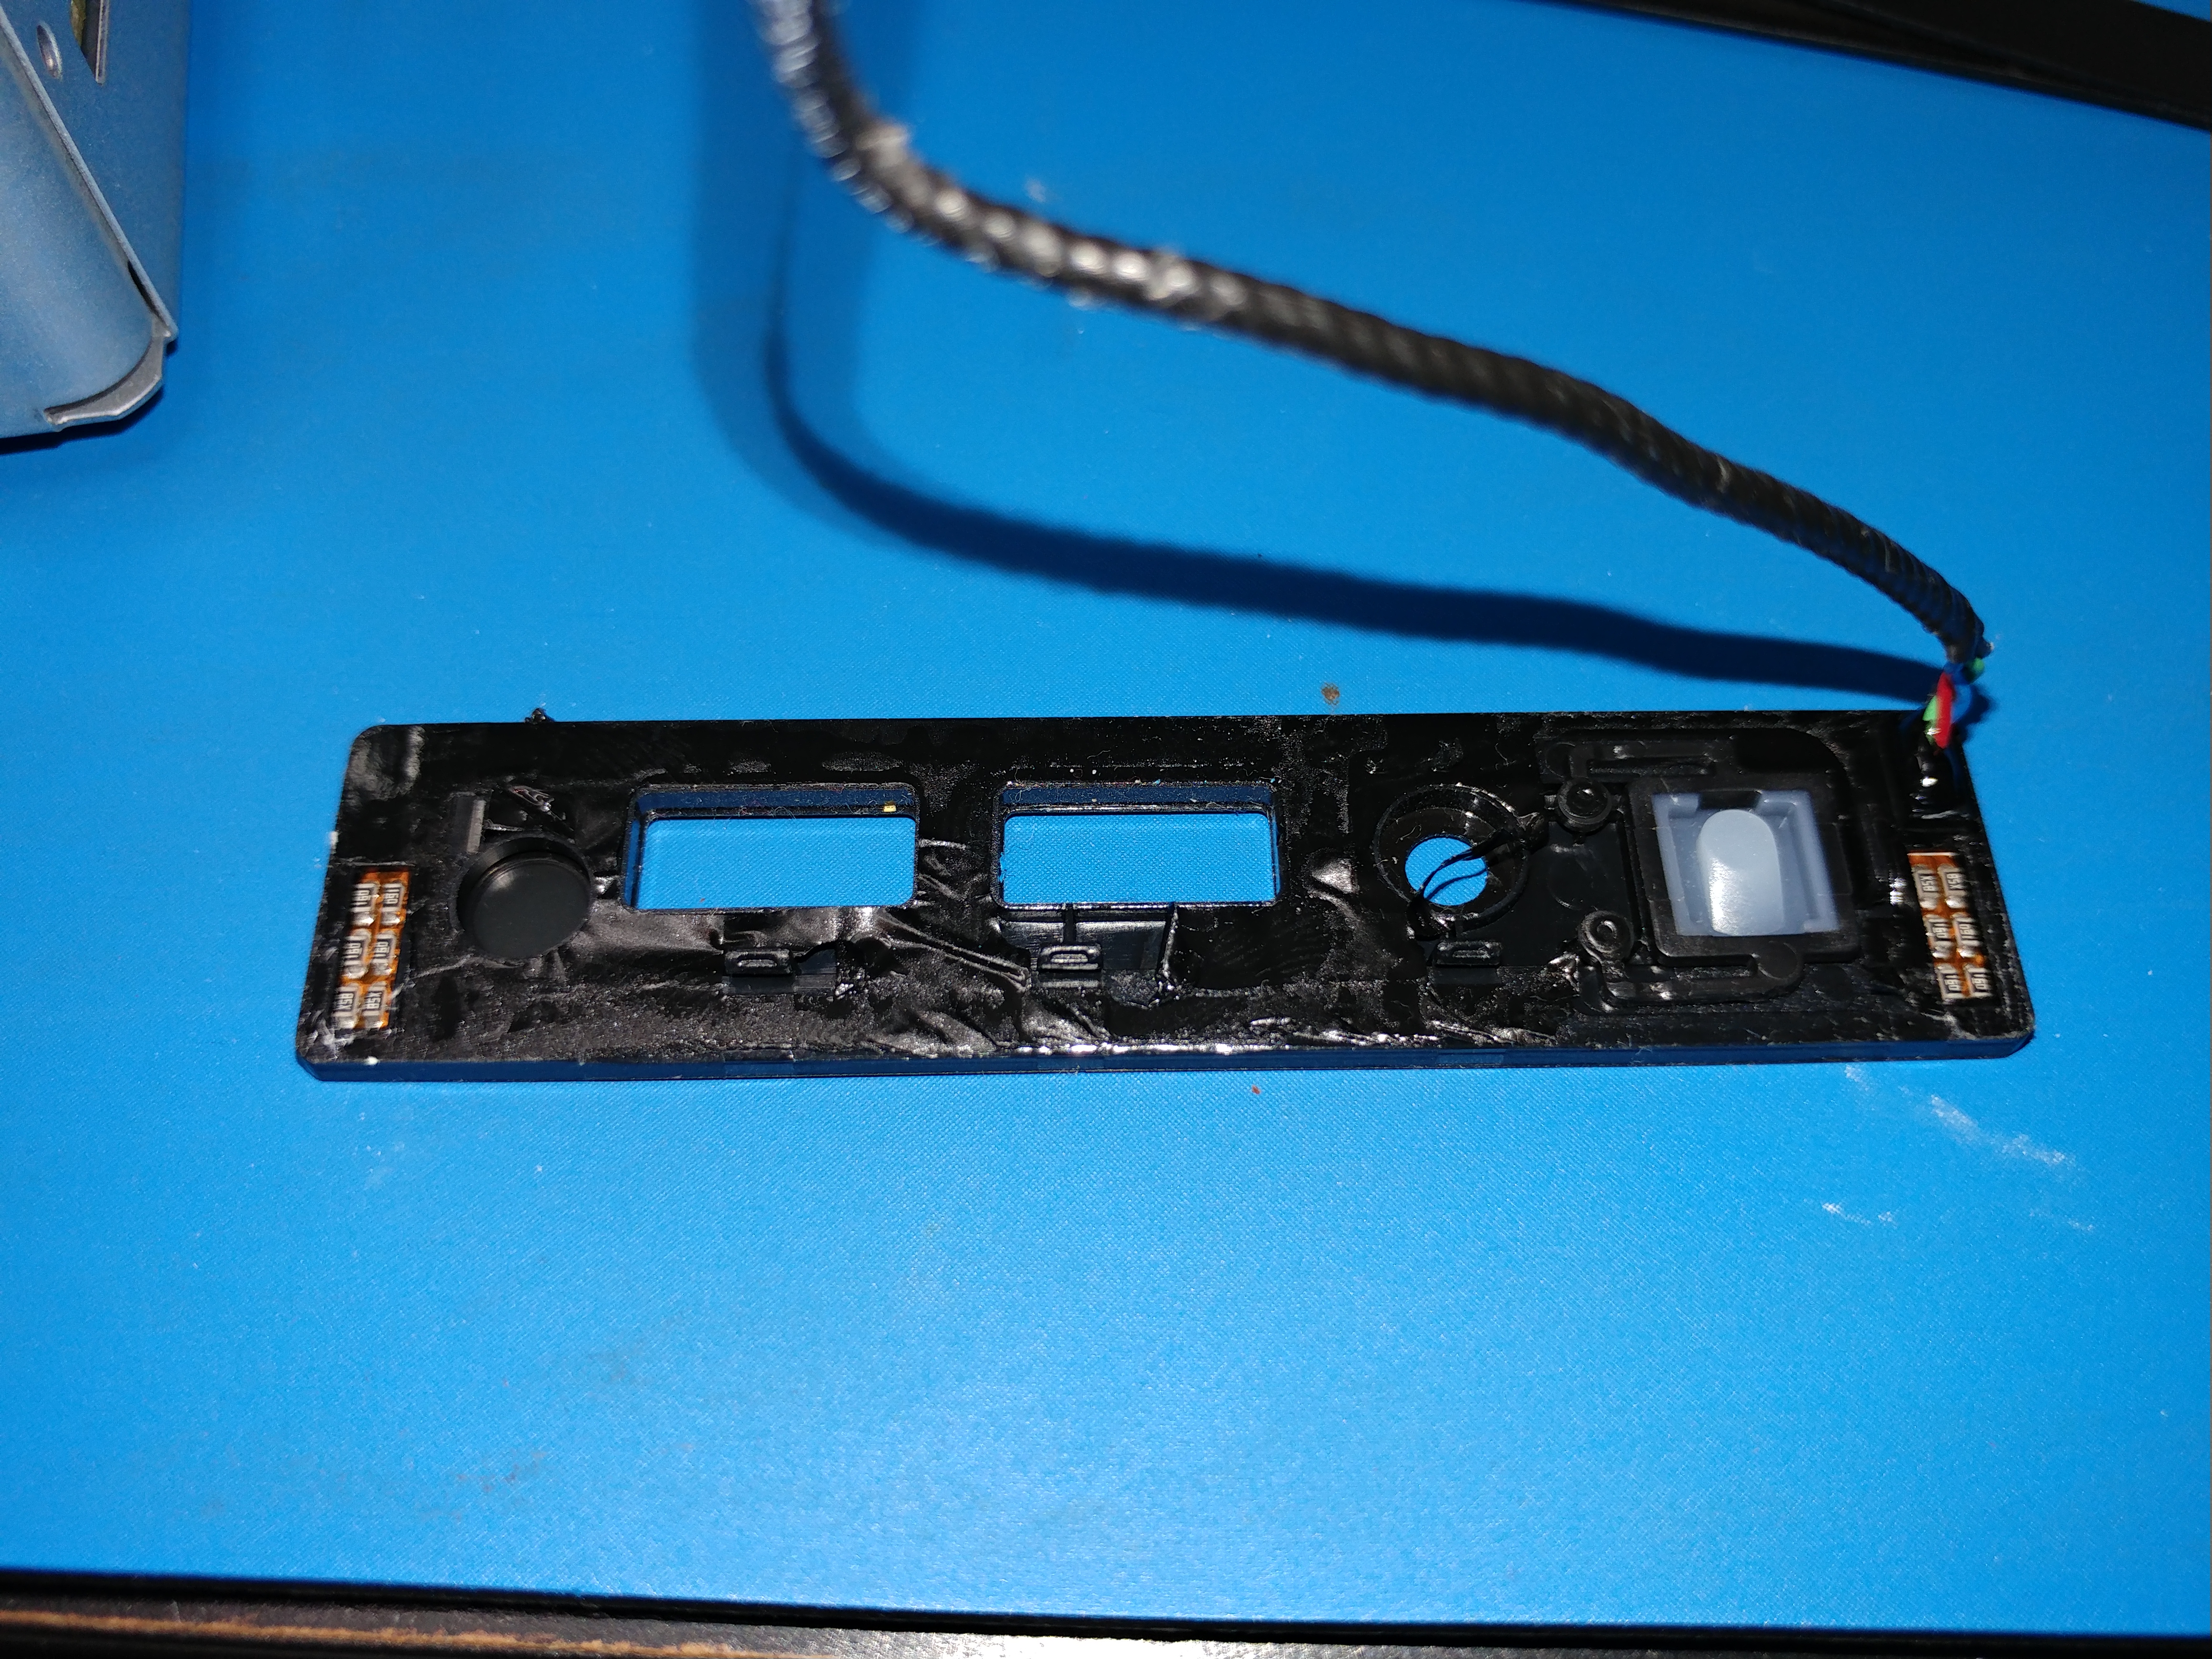
 And here you see the front IO without the panel on. If you look closely at the white panel on the right hand side there is a small bit of damage here. It’s like a wax paper and I managed to push into it when I didn’t know it was there. Be careful of that, learn from my mistake.
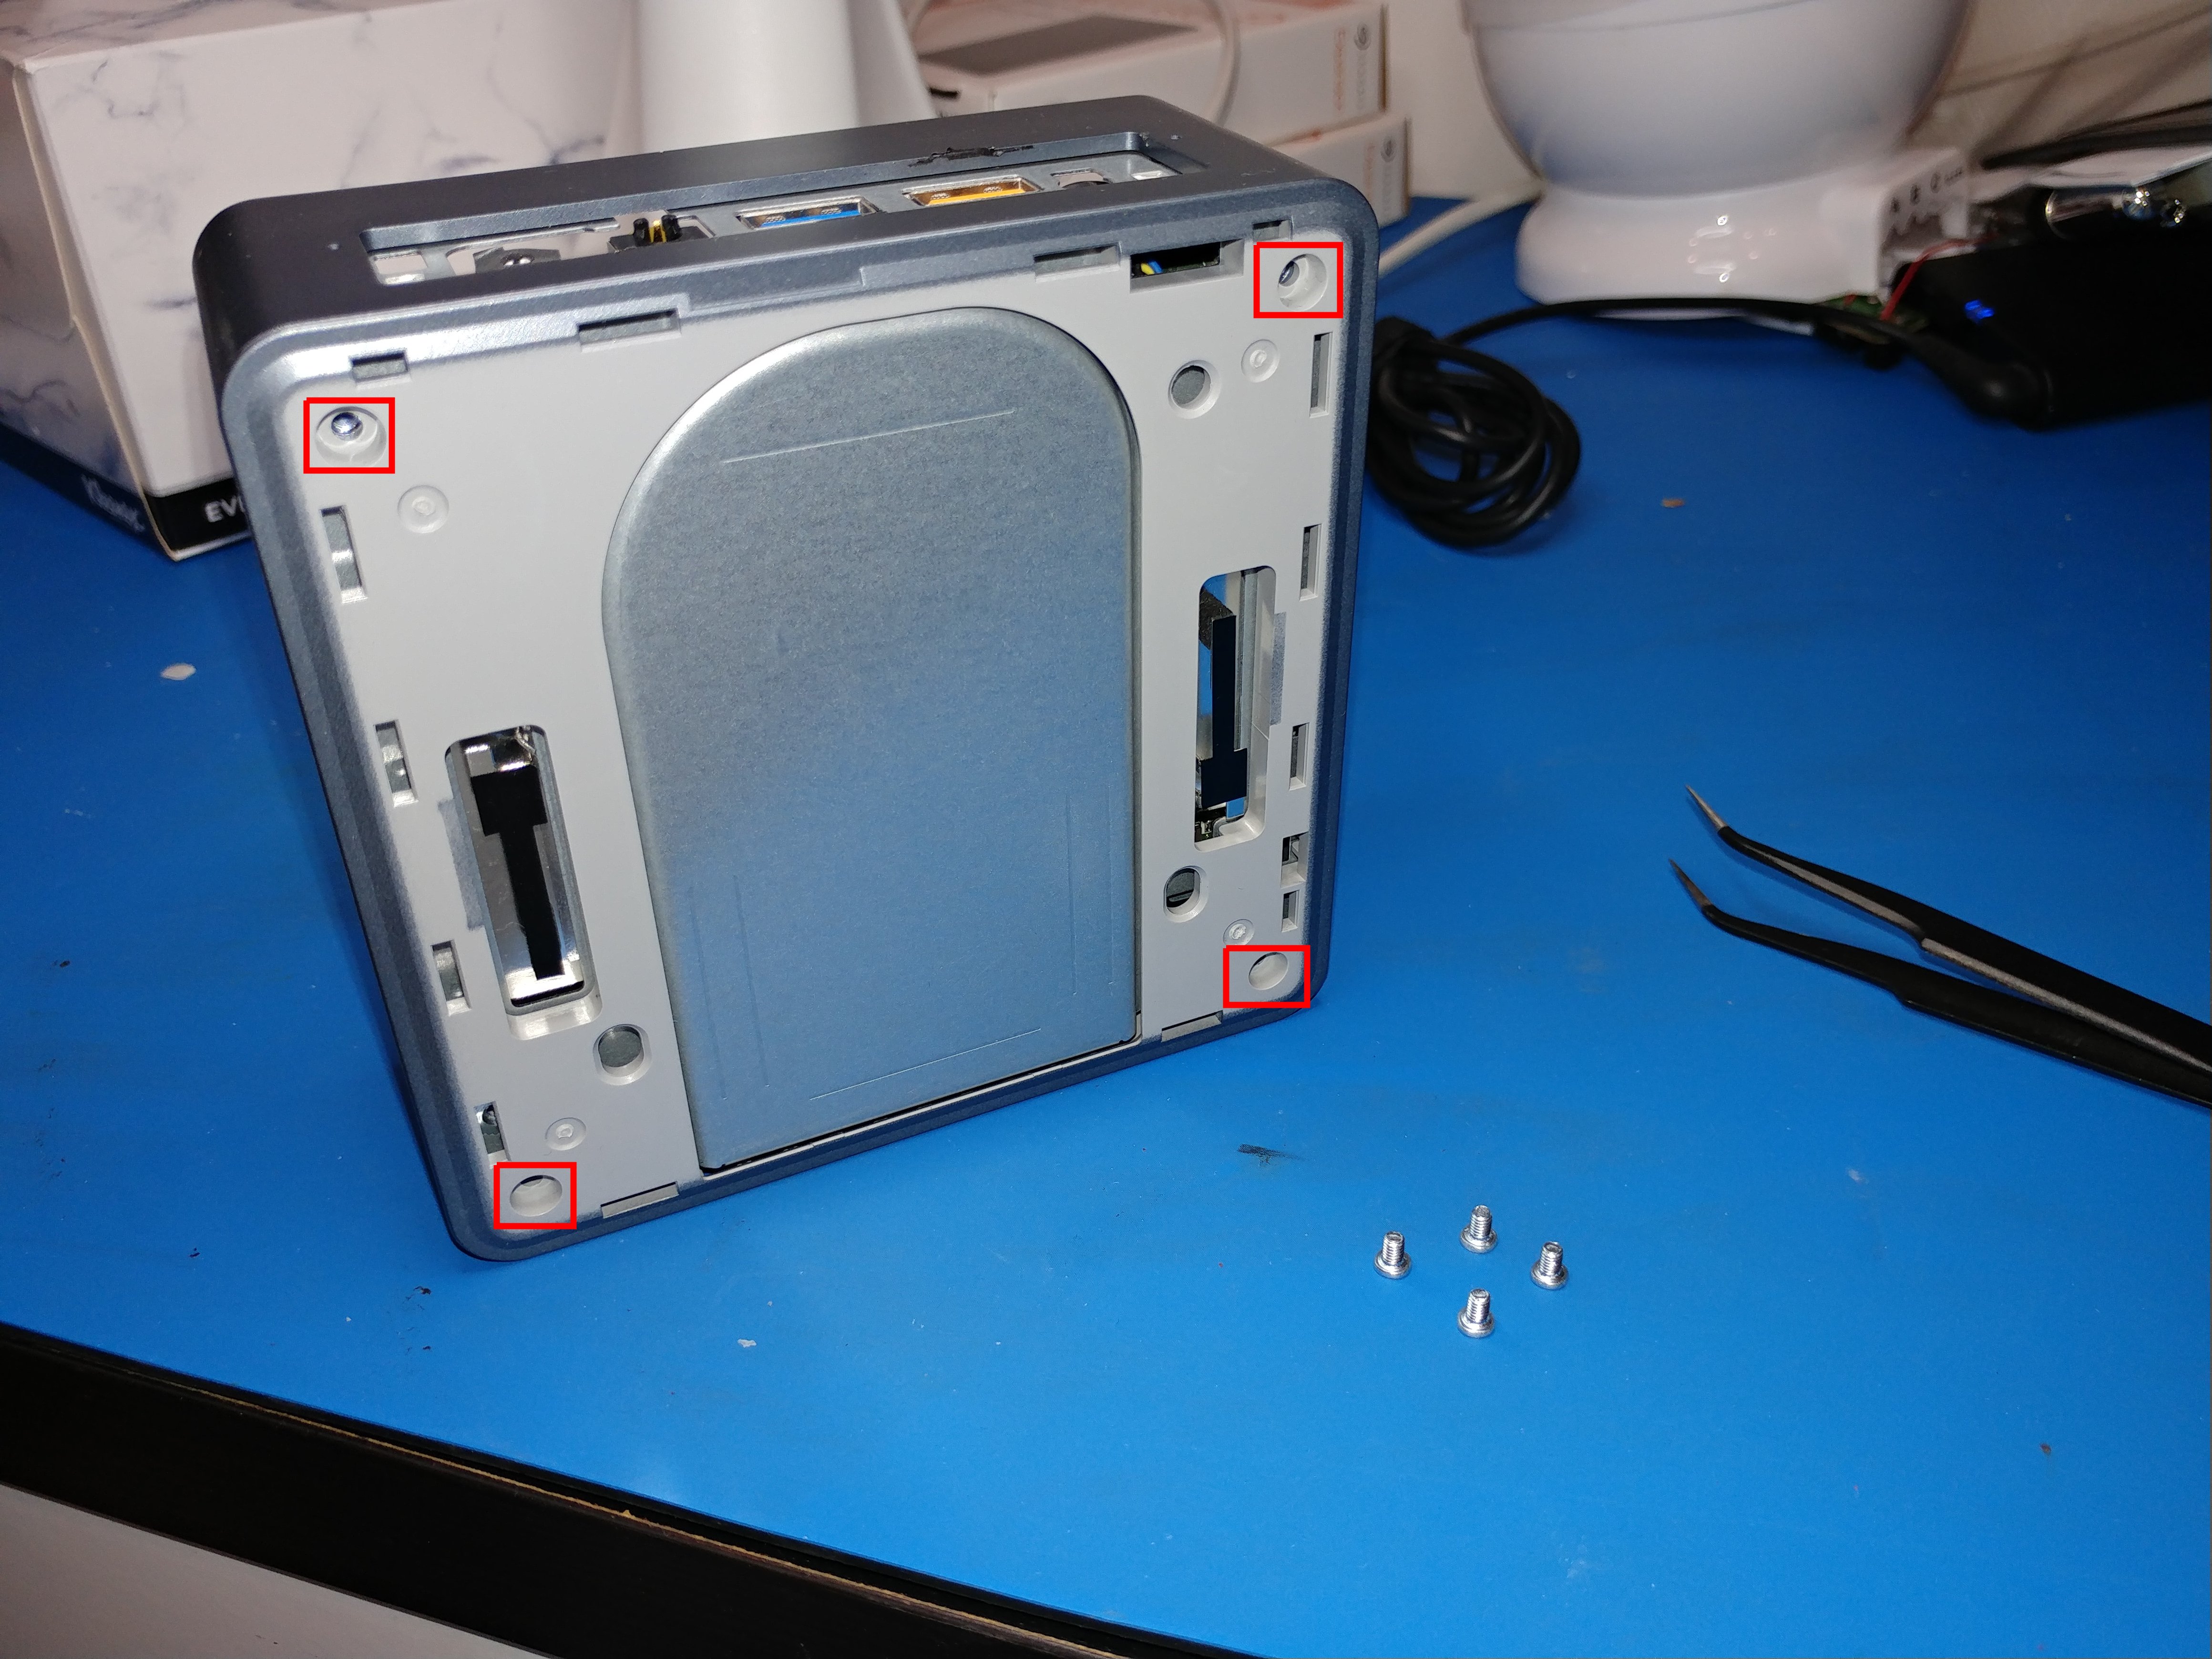 Now that you’ve got the IO panels off, turn it over and take out the four screws (red boxes) that hold the plastic case to the chassis.
 You should now be able to just lift the chassis out of the case.
 To take the motherboard out of the chassis you’ll need to remove the power button lead (yellow box) and the Wifi card leads (red box). Be very careful with the WiFi connectors, they are very small and very fragile.
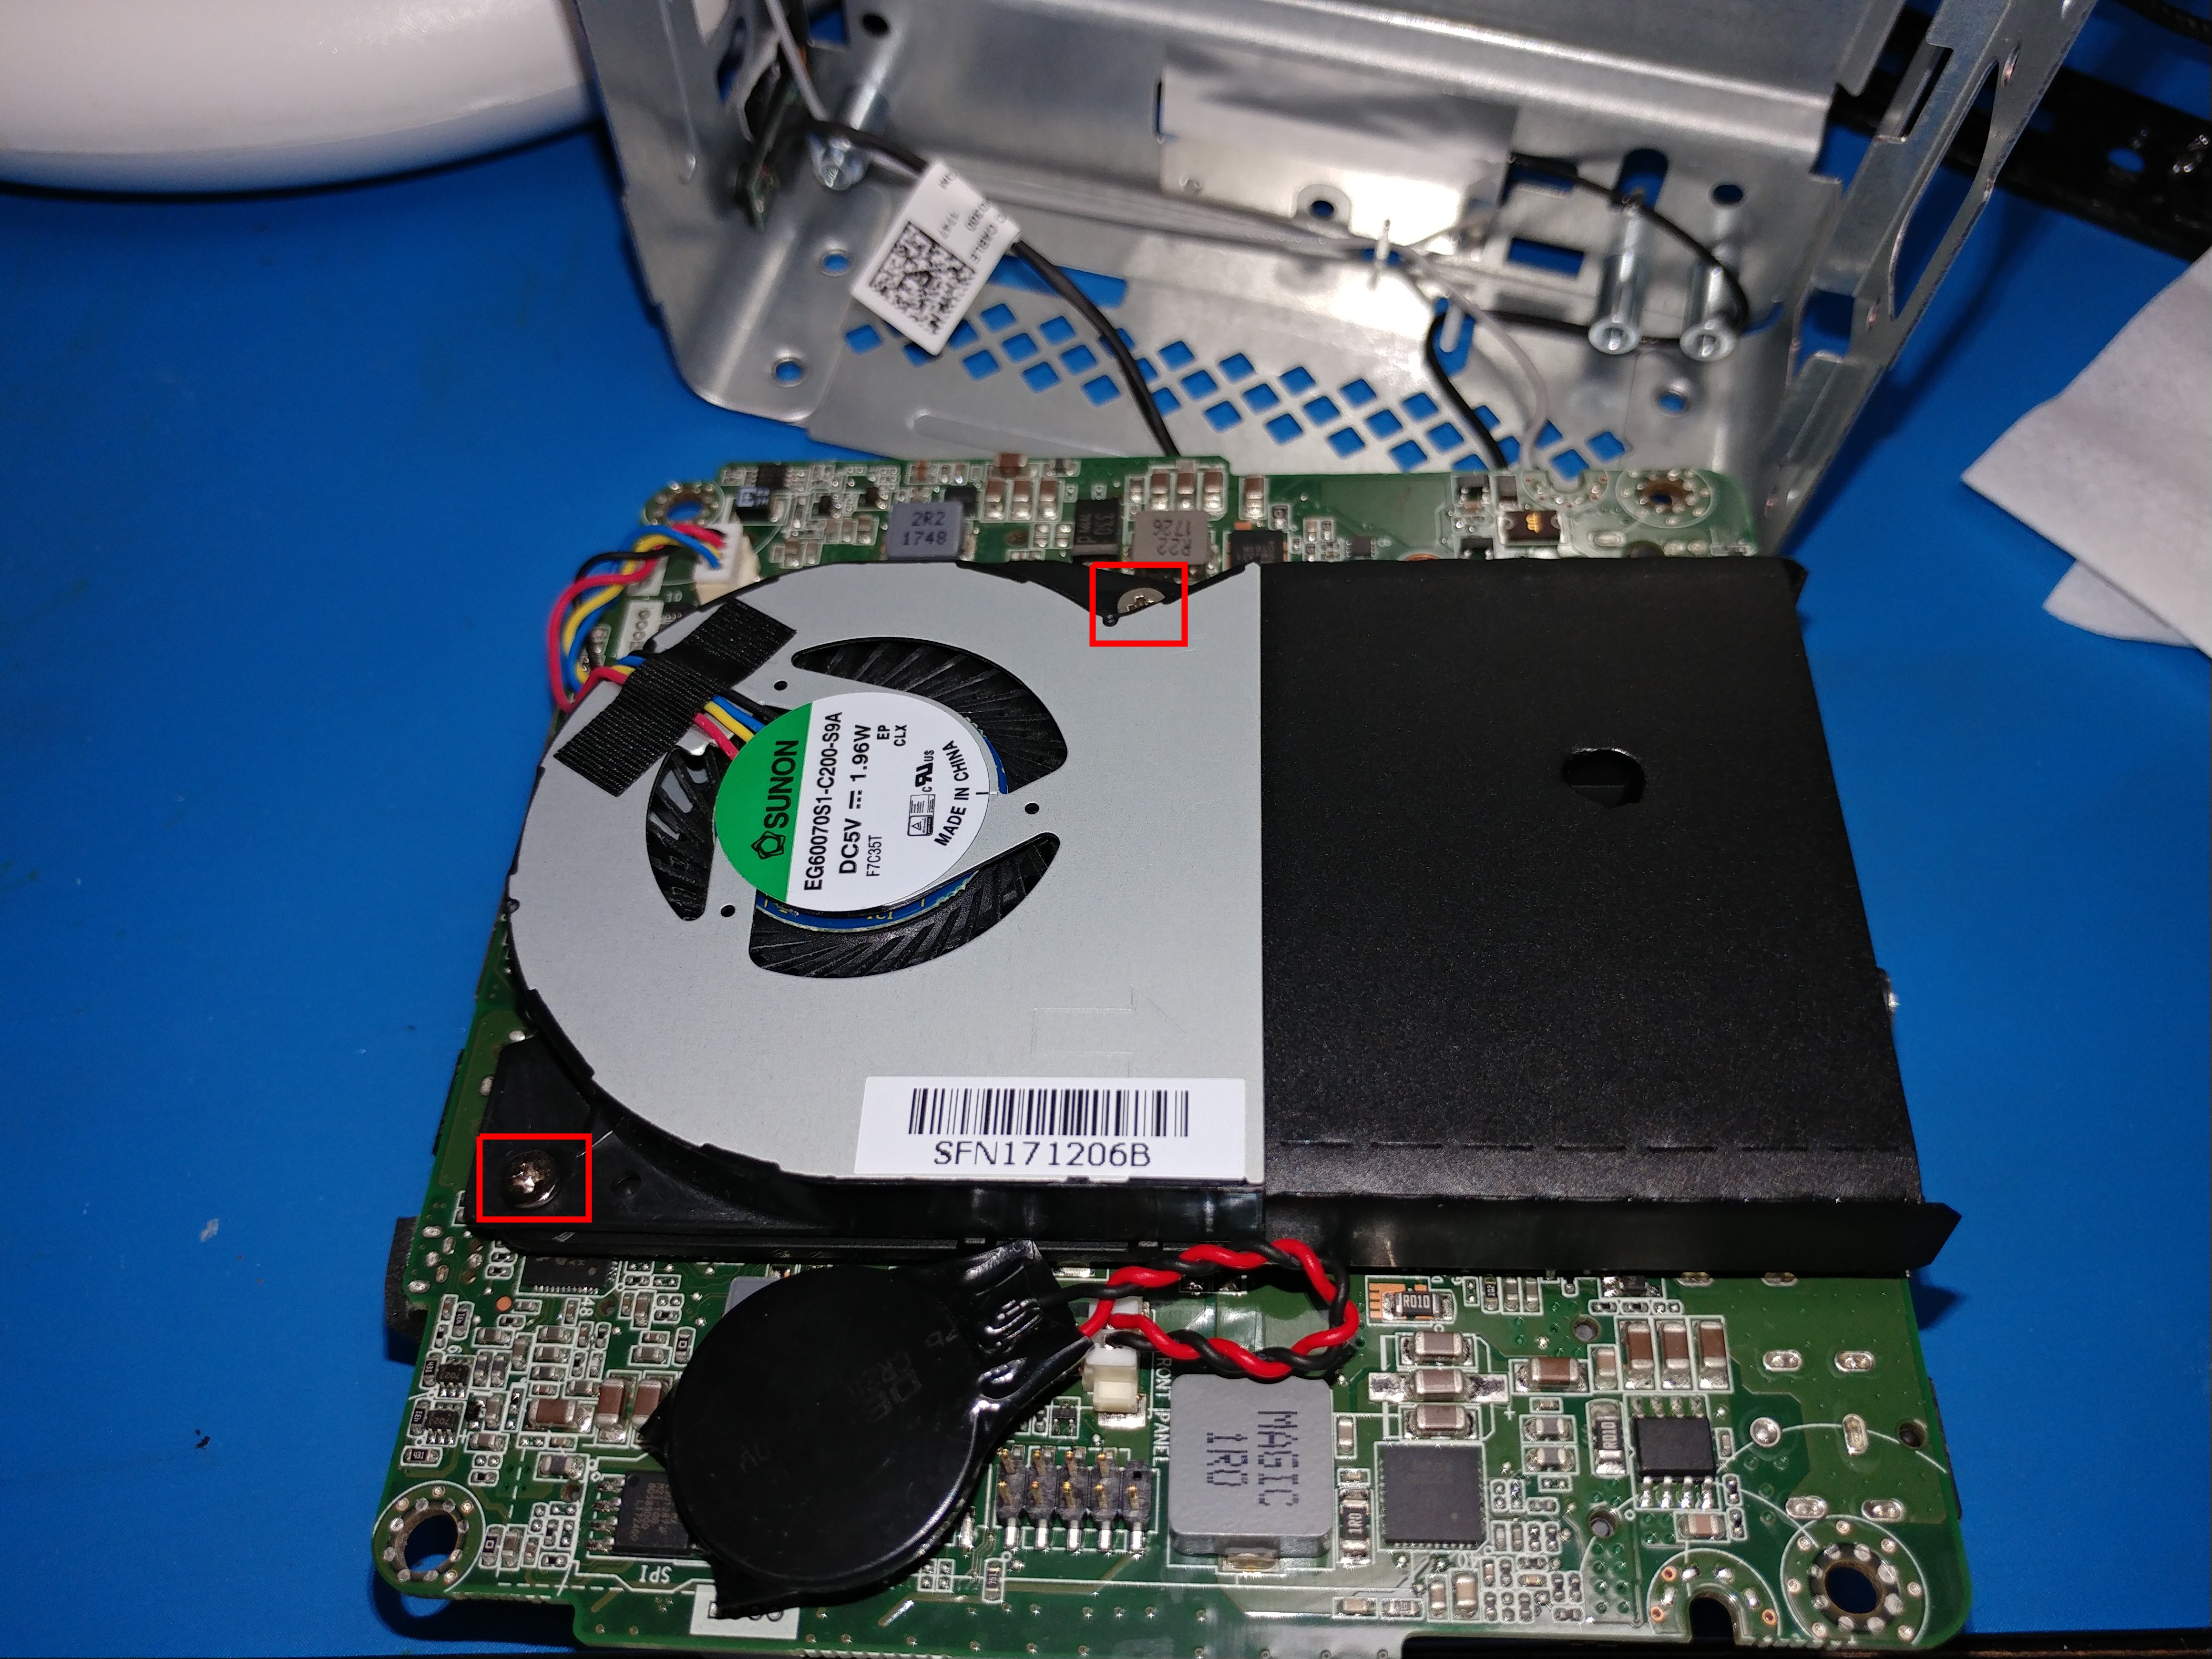 Gently ease the motherboard out of the chassis and you’ll see the CPU cooling solution. I was surprised at how large the cooler was relative to the case size. Take out the two screws (red boxes) to remove the fan. You can just move it away or you can remove it’s power cable to take it off completely.
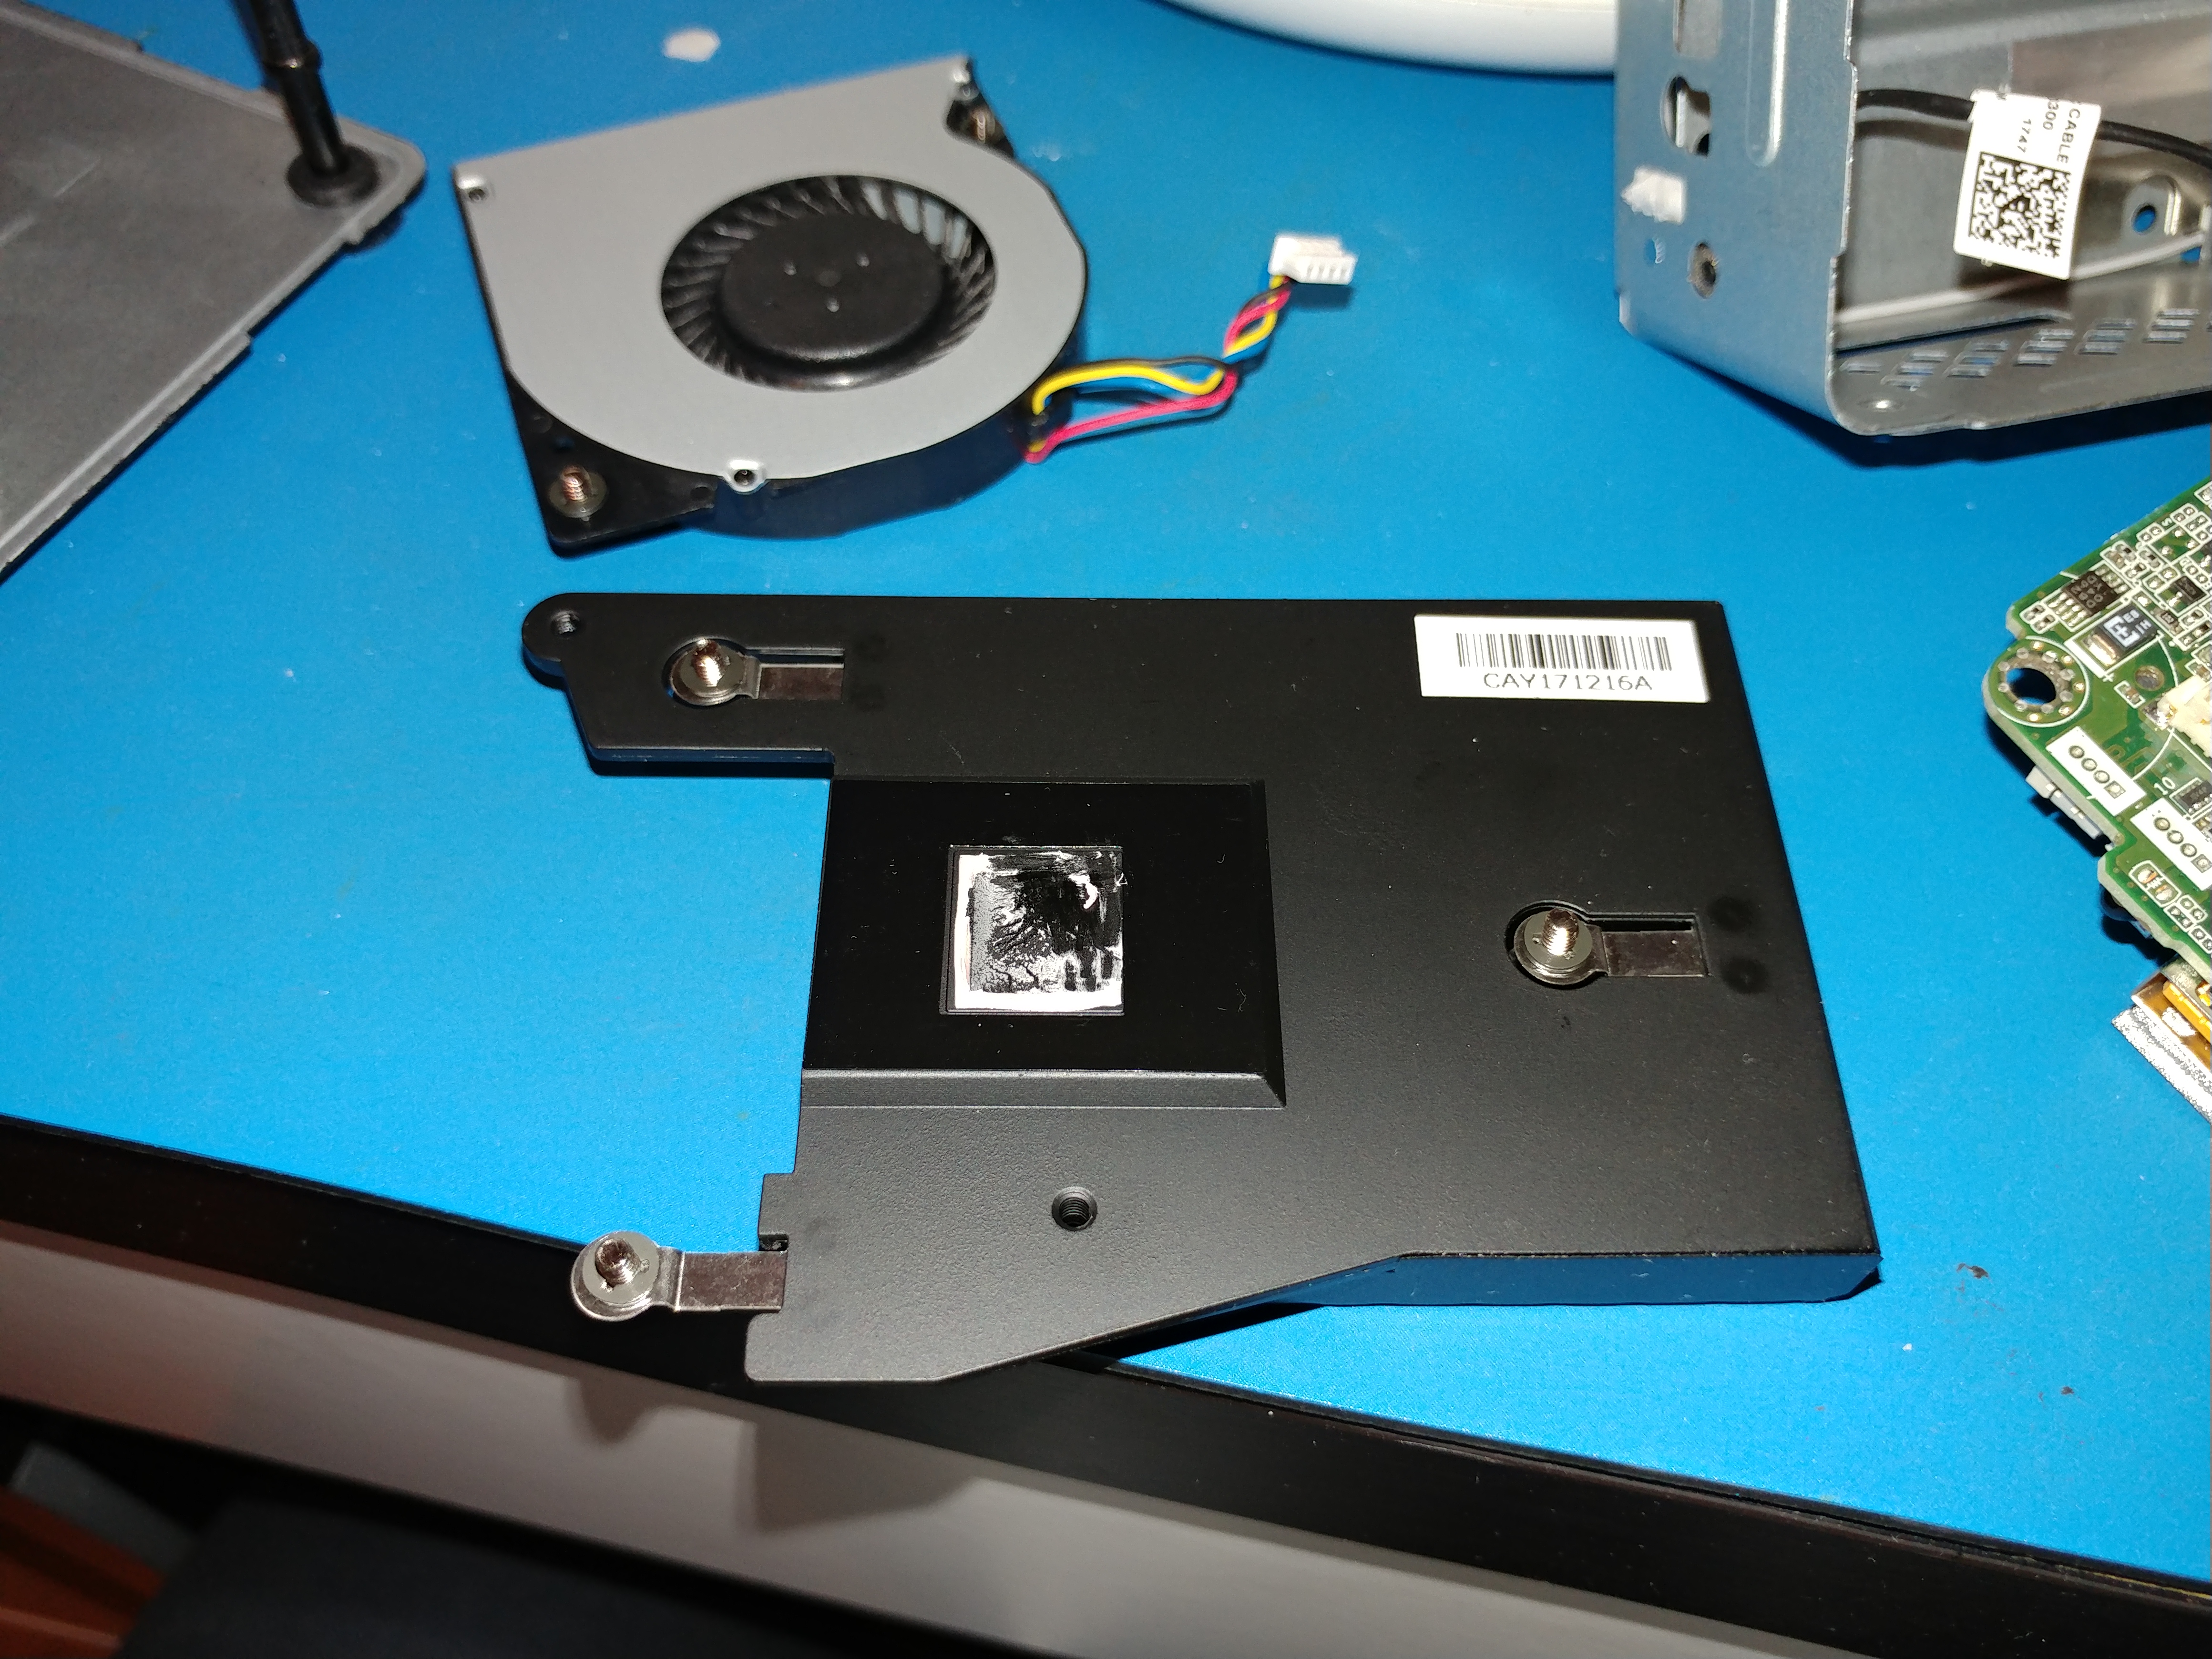
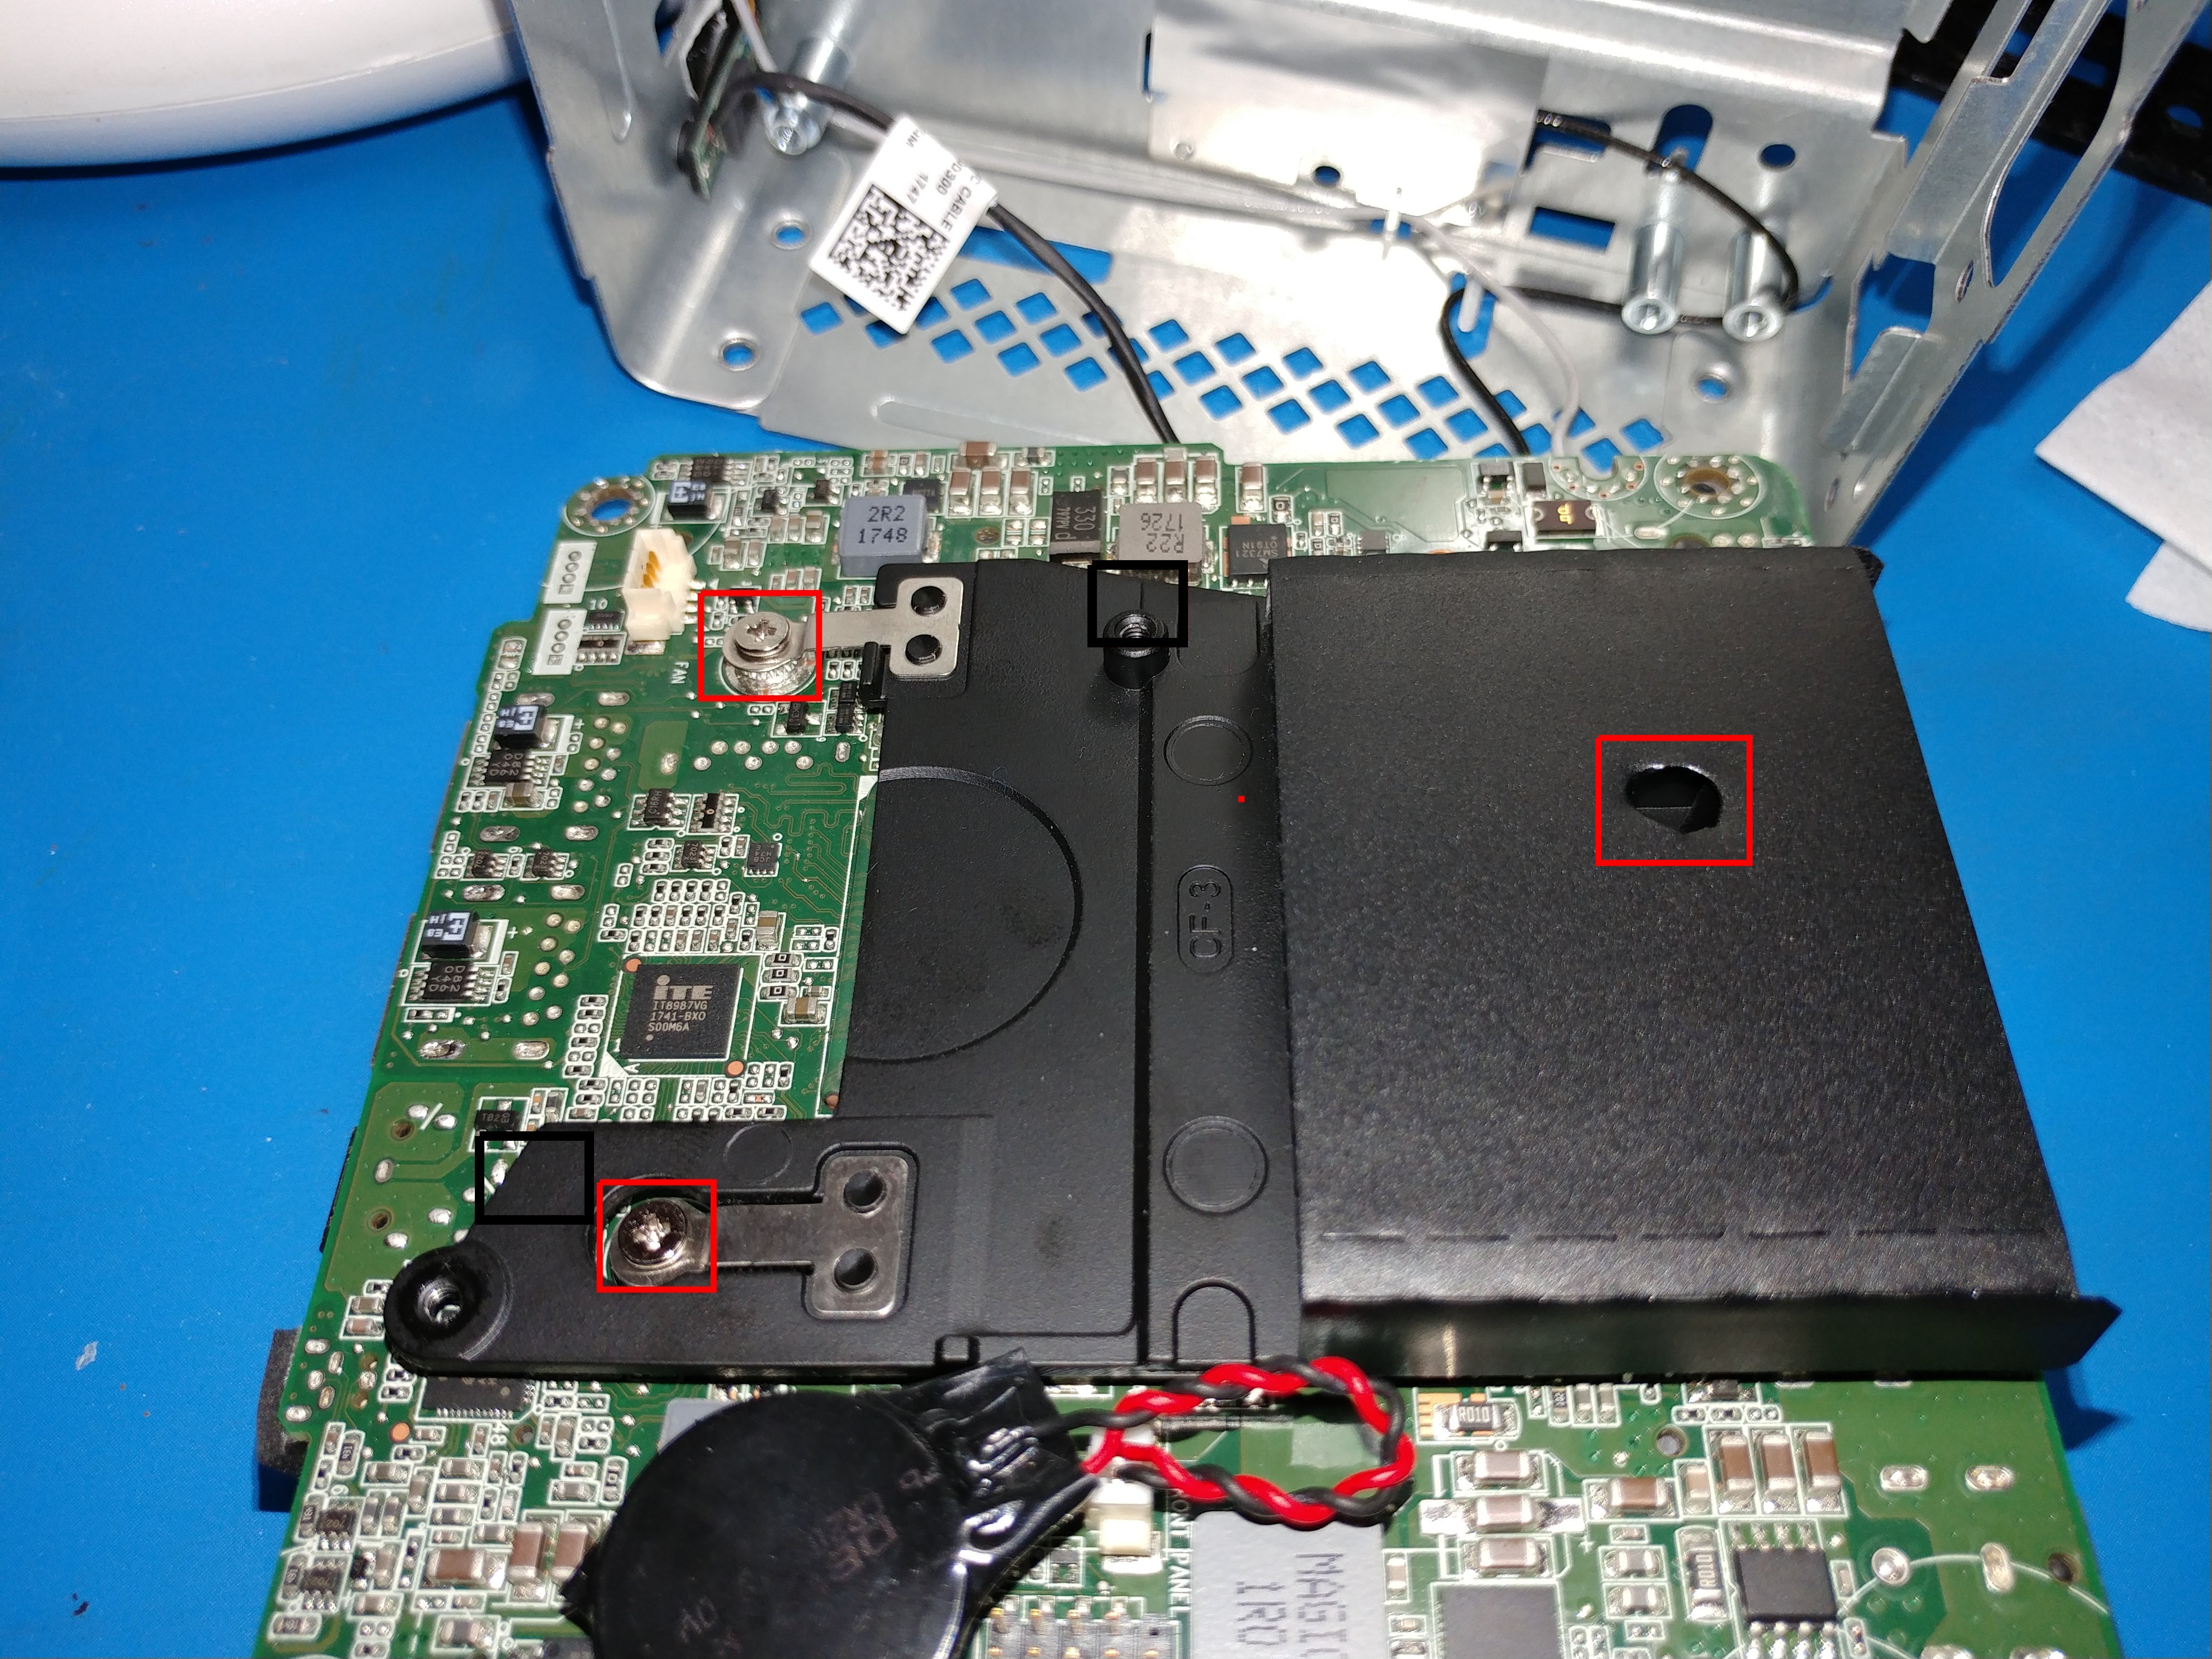 With the fan off you can now see the CPU heat sink in all it’s glory. Well not really because it is covered by a black plastic airflow shield but anyway. Just three more screws (red boxes) and we’ll have reached our goal.
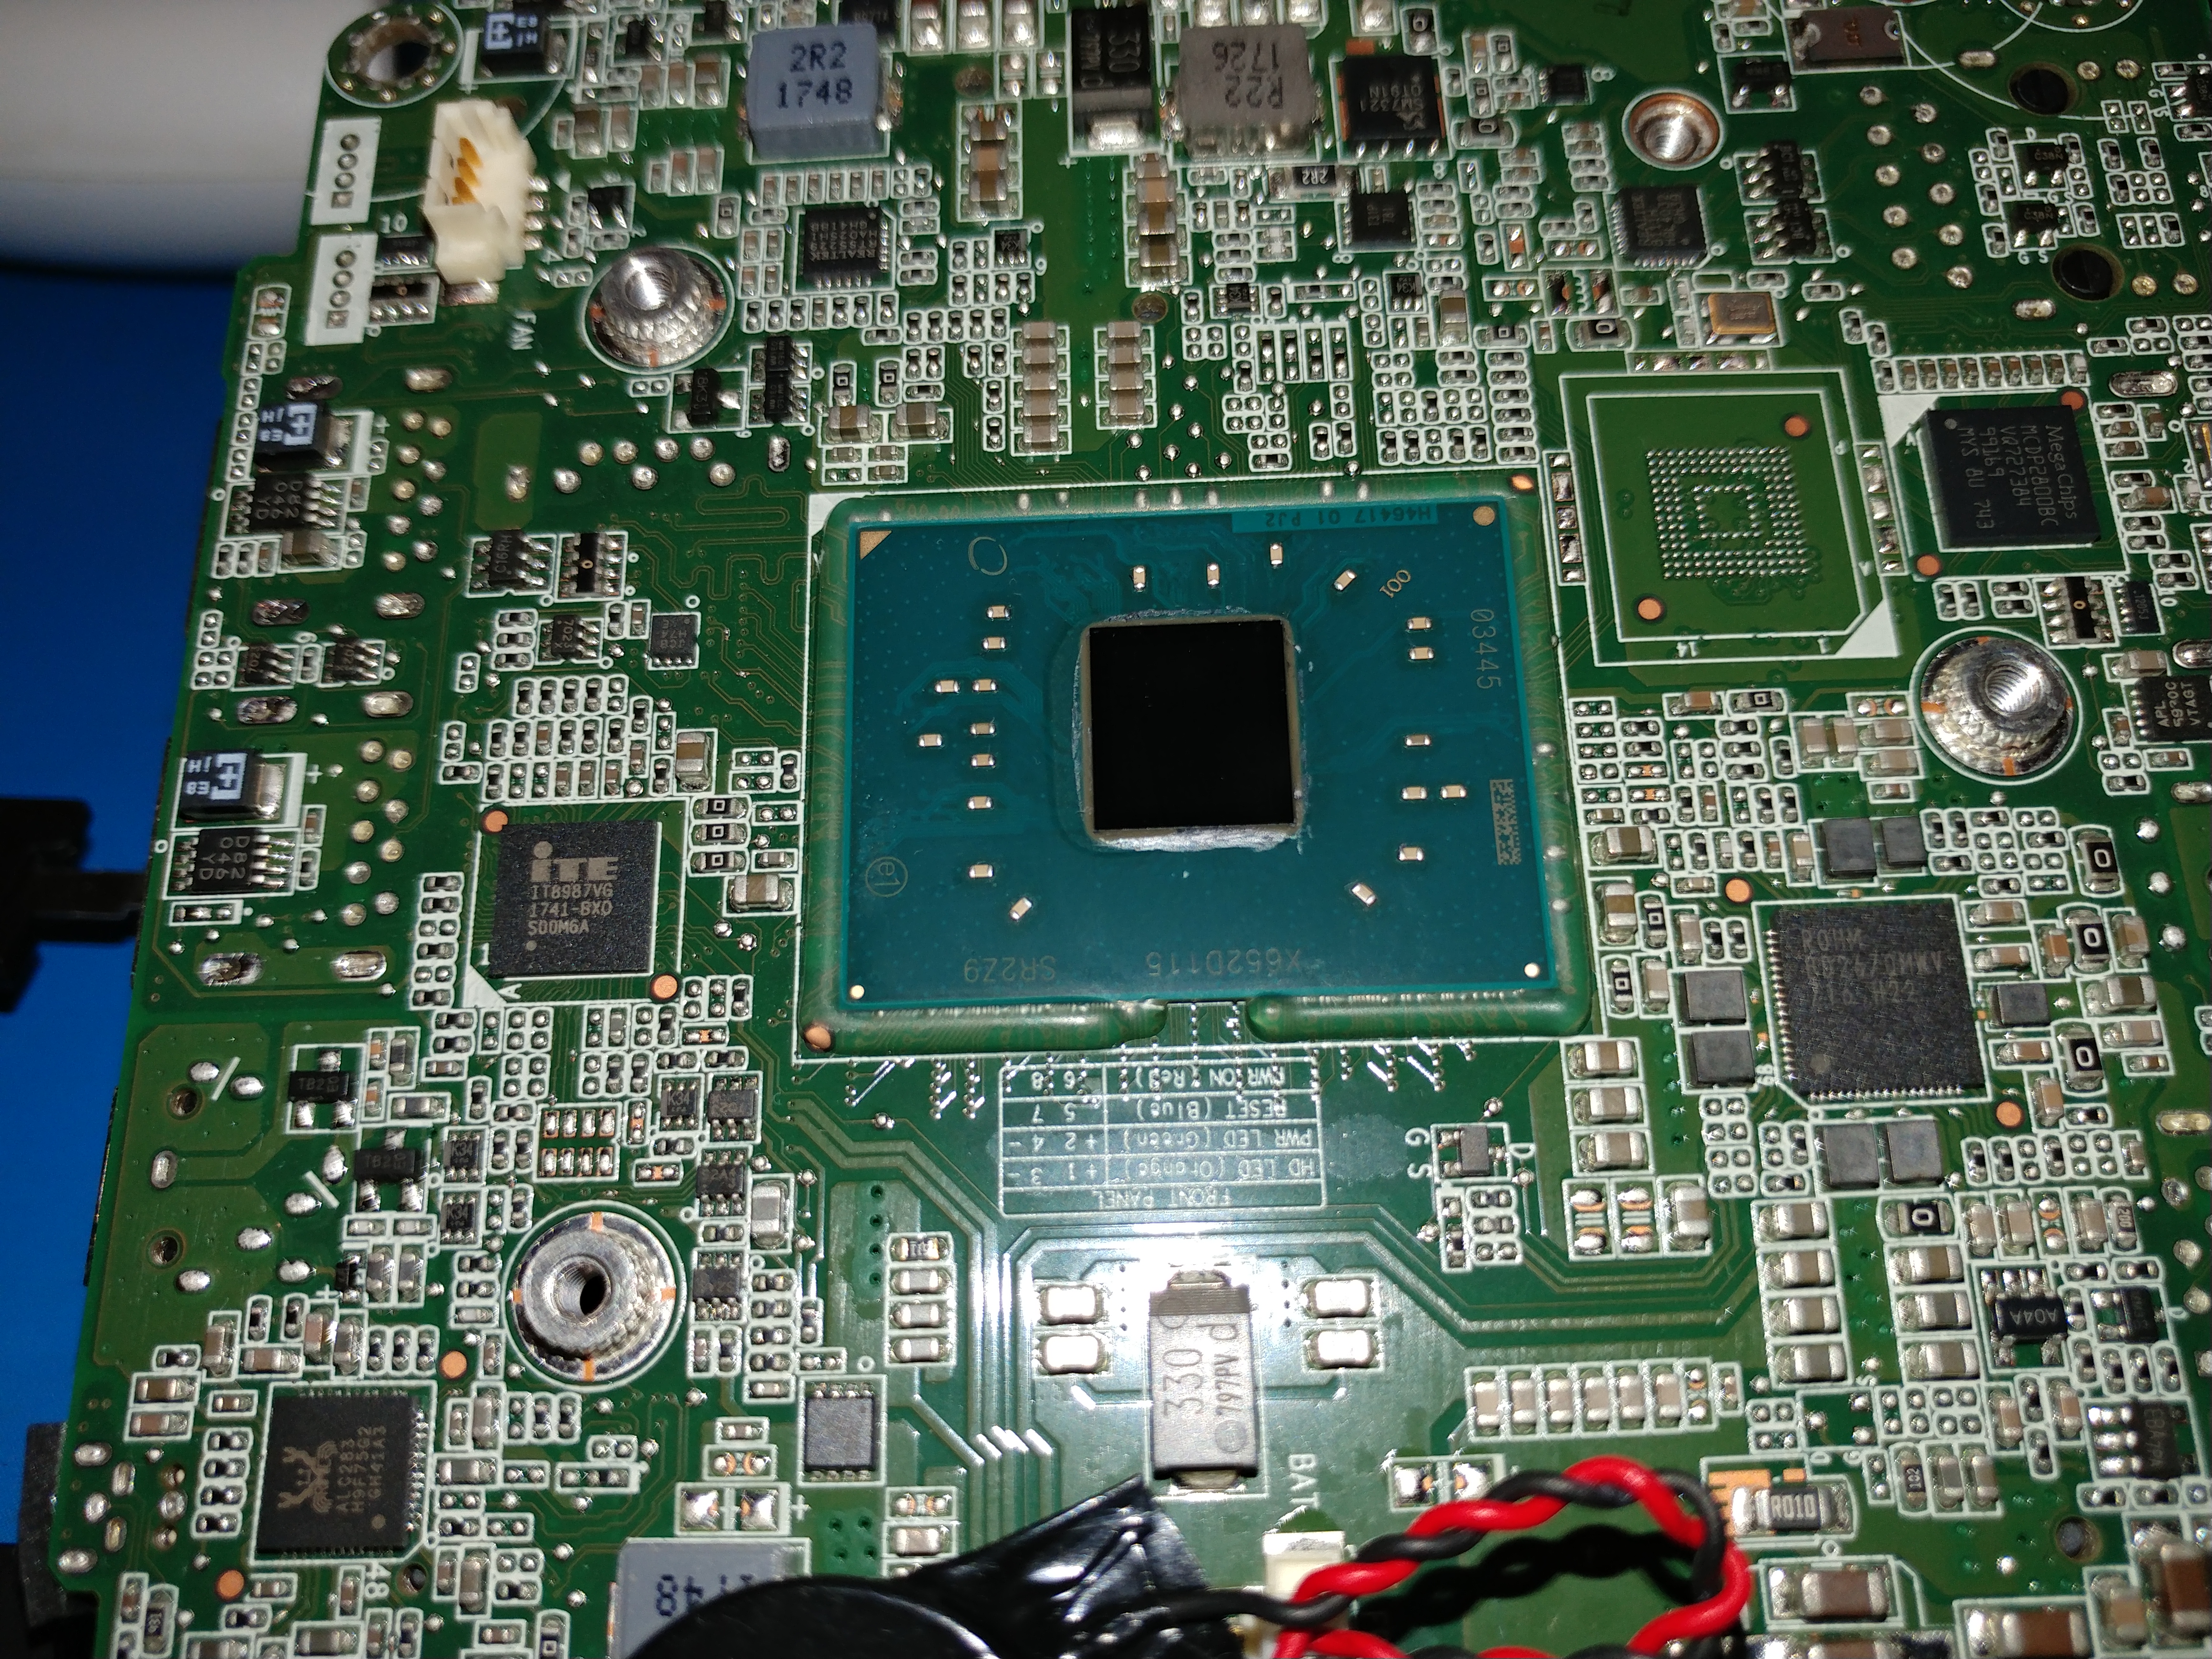
 And here we are! The first thing you’ll notice is that Intel opted not to use an Integrated Heat Spreader (IHS) on the chip; the die itself makes direct contact with the heat sink. Second you’ll notice a really shoddy application of Thermal Interface Material (TIM – the pink stuff).
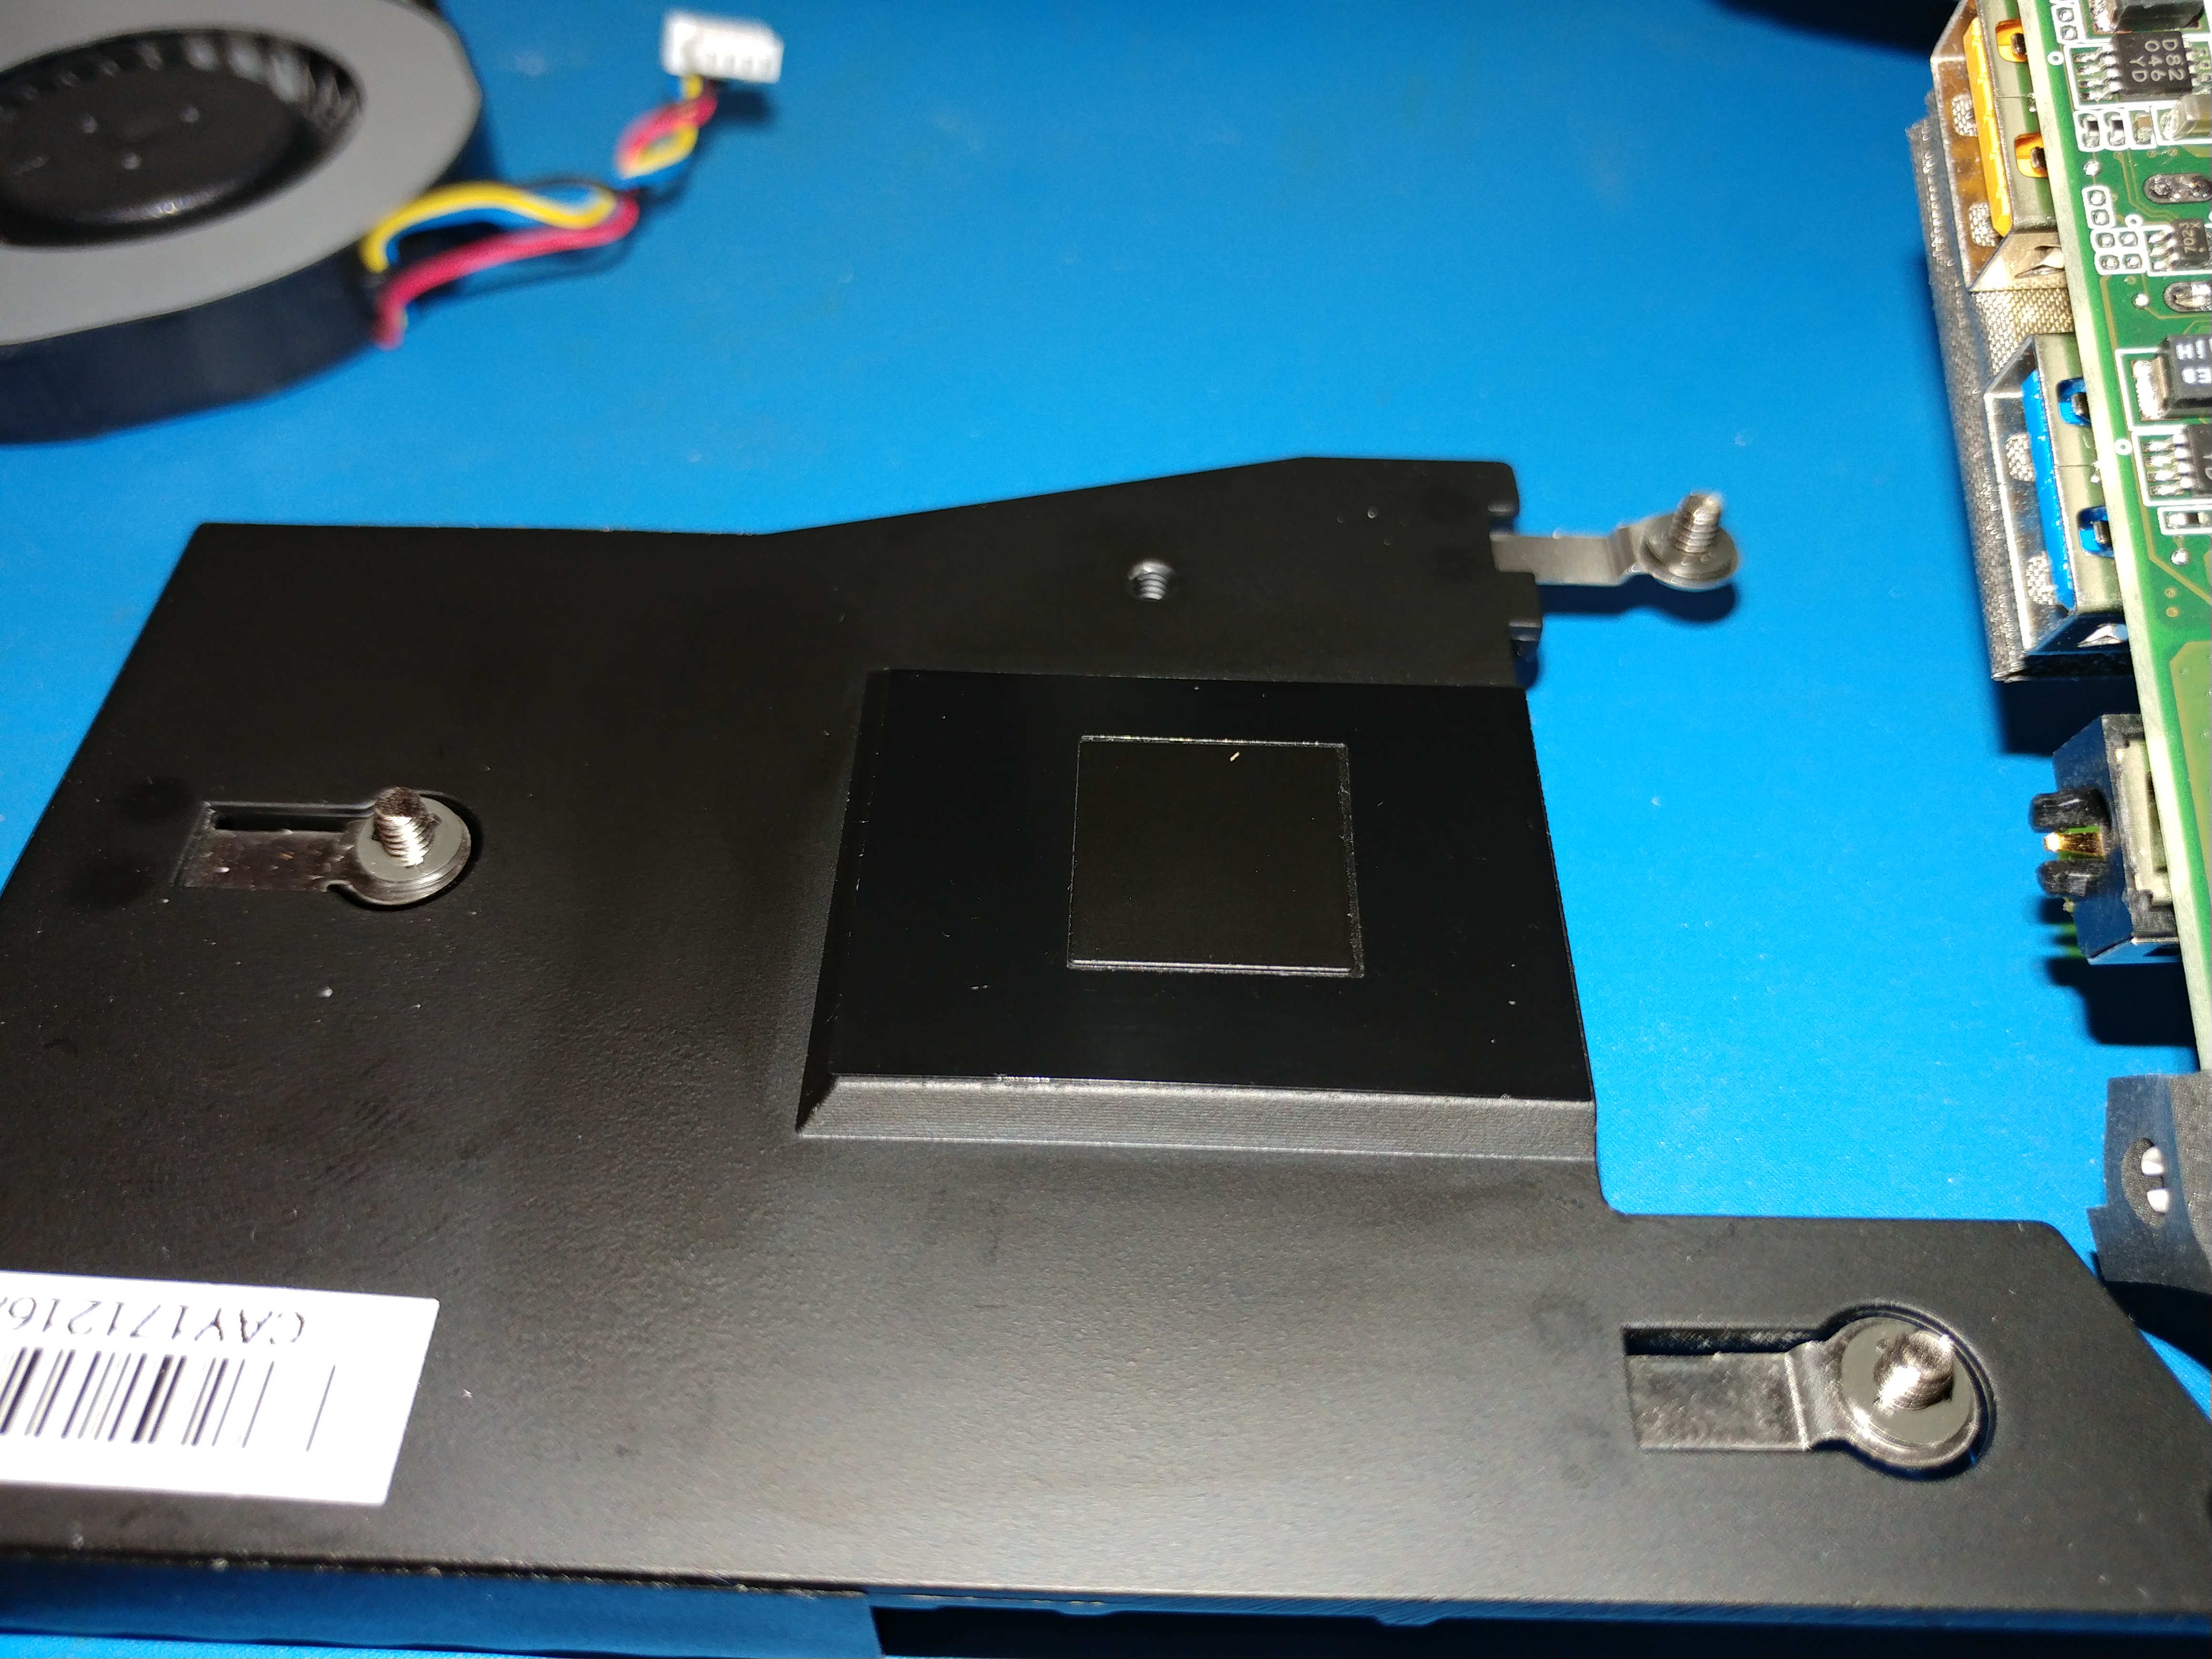
 The same shoddy TIM application is also present on the heat sink itself. What I find interesting here is that the heat sink appears to be made out of a powder-coated metal slab. I would think that the powder coat would reduce the cooling capacity of the heat sink but I could be wrong on that. Just seems a really interesting choice by Intel here.
 So we clean the old TIM off with isopropyl alcohol and my new-favourite computer cleaning cloths: dried-out wet wipes. Strong, soft, cheap and disposable, they are perfect for cleaning computer parts but you have to wait until they have dried out before using them as the liquid that they come imbued with is (probably) conductive, not good for sensitive electronic components.
 The CPU heat sink also gets a good clean.
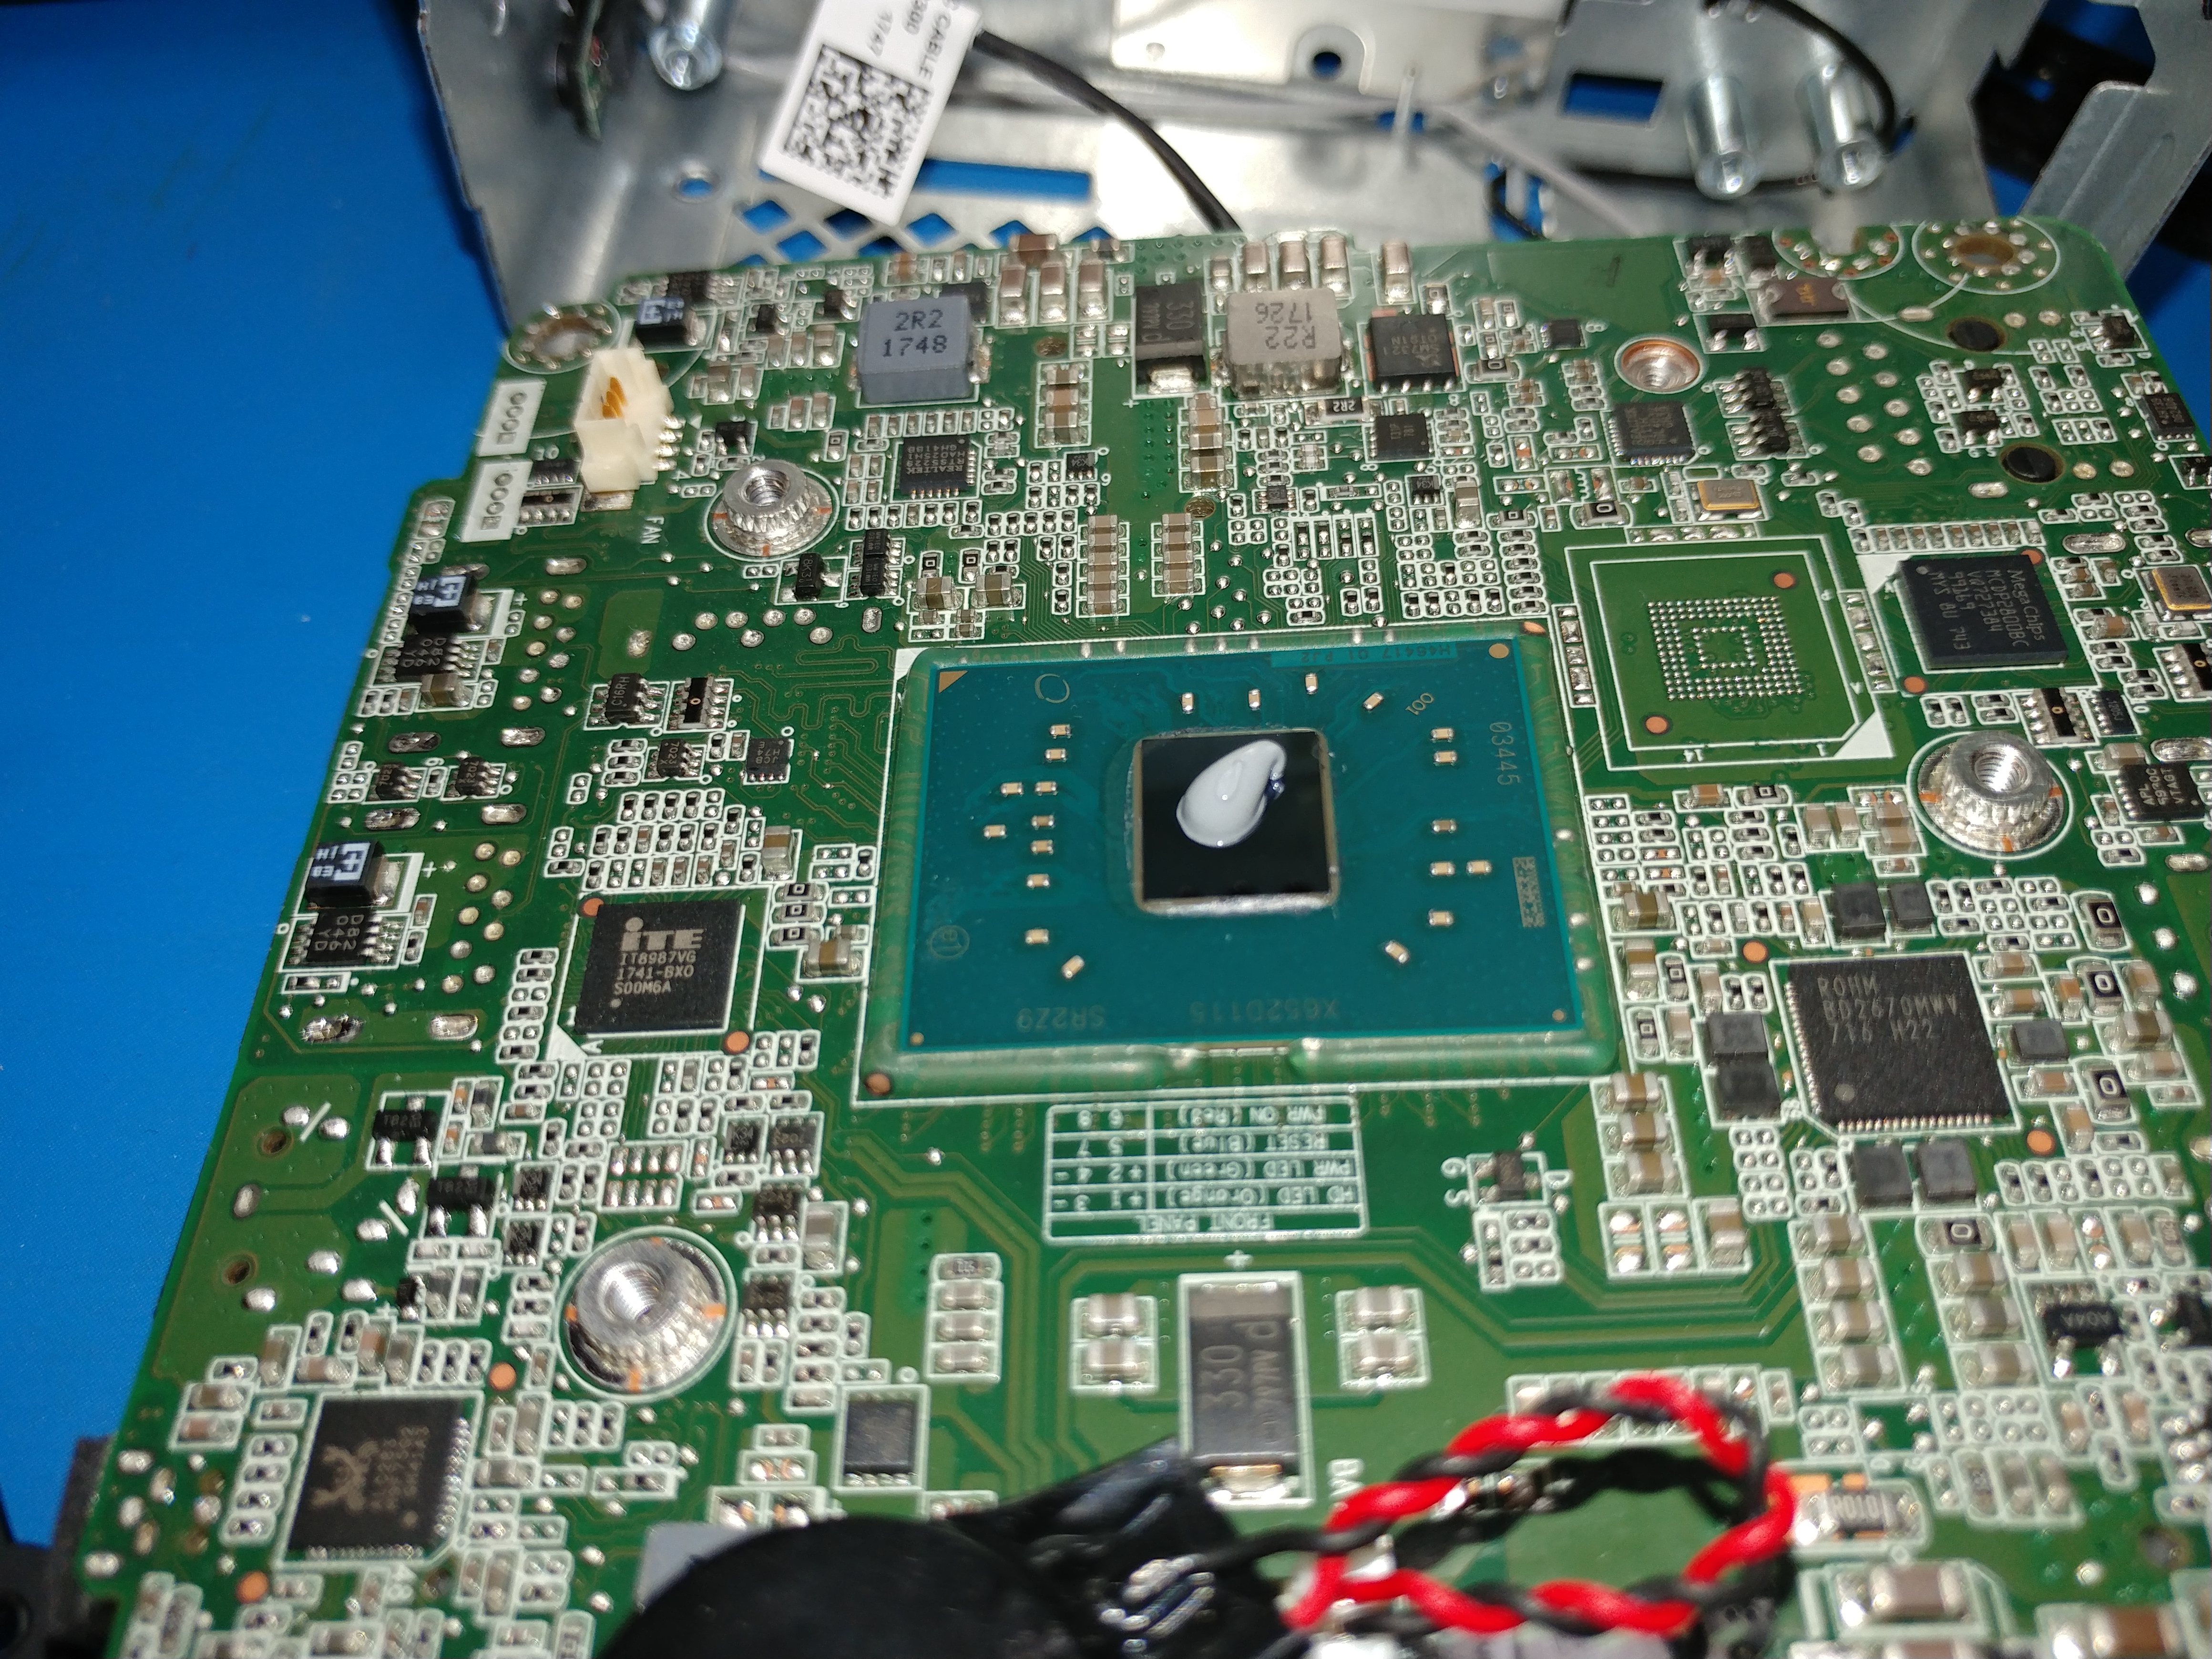 And now we start to put it all back together. A nice pea-sized dollop of Cooler Master MasterGel Maker in the centre of the die and we’re all ready to reassemble. Literally just reverse the process you just followed, but with a couple of pointers:
- Make sure to put the CPU heat sink straight down onto the CPU and try not to move it around, otherwise you’ll be smearing the TIM around everywhere and essentially undoing all the work we’ve just done.
- Be very careful putting the WiFi connectors back onto the card. It is a very fiddly and frustrating process but don’t force them because you will break them.
- If you’ve taken the front IO panel off well it should just stick back onto the front but if you haven’t, you may need some double-sided tape to get it back on.
So was it worth while going through all of that? Well it was interesting to pull the machine apart and see how it was put together, they really are an impressive piece of engineering. It’s important to remember that Intel is a PC manufacturer – they make the CPUs that go in them, but they don’t typically make the machines themselves. In designing, building and selling these devices, Intel has done something it hasn’t done in the past (as far as I’m aware) and they have made a fantastic product.
But it was about the heat right? Well I’m pleased to say that it was well worth the effort. The machine now runs at about 45 degrees, peaking up to 57 degrees. So for a total investment of about an hour of time and a pea-sized dollop of TIM we’ve dropped about 12 degrees, or 21%. Over time that will make a massive difference to the lifespan of the CPU and significantly reduces the speed at which the fan has to run to keep the CPU cool, which means lower power draw. Overall I’m really pleased with the results, but to be honest, it would have been better if Intel had done a proper job with the TIM in the first place.
I hope someone finds this useful, let me know on the socials if you have feedback/comments/questions.